¶ Introduction
The ALM Assistance module allows users to view, follow, and process helpdesk tickets. Statistics are also available. It conforms to the ITIL good practices guide and integrates the notion of standardized fields. Though it conforms to ITIL standards, there is no obligation to follow these guidelines. You are free to implement the Assistance module in whichever manner best meets your needs.

¶ Getting started
Define users and their roles
Here are the different roles that are traditionally found in helpdesk services :
Requesters – The ALM users or groups who requested assistance.
Technicians – The ticket is normally processed by a technician, a group, or possibly a supplier registered in the application.
Watchers – The users or groups who receive notifications.
Depending on the role of the user, the module adjusts the visible information, as well as the possible actions.
The technicians are the actors who have access to the most information and actions concerning tickets.
The requesters and observers only see the information necessary for responding to their request.
In the cases where there are multiple users or groups, only the first user or group is defined during the creation of the ticket. The additional actors are added later. A user who does not have the rights to modify the actors but who has the rights to view the ticket, has the option of becoming an observer.
In cases where the users are not registered, emails can be associated with a ticket. By default, unregistered requesters or observers can enter an email. Notifications must be enabled for this.
¶ Tickets
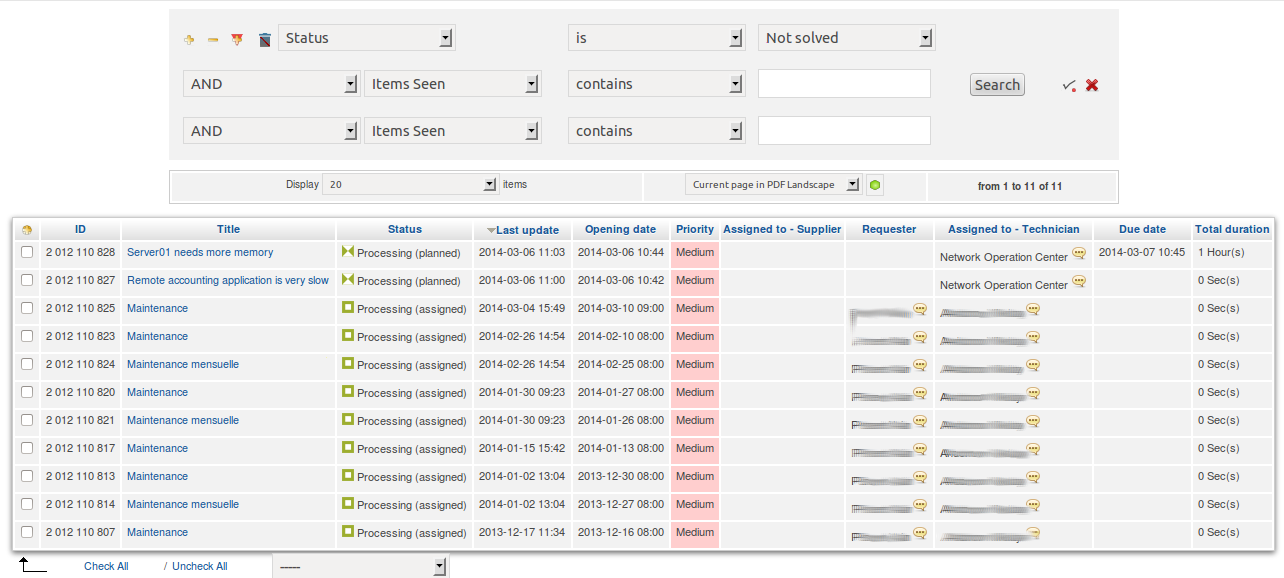
¶ Lifecycle of a ticket
Types of Tickets
Tickets in ALM are classified as incidents or requests. What you select in the Type field permits you to execute certain actions and personalize the list of available categories.
ITIL defines the lifecycle of a ticket statuses. ALM provides the following statuses:
New
Processing (Assigned)
Processing (Planned)
Pending
Solved
Closed
These statuses cannot be modified.
Classification of Tickets
The order of tickets is based on information provided by the requester and the technician in the following ways:
The requester specifies that the ticket is urgent.
The technician realizes the importance.
The priority is the result of these two items.
It is calculated automatically by the software and indicates the actual importance of the ticket.
A user can create a ticket in several ways:
By contacting an operator directly, who creates the ticket for them.
By sending the request as an email.
¶ Adding a ticket
Here are the steps involved in creating a ticket :
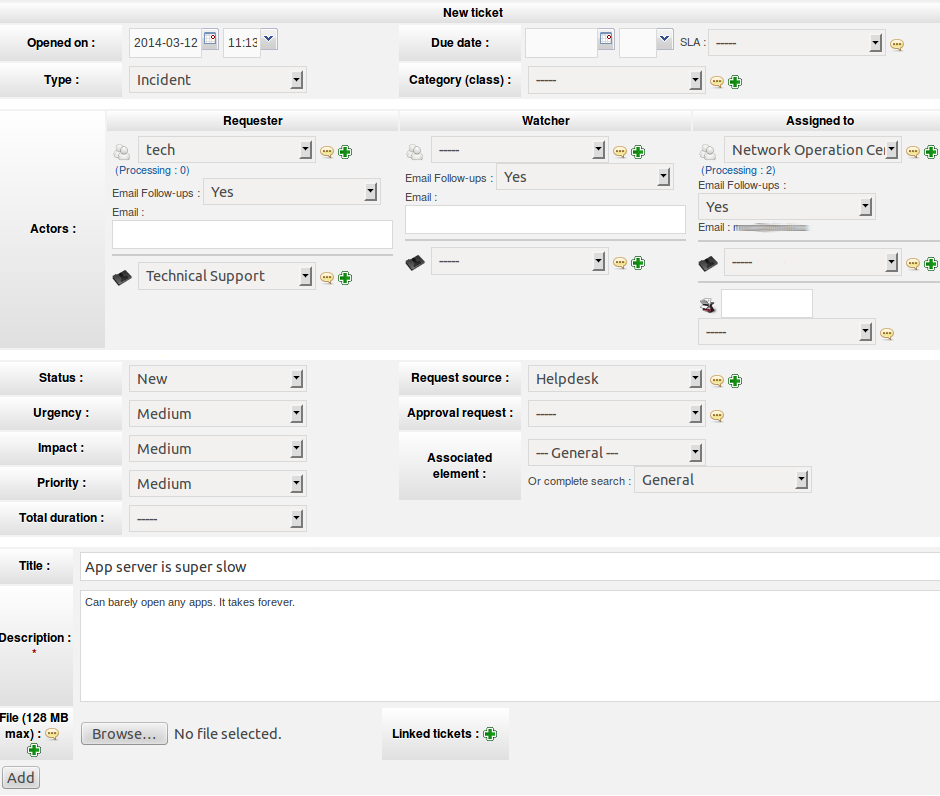
Step 1: Go the Assistance tab and click the plus sign icon to load the ticket creation page.
Step 2: Fill in the appropriate fields and click Add.
When opening an existing ticket, the Followups tab is used by default to display the ticket. From here you can add new information to the ticket, or modify the status of the ticket.
To add a follow-up, click Add a new follow-up and enter the new information. A follow-up can be private or public. A private follow-up is only visible to users who have permission to see all follow-ups and tasks. This allows, for example, an exchange between technicians that is hidden from the requester.
Here is a screenshot of the ticket creation page:
¶ Tasks
A task is an action related to a ticket. Tasks can have categories, and can be public or private.
A private task is only visible to :
It's creator.
Users who are affected by it.
Users who have sufficient permissions.
Tasks can be planned. If the start date, duration and due date are specified the task will appear in the Planning tab of the technician to whom the task is assigned. The Planning tab can be used to verify the availability of technicians.
¶ Ticket Categories
Tickets can be categorized in order to facilitate their processing. The requester can specify a category, and this can later be modified by the technician if necessary.
It is important to carefully define the list of categories when first setting up the helpdesk features. Too many categories can create confusion for the users, and too few can prevent them from correctly specifying their needs.
A category can be hidden in the simplified interface. It can also be hidden from incidents, requests, or problems. Ticket categories can be used for the automatic processing of tickets.
¶ Ticket Templates
Just like inventory objects, templates can be used for tickets. Templates allow you to personalize the ticket request interface depending on the type or request. Ticket templates can be managed by clicking the icon depicting a plus sign with a red triangle.
The behaviors which can be modified are as follows :
The list of fields that are mandatory for ticket creation.
The list of fields contains predefined values.
The list of fields which should be hidden.
¶ Receivers
ALCM can create or update tickets from emails. An account must be set up on an external mail server, from which the emails will be retrieved.
¶ Opening a Ticket
Users can open tickets in the following ways:
directly in ALCM
Via the interface ticket interface is accessible to non registered users.
Via the simplified interface (basic form for registered users).
Via the standard interface.
By email
Regardless of the method, if a title is not provided (or email subject), the ticket will use the first 70 characters from the description (or email body) as the title.
Depending on the configuration, certain fields may be mandatory in order to create a ticket (title, description, and/or category). If one or more of these fields are not filled, the ticket will not be created.
¶ Problems
One or more incidents showing the same symptoms can be listed as a problem in the Problems tab.
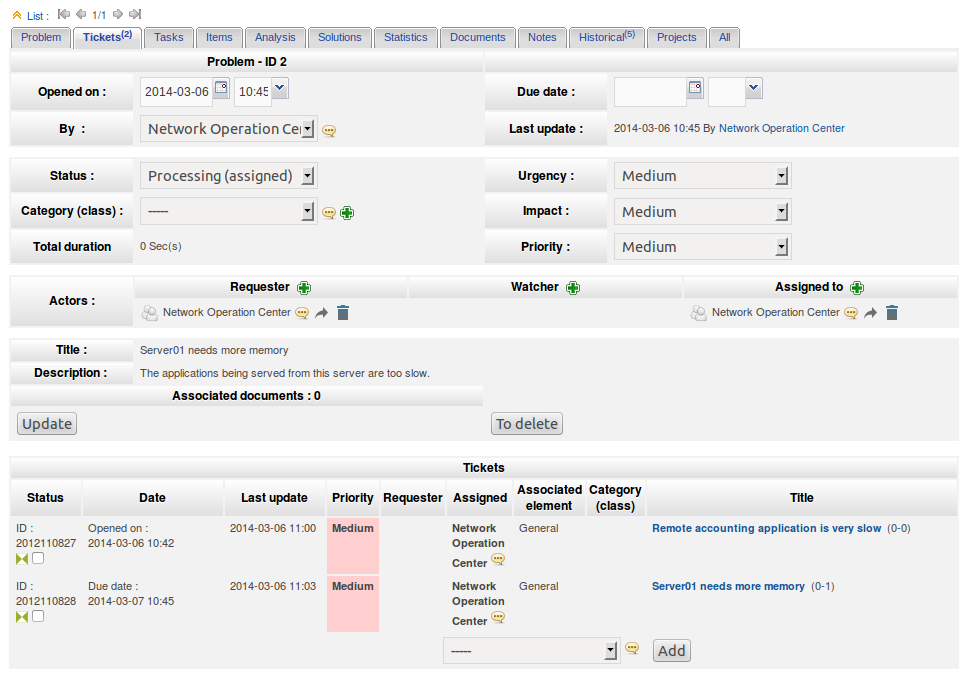
The problem creation form resembles the incident form since they share many of the same concepts (requesters, watchers, assigned to, status, etc). Once the problem is created, it is possible to attach incidents (Tickets sub-menu) to it. Affected hardware can also be attached to the problem via the Items tab.
An analysis phase (Analysis tab) consists of describing the impacts, causes, and symptoms of the problem in order to arrive at a solution.
As with the tickets, the management of tasks and the addition of a solution allows you to follow and resolve the problem. Problems use their own notifications. Statistics for problems are also available.
The following screenshot shows a problem that was created from and existing ticket. A second ticket, which is related, was associated with this problem.
¶ Planning
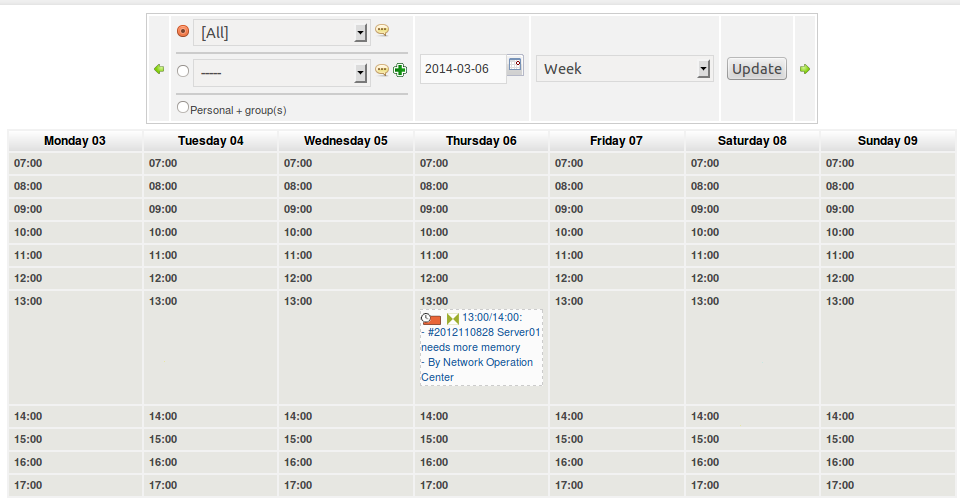
The Planning tab allows you to visualize the scheduled tasks associated with a ticket or a problem assigned to a technician or group. It is possible to search by date.
When viewing the calendar for a specific user, the information can be exported in two formats:
- Ical
- Webcal
The screenshot below shows an example of a planned task.
¶ Statistics
On this page you can view various ticket statistics.
Global statistics allow you to view the information in graphs. Using the checkmarks on the left, you can add or remove elements from the graphs.
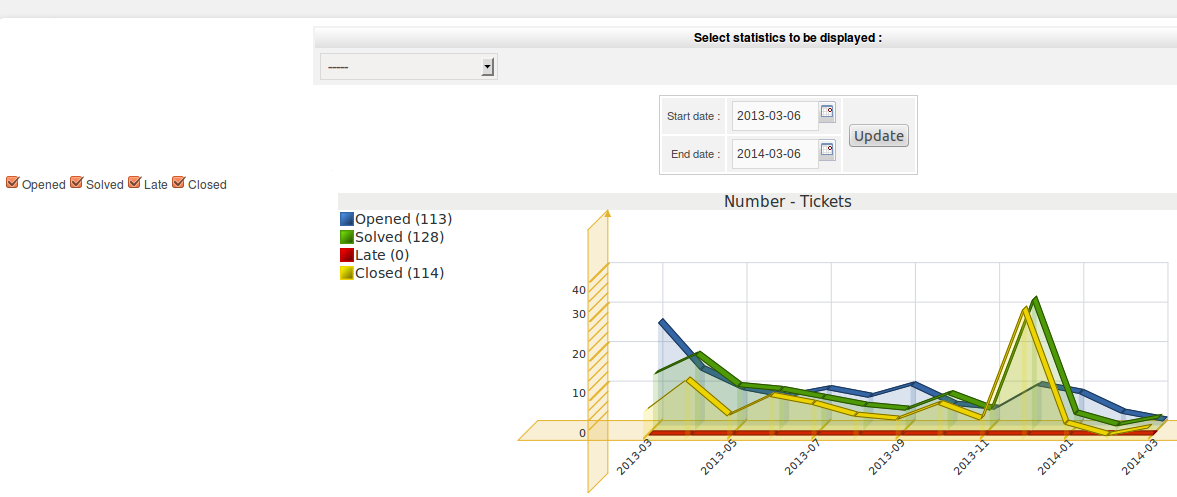
Here it is possible to view time based statistics for such items as the number of tickets that are open, closed, resolved, etc.
¶ Recurrent tickets
Thanks to templates, it is possible to program the opening of recurrent tickets. This feature is accessible from the Recurrent Tickets menu.

A recurrent ticket includes a template (which will be used as the model for the tickets), a start date, and a frequency setting.
Here are the steps required for creating a recurrent ticket:
Step 1 : First, create a ticket template. From the Assistance page, click the Plus icon to load the templates page.
Step 2 : Next, click the plus sign to create a new template. Choose a name for your template and click Add. The new template will appear in the list.
Step 3 : Once the template is created, you will need to pre-configure it. Click the template to open it, You will see several different tabs. The one you will use most often is Predefined Fields. This tab will allow you to predefine the fields for the future recurrent ticket. At the bottom of the page you will see a dropdown list. Select an item from the list to predefine the corresponding field. Once all of the field have been predefined, click the Update button to save the changes. Your template is now ready to use.
Step 4 : Once the template has been created, return to Assistance > Recurrent Tickets and click the plus sign. In the Ticket template field you can now select the new template you created. Once all the fields have been filled, click Add.