This Quick Start guide will help you to start using the blësk Application Performance Monitor (APM) after installing the blësk Network Monitoring system.
¶ Host
In APM, a host entry is used to define a physical server, workstation, device, etc. that resides on your network. Every time a new device is added to APM, a host entry should be created to handle all definitions specific to this device.
If you decide to manually create a new host entry, it is recommended to copy/clone an existing one. You can then edit the new entry to modify the values and parameters needed to make it fit the newly added device. This will help you save time and avoid possible errors during creation based on a blank host template.
There are many options and parameters available when creating a new host. Below we will focus on the ones which require special attention.
Note: If you use blësk’s auto detection feature, then host entries will automatically be created for you when the device is exported to the APM database.
¶ The ‘Check command’ directive
This field, which appears under the “Common settings” tab of a Host definition, is used to specify the command that should be used to check if the host is up or down. If you leave this argument blank, the host will not be actively checked. Application Performance Monitor will then likely always assume the host is up. This is useful if you are monitoring devices that are frequently turned off, or when you want to save some resources because you are monitoring thousands of devices.

By default, this check is defined and active and uses a ping command to check a host. You may also remark that depending on the command you select under the “Check command” field, the “Command view” will automatically be adjusted to display the corresponding command parameter used by the command.
Note: Usually, for a host definition, only the “check-host-alive” command or a blank command should be used. The other commands do not apply to this context.
¶ The ‘Host groups’ directive
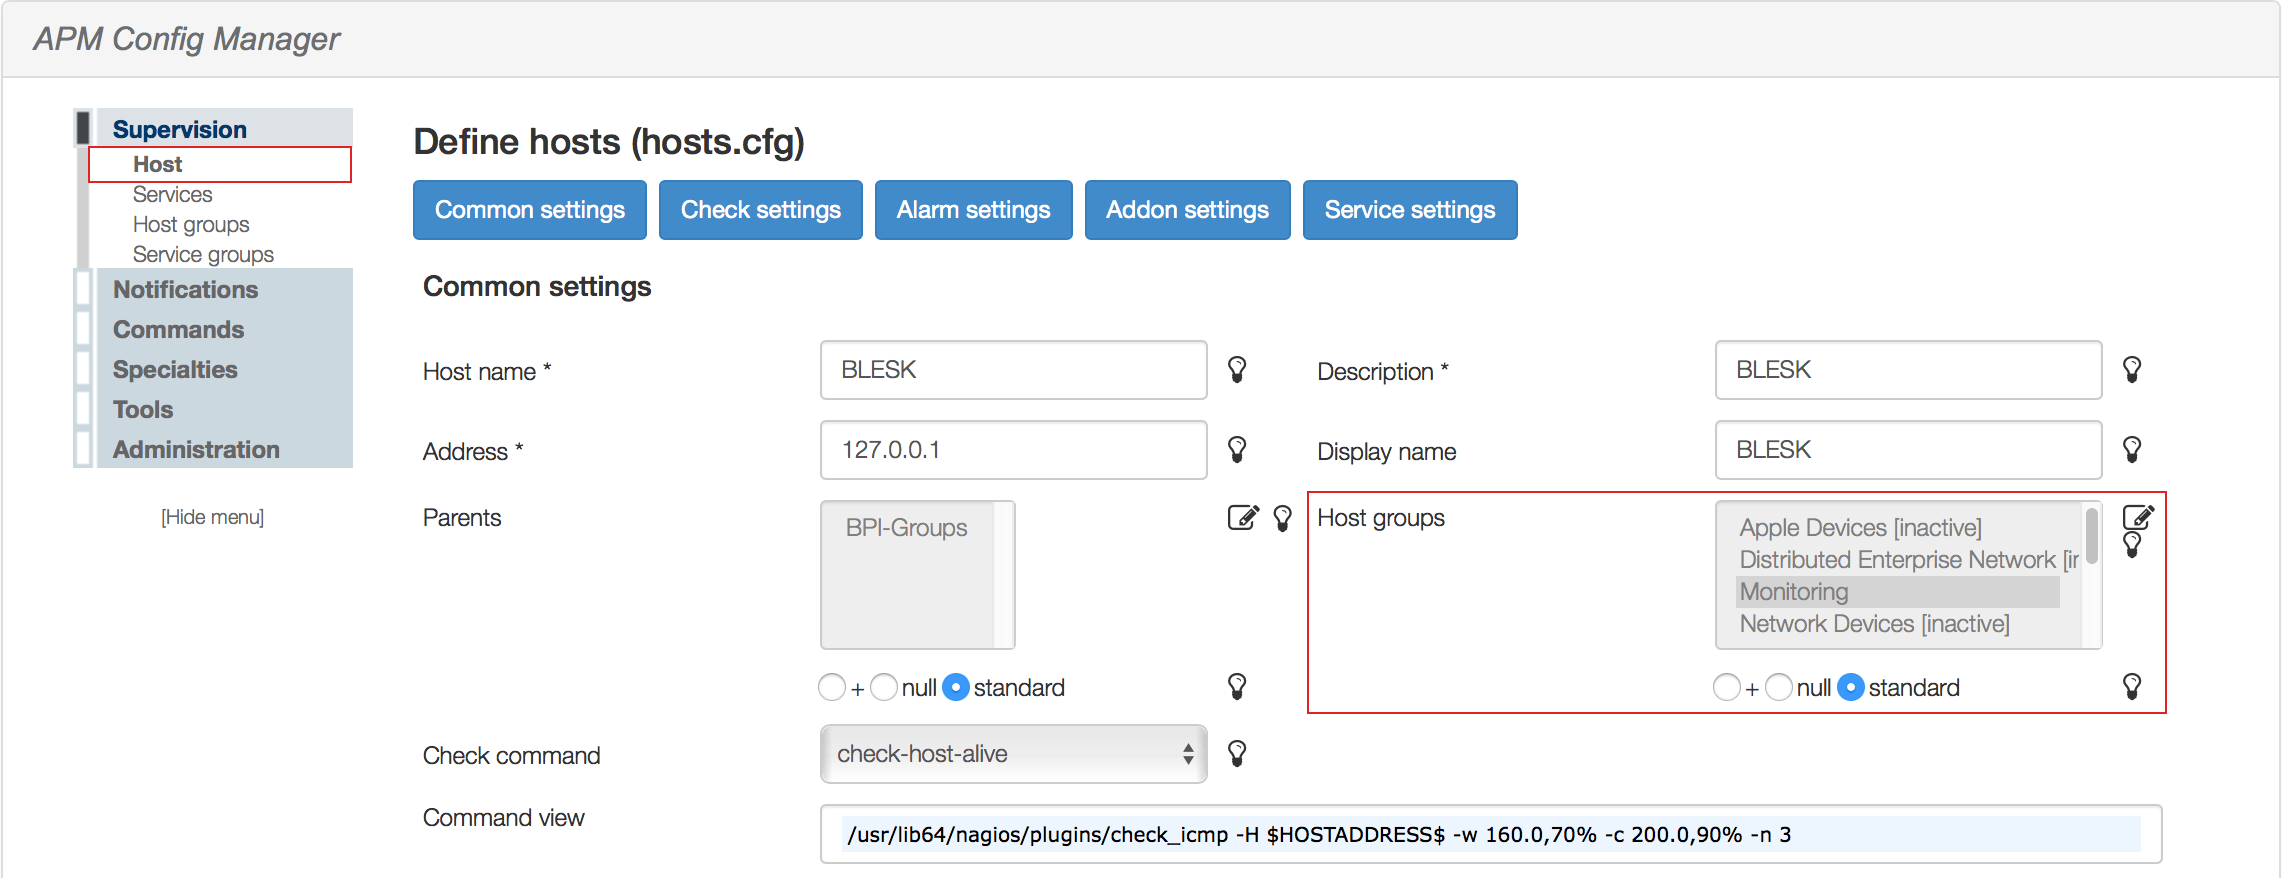
This field, which appears under the “Common settings” tab of a Host definition, is used to identify to which hostgroup(s) the host belongs. This directive may be used as an alternative to (or in addition to) using the “Members” directive in “Host groups”.

If a hostgroup is defined here (under the Host template) – this host will not be selected inside the “Member” field of the same “Host groups” definition! Therefore, if you select the name of a host group here, this same name will not be used under the “Members” field of the “Host groups” definition even if you select it.
By default, the auto detection engine of blësk prefers to use the “Host groups” directive in the “Host” definition to identify the host group to which the host belongs.
Note: Remember that the ‘Host groups’ field that appears in the “Host” template page as described here, is not the same as the one under the “Host groups” template page even if they share the same name. Refer to the “Host Groups” paragraph below for more information on difference between both definitions sharing the same name.
¶ The ‘Contact groups’ directive
This field, which appears under the ‘Alarm settings’ tab of a Host definition, is used to select the names of the contact groups that should be notified whenever there are problems with the host.

If you have manually created a new “Host” entry, then this field will be empty and you must specify at least one contact and/or contact group in each host definition.
If you have used the auto detection feature of blësk to automatically add and create the “Host” entry, then it is important to note that depending on the type of device detected by the auto detection engine, a predefined contact group will be selected for you here.
If the detection engine of blësk was not able to correctly identify the type of device added, then the default contact group “contact_groups” will be selected for any devices that were not correctly identified during the auto detection.
¶ The ‘Contacts’ directive
This field, which appears under the ‘Alarm settings’ tab of a Host definition, is used to select the contacts that should be notified whenever there are problems with the host. It is useful if you prefer notifications to be sent to only a few people and don’t want to configure contact groups.

¶ Services
A service entry is used to identify a “service” that runs on a host. The term “service” is used very loosely. It can mean an actual service that runs on the host (HTTP, SQL, EXCHANGE, etc.) or some other type of metric associated with the host (response to a ping, number of logged in users, free disk space, etc.).
If you decide to manually create a new service entry, then it is recommended to copy/clone an existing one and modify the values and parameters needed to make it fit the requirements. This way you will save time and avoid possible errors during creation based on a blank service template.
There are many available options and parameters available when creating a new service. Below we will focus on the ones which required special attention.
Note: If you use the auto detection feature of blësk, then all services detected for a particular device will automatically be associated with the corresponding host entry for you when the device will be exported to the APM database.
¶ The ‘Check command’ directive
This field, which appears under the ‘Common settings’ tab of a Service definition, is used to specify the command that should be run in order to check the status of the service. The command used varies according to the service to check. The description usually matches (or partially matches) the service name.

By default, this check is defined and active and uses a command to run for the service. You may also remark that depending on the command you select under the ‘Check command” field, the “Command view” will automatically be adjusted to display the corresponding command parameter used by the command.
¶ The ‘Host groups’ directive
This field (optional), which appears under the ‘Common settings’ tab of a Service definition, is used to identify the hostgroup(s) that the service “runs” on or is associated with. Contrary to the Host groups directive in a host definition, this directive may NOT be used as an alternative to (or in addition to) using the “Members” directive in “Host groups”.

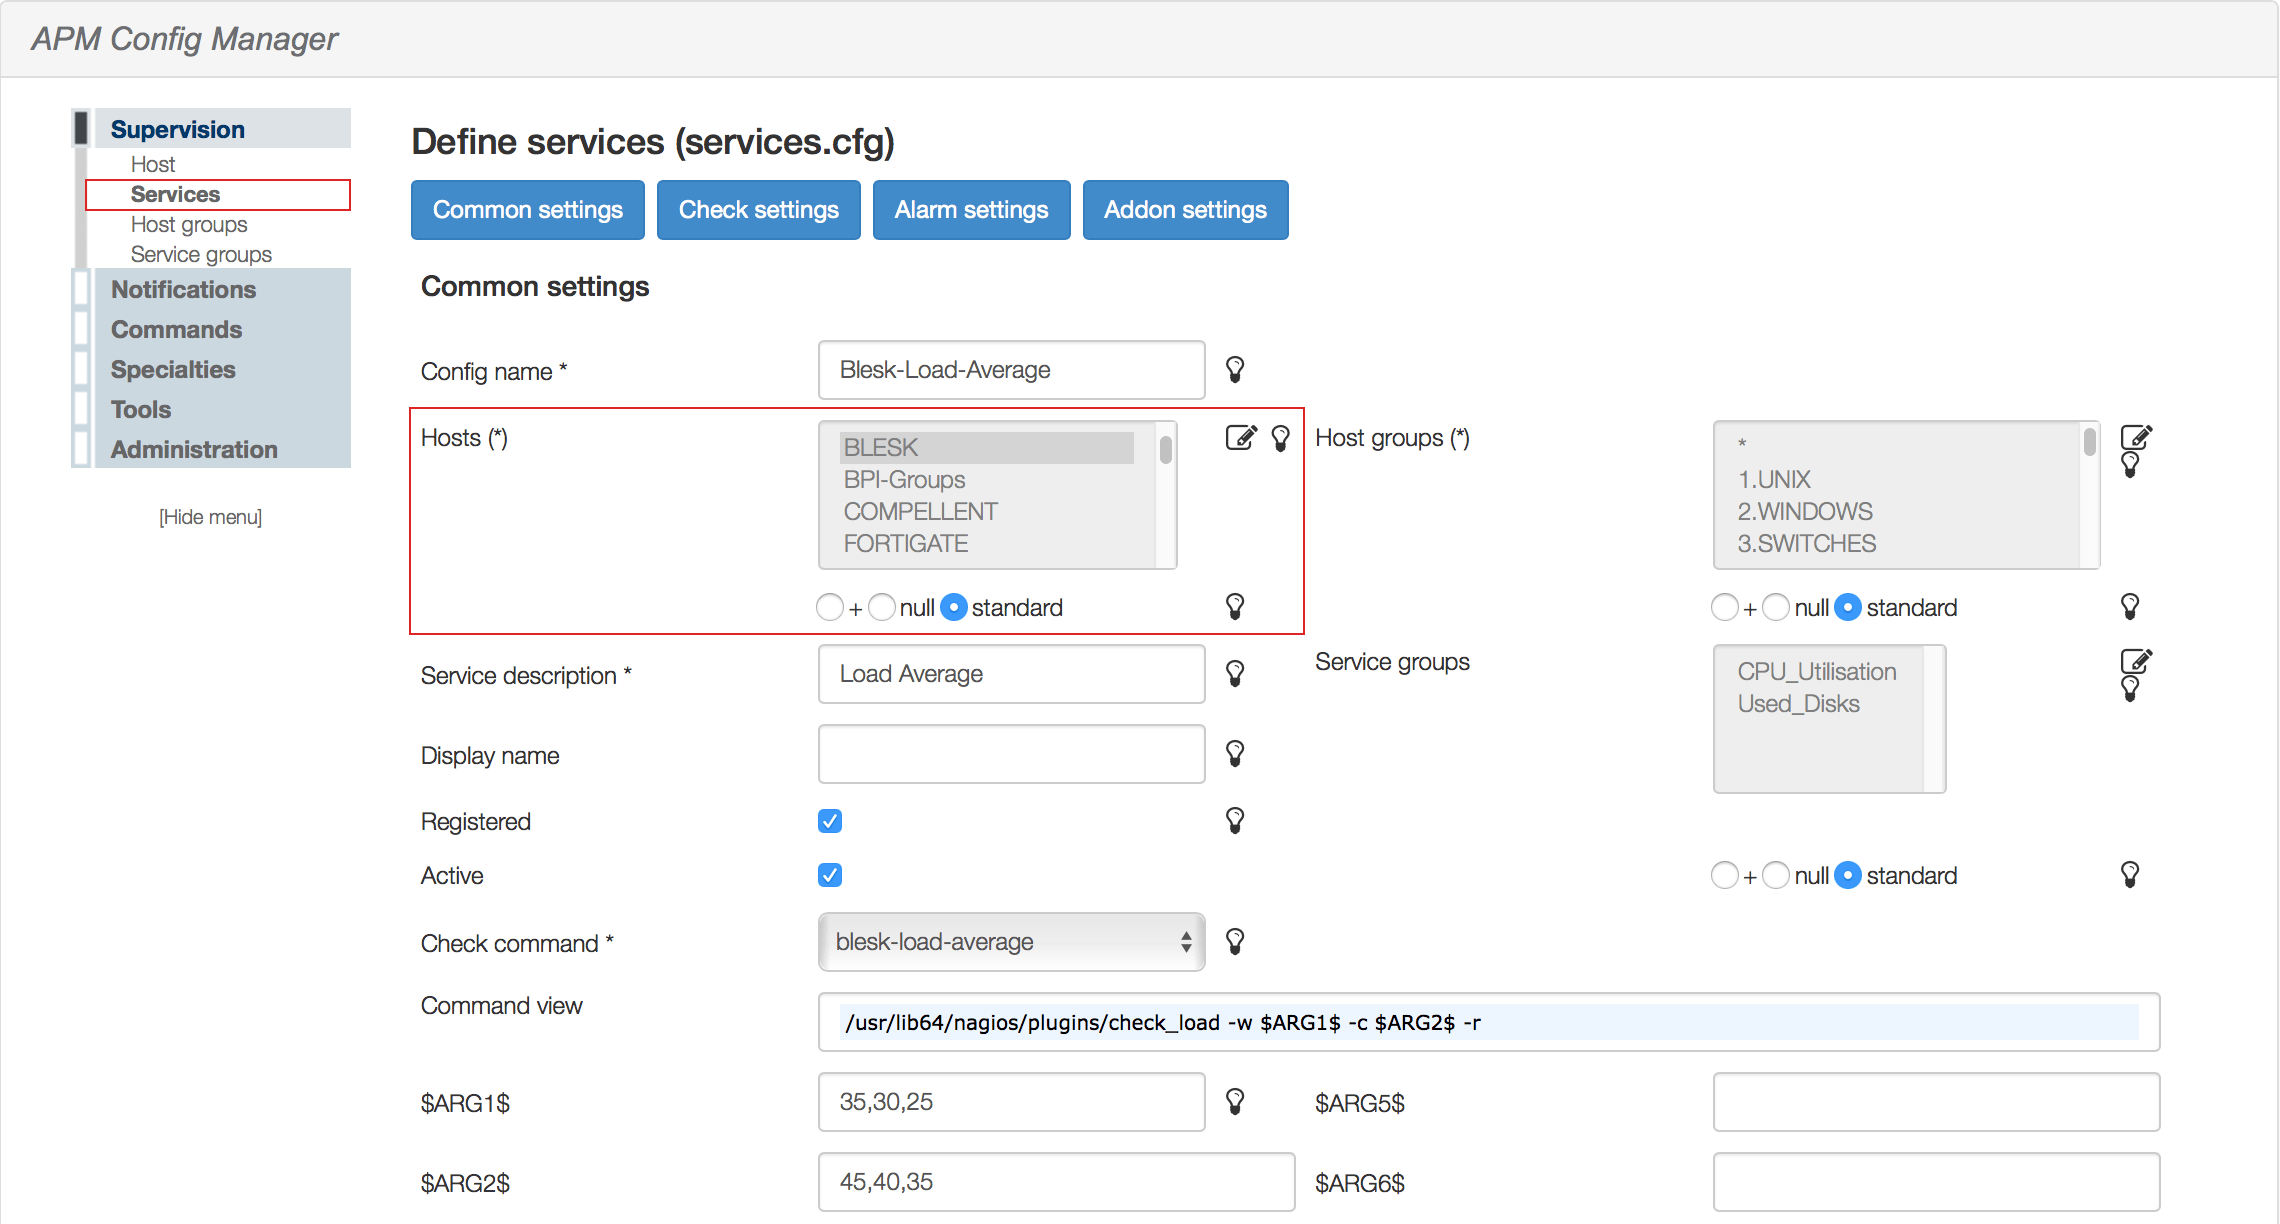
For better manageability, it is recommended to use the “Hosts” field instead of the “Host groups” field in the service definition to associate the service to one or more hosts.

One of the reasons for using this approach is that if you use the “Host groups” field to associate the service, then association is made for all hosts member of the “Host groups” field. This could cause problems because if the service is not available on one of those hosts, then a false positive alert will be generated for a service that doesn’t exist on the host(s).
Note: If you like, you can select one or more Host groups and one or more Hosts for the same service. This option work as well.
¶ The ‘Contact groups’ directive
This field, which appears under the ‘Alarm settings’ tab of a Service definition, is used to select the names of the contact groups that should be notified whenever there are problems with this service.

⇣

If you have manually created a new ‘Service” entry, then this field will be empty and you must specify at least one contact and/or contact group in each service definition.
Note: By default, every existing service template will have, depending of the type of service, a predefined contact group selected.
¶ The ‘Contacts’ directive
This field, which appears under the ‘Alarm settings’ tab of a Service definition, is used to select the contacts that should be notified whenever there are problems with this service. It is useful if you want notifications to go to just a few people and don’t want to configure contact groups.

If you have manually created a new ‘Service” entry, then this field will be empty and you must specify at least one contact and/or contact group in each service definition.
Note: If you like, you can select one or more contact groups and one or more contact for the same service. This option works as well.
¶ Host groups
Remember that “Host groups” in APM are used to group common devices together in order to facilitate the display and the alerts that will be sent when something goes wrong.
For example, if I create a group of hosts called “WINDOWS SERVERS” under which I put all the Windows servers on my network, and Bob is responsible for managing and dealing with alerts received from Windows servers, then if a service or a Windows host under this group is down, Bob will receive the alert of this group and will know for which server this alert applies.
This approach is just a recommendation to facilitate the management of devices on your network. You can put everything under the same group if you like but for better flexibility, it is recommended to create different group and put different devices into them so that it becomes easy to assign a group of hosts to a particular person or group of people responsible for these devices.
¶ Create Host groups
To create new Host groups, go to “APM | Configure | Administration | Supervision | Host groups” and then click on the “Add” button.
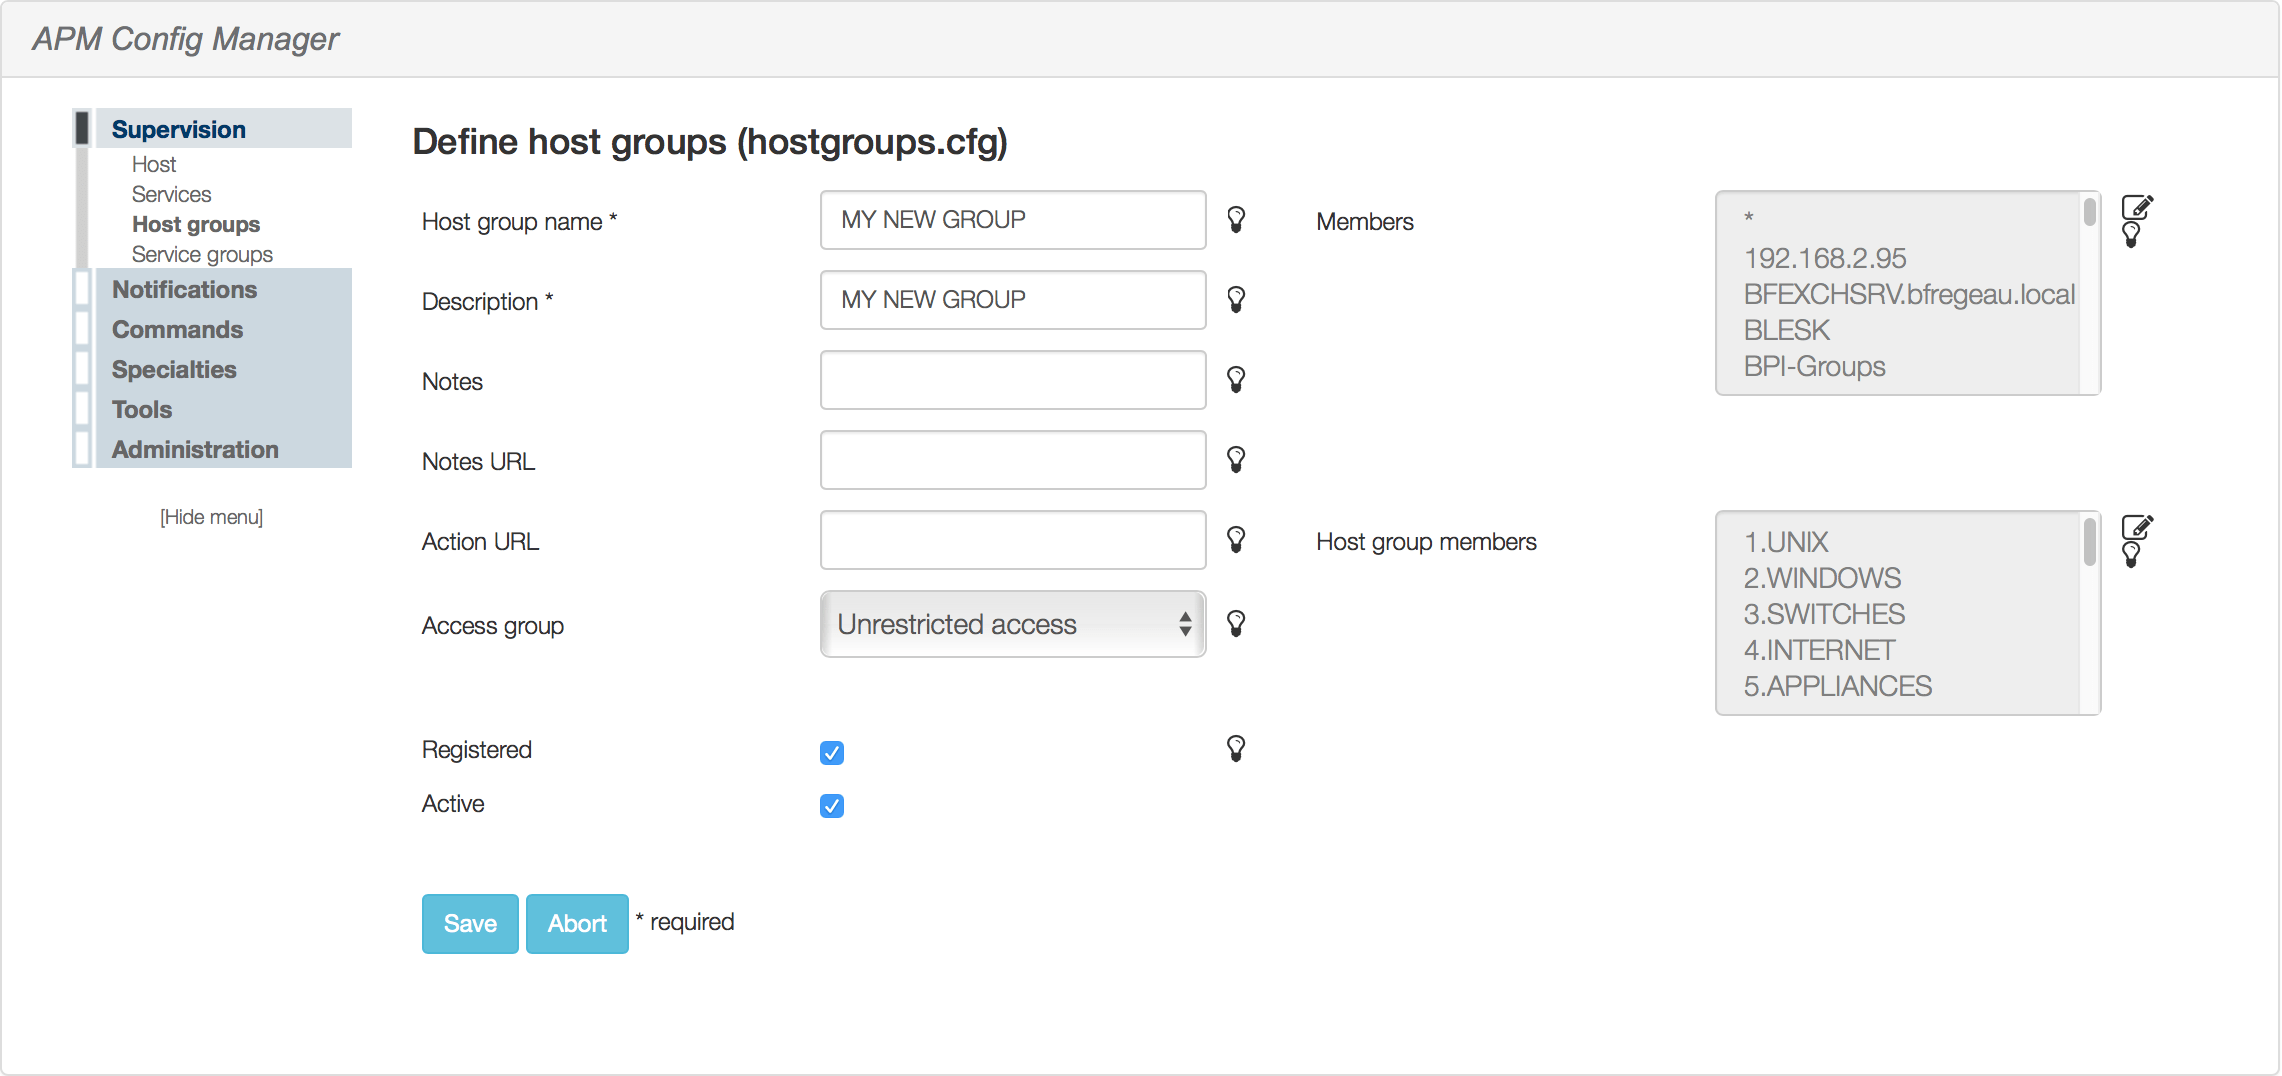
Then define a name for your Host group and a description. These two fields are the minimum required for the new Host group to be created.
Note: Don’t forget to activate the Host group by checking the boxes “Registered” and “Active” on the page before clicking the “Save” button.
¶ The ‘Members’ directive
Under the “Host groups” definition page, we can use the “Members” field available to list the hosts that should be included in this group. This directive may be used as an alternative to (or in addition to) the hostgroups directive in “Host” definitions as mentioned earlier in this document.

Remember that the auto detection engine of blësk prefers to use the “Host” definitions to associate a new host with a hotsgroup and this is done in each “Host” definitions page, not here.
This doesn’t prevent you from manually doing it here (in the Members field) for hosts that have not automatically been exported by the auto detection engine.
Note: If you select a hostgroup inside a host definition using the hostgroups directive in “Host” definition, this host will not be selected here (in Host Groups under the Members field) because these are two different ways to specify a hostgroup!
¶ Default Host groups Template
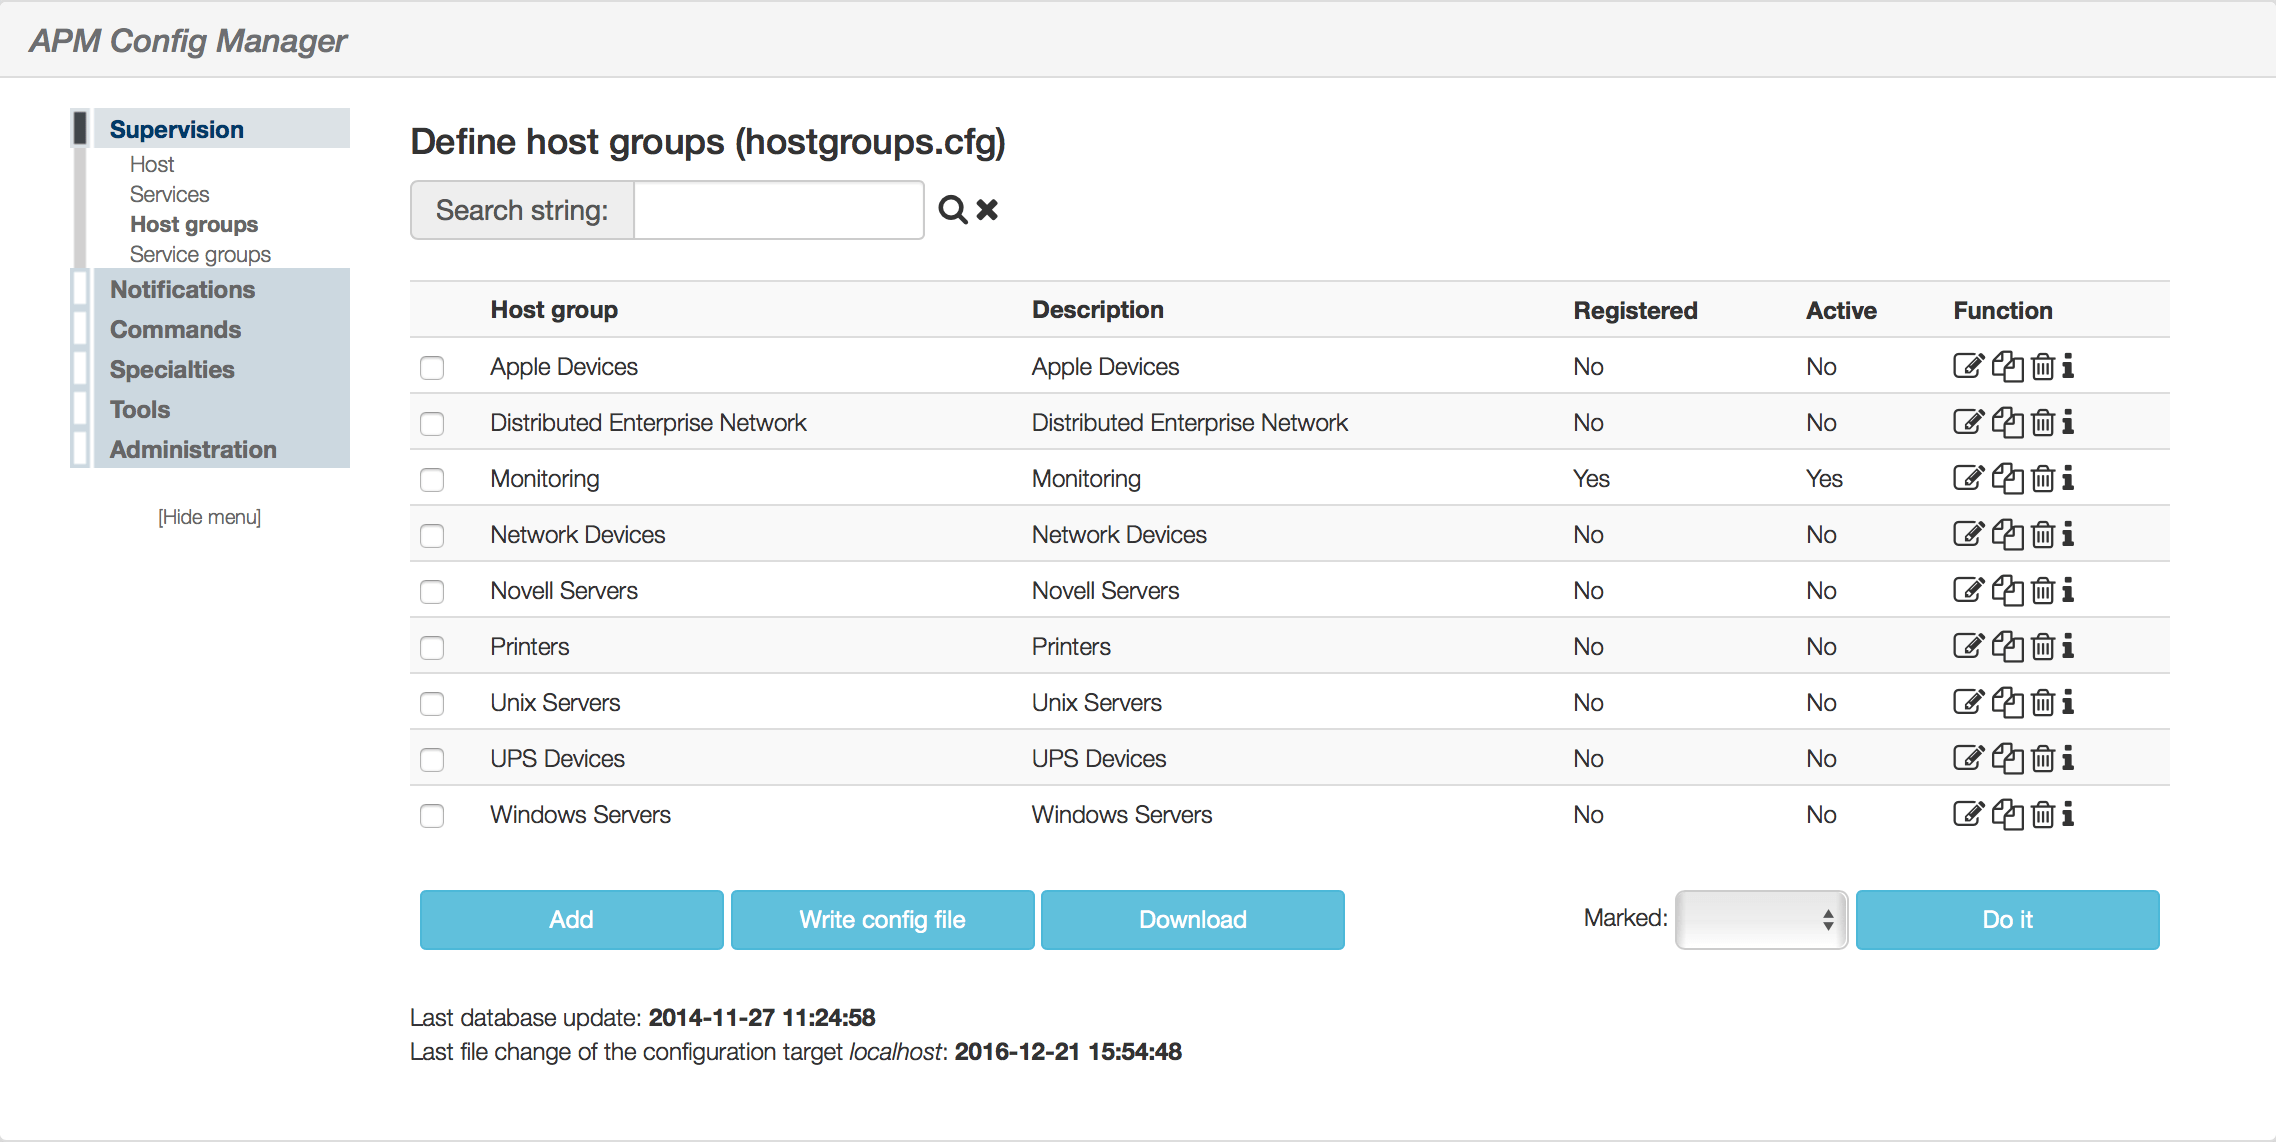
To facilitate the use of Host groups, we’ve created for you a number of Host groups based on the types of devices commonly found on a network. If you want to quickly start using APM, you can use these pre-defined Host groups and add to them the devices that you want. Here are the names of those Host groups:
- Apple Devices
- Distributed Enterprise Network
- Monitoring
- Network Devices
- Novell Servers
- Printers
- Unix Servers
- UPS servers
- Windows Servers
Every devices that falls into one of the above default Host groups, will automatically have the default Contact groups related to the Host groups associated to the device.
Note: The auto detection engine of blësk will use the above default Host groups for every devices that belongs to the corresponding group.
¶ Contact
Contact is used to identify someone who should be contacted in the event of a problem. You should create entries for all people who should receive alerts then assign them to the corresponding Contact groups if needed. You can have a Contact assigned to more than one Contact group too.
¶ Create Contact
To create new Contact, go to “APM | Configure | Administration | Notifications | Contact” then click on the “Add” button.
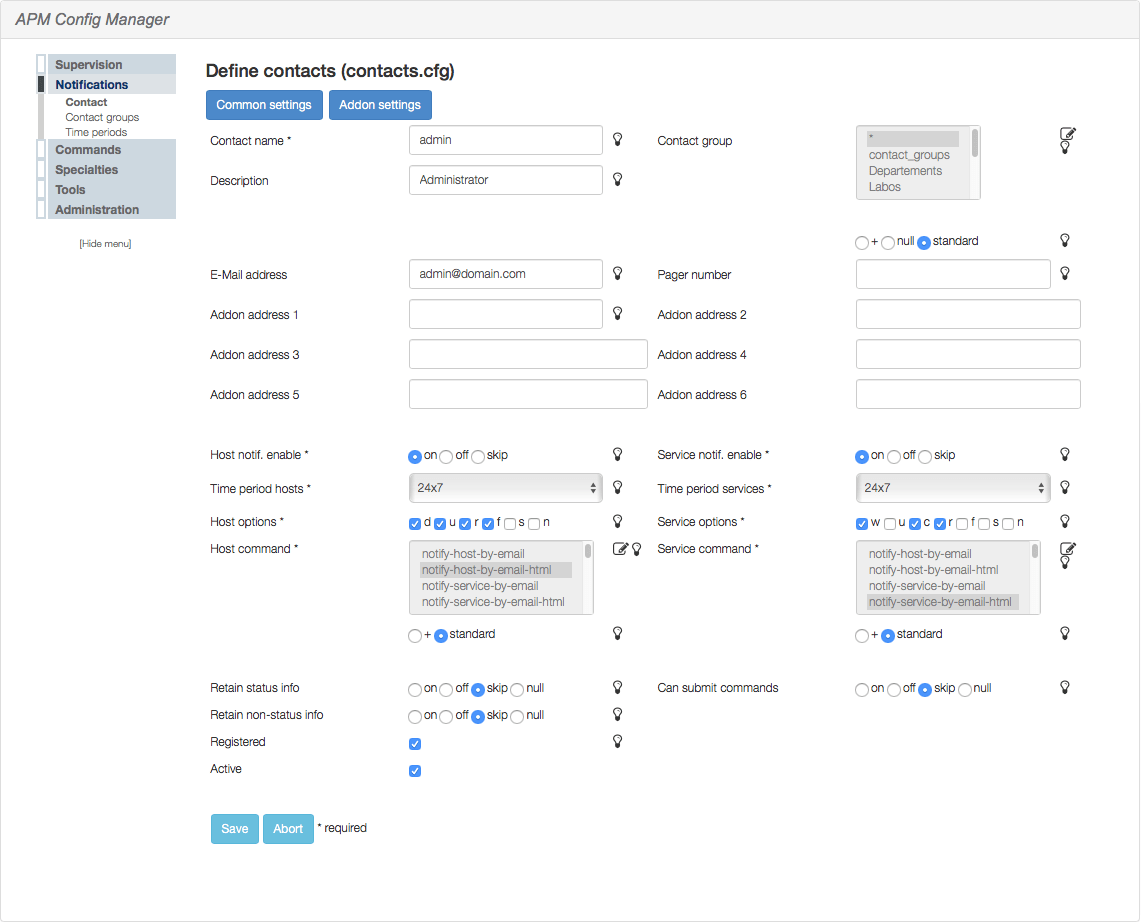
Then define a name for your Contact, the time period during which the contact can be notified about host problems, the time period during which the contact can be notified about service problems, the host states (Host options) for which notifications can be sent out to this contact, the service states (Service options) for which notifications can be sent out to this contact, the commands used to notify the contact of a host problem, and the commands used to notify the contact of a service problem.
The other parameters are optional for the contact to be created but are needed and must be defined for the contact to work correctly.
To save time in the creation of a new Contact, you can copy/clone the default “admin” Contact and then change parameters to fit those required for the new contact. In this way, you can avoid possible errors during configuration for the new contact.
The Host and Service command fields are special because they handle many commands that can be selected, but only two of them apply for the context of Host or Service command.

These two commands for the “Host command” field are:
- notify-host-by-email
- notify-host-by-email-html
The difference between them is that “notify-host-by-email” will send plaintext alerts when a host is in a problem state whereas “notify-host-by-email-html” will send the alert in HTML format.
These two commands for the “Service command” field are:
- notify-service-by-email
- notify-service-by-email-html
The difference between them is that “notify-service-by-email” will send plaintext alerts when a service is in a problem state whereas “notify-service-by-email-html” will send alerts in HTML format.
Note: It is important not to mix notification commands that apply to hosts with those that apply to services. You can see the difference in their name. For example, (notify-host-by-email) applies to a host because we see the description host in the name of the command. The same applies to service (notify-service-by- email).
¶ Default Contact Template
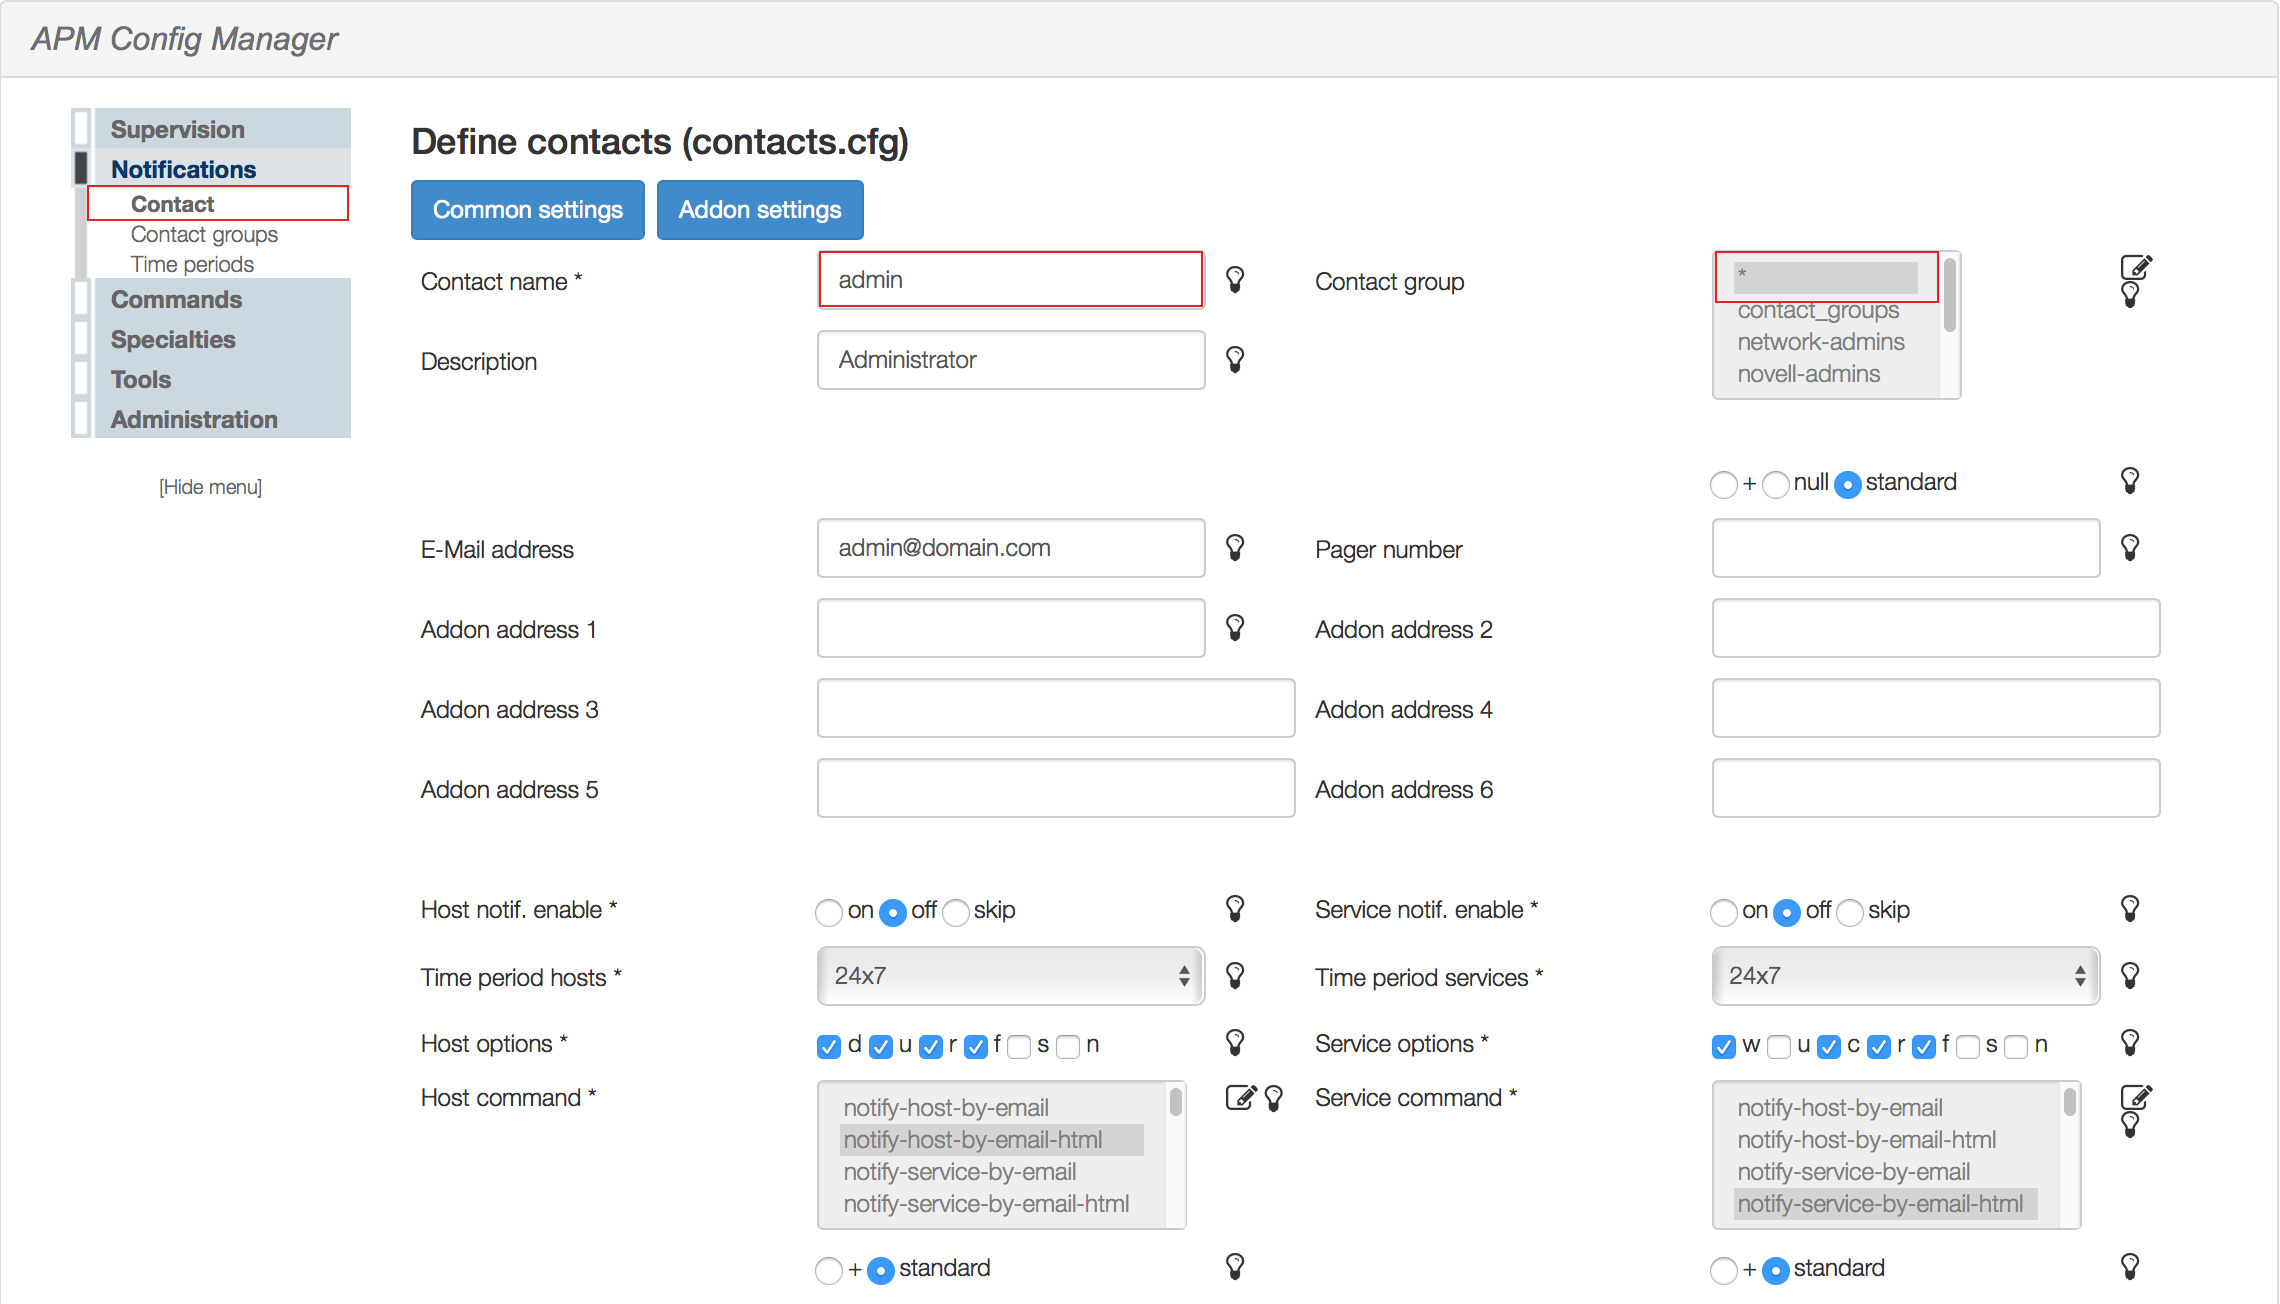
By default, APM comes with a default Contact item called “admin” which handles all the default Contact groups. This make this default Contact the one that can receive all alerts for all devices monitored under APM. In this way, we can be sure that no alerts are forgotten in the process. This is possible because we use and select the special string * in the Contact group field definition for this default Contact.

Schema

¶ Contact groups
A contact group is used to group one or more contacts together for the purpose of sending out alerts and recovery notifications.
For example, I can have two teams working on different parts of the network. One who is responsible only for network devices, and the second responsible for all servers. By creating a Contact group called NDG for those people responsible for monitoring the health of all network devices and another group called SDG for those in charge of servers will let me separate alerts according to the device that is having a problem.
¶ Create a Contact group
To create a new Contact group, go to “APM | Configure | Administration | Notifications | Contact groups” and click the “Add” button.
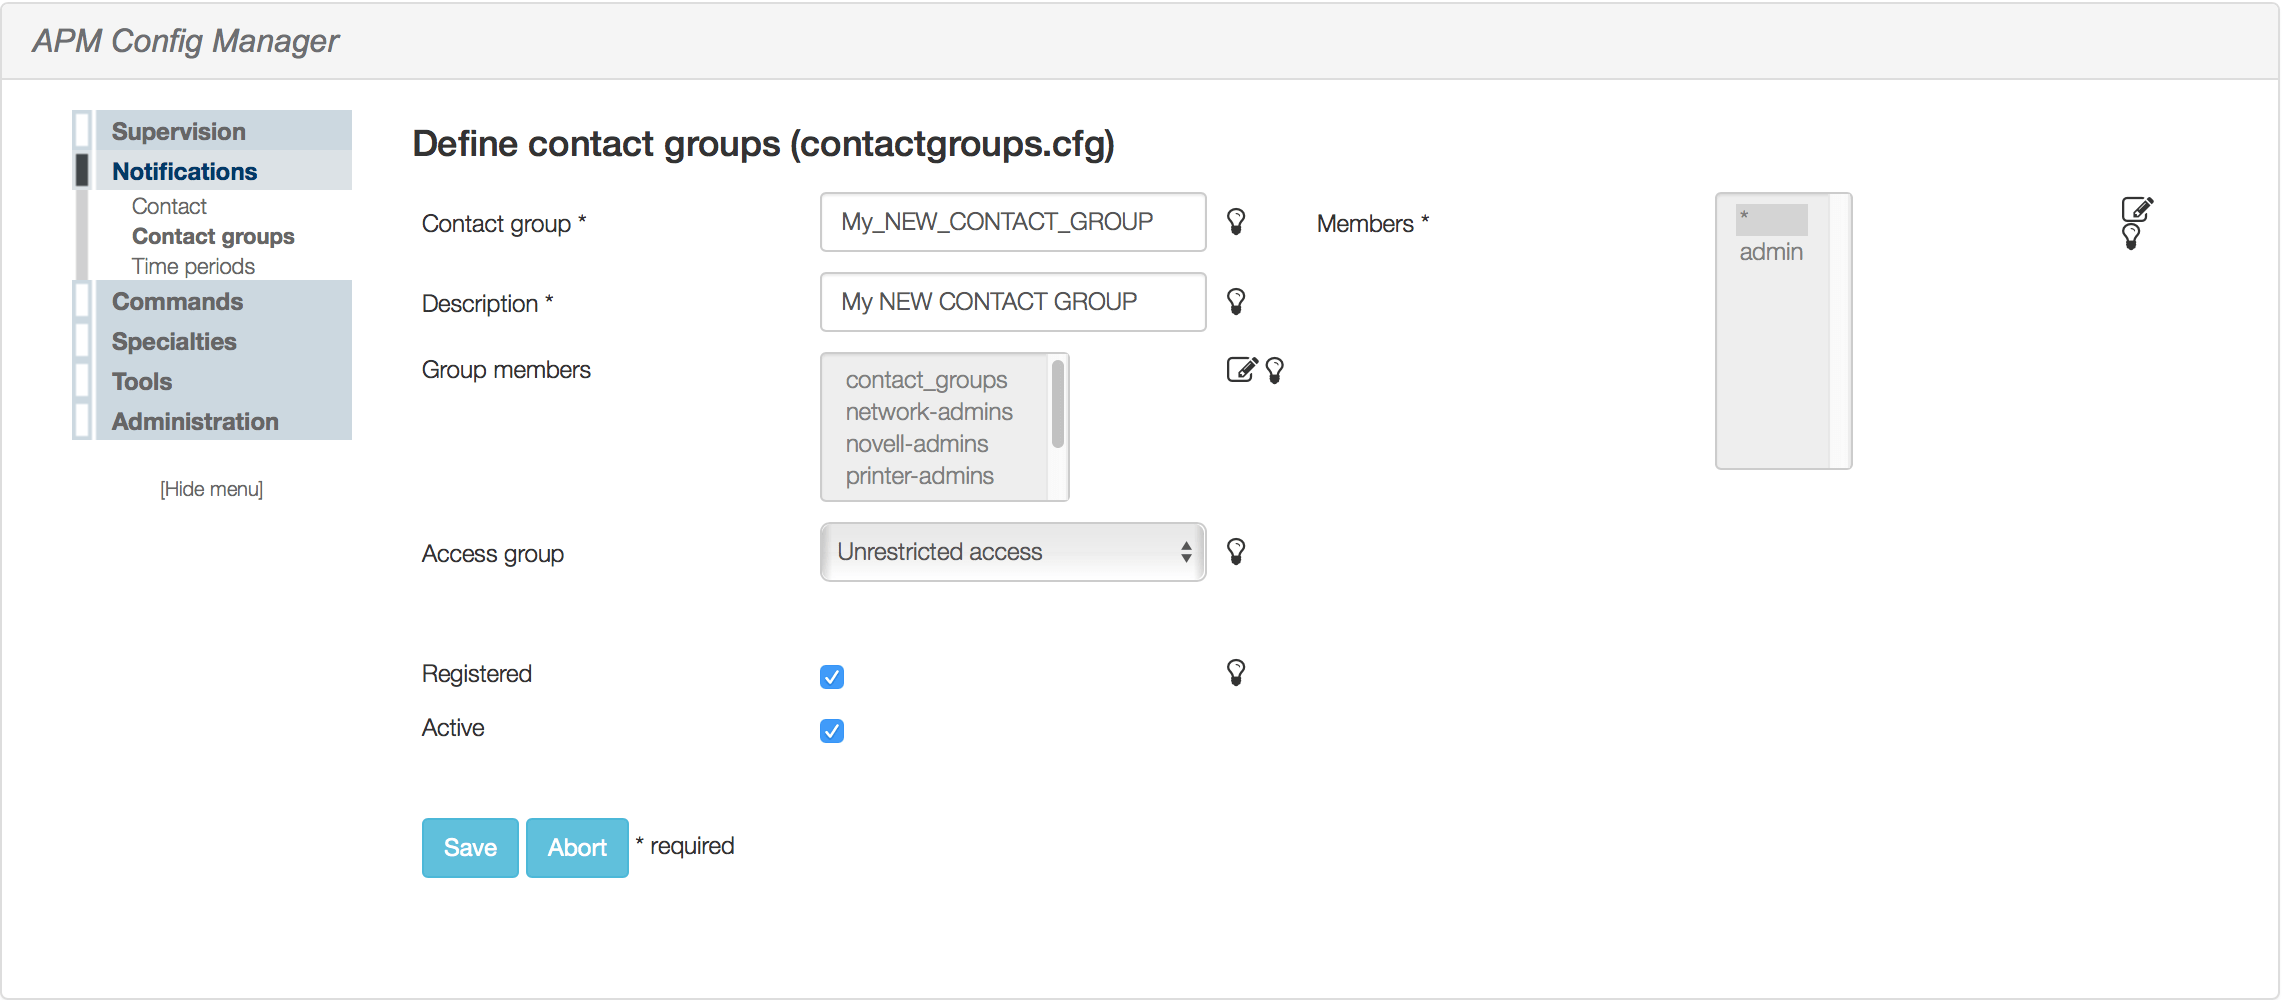
Then define a name for your Contact group, a description, and finally select from the list of available members (contacts) the ones which should be associated with this new Contact group. These three fields are the minimum required for the new Contact group to be created.
Note: Don’t forget to activate the Contact group by checking the boxes “Registered” and “Active” on the page before clicking on the “Save” button.
¶ Default Contact groups Template
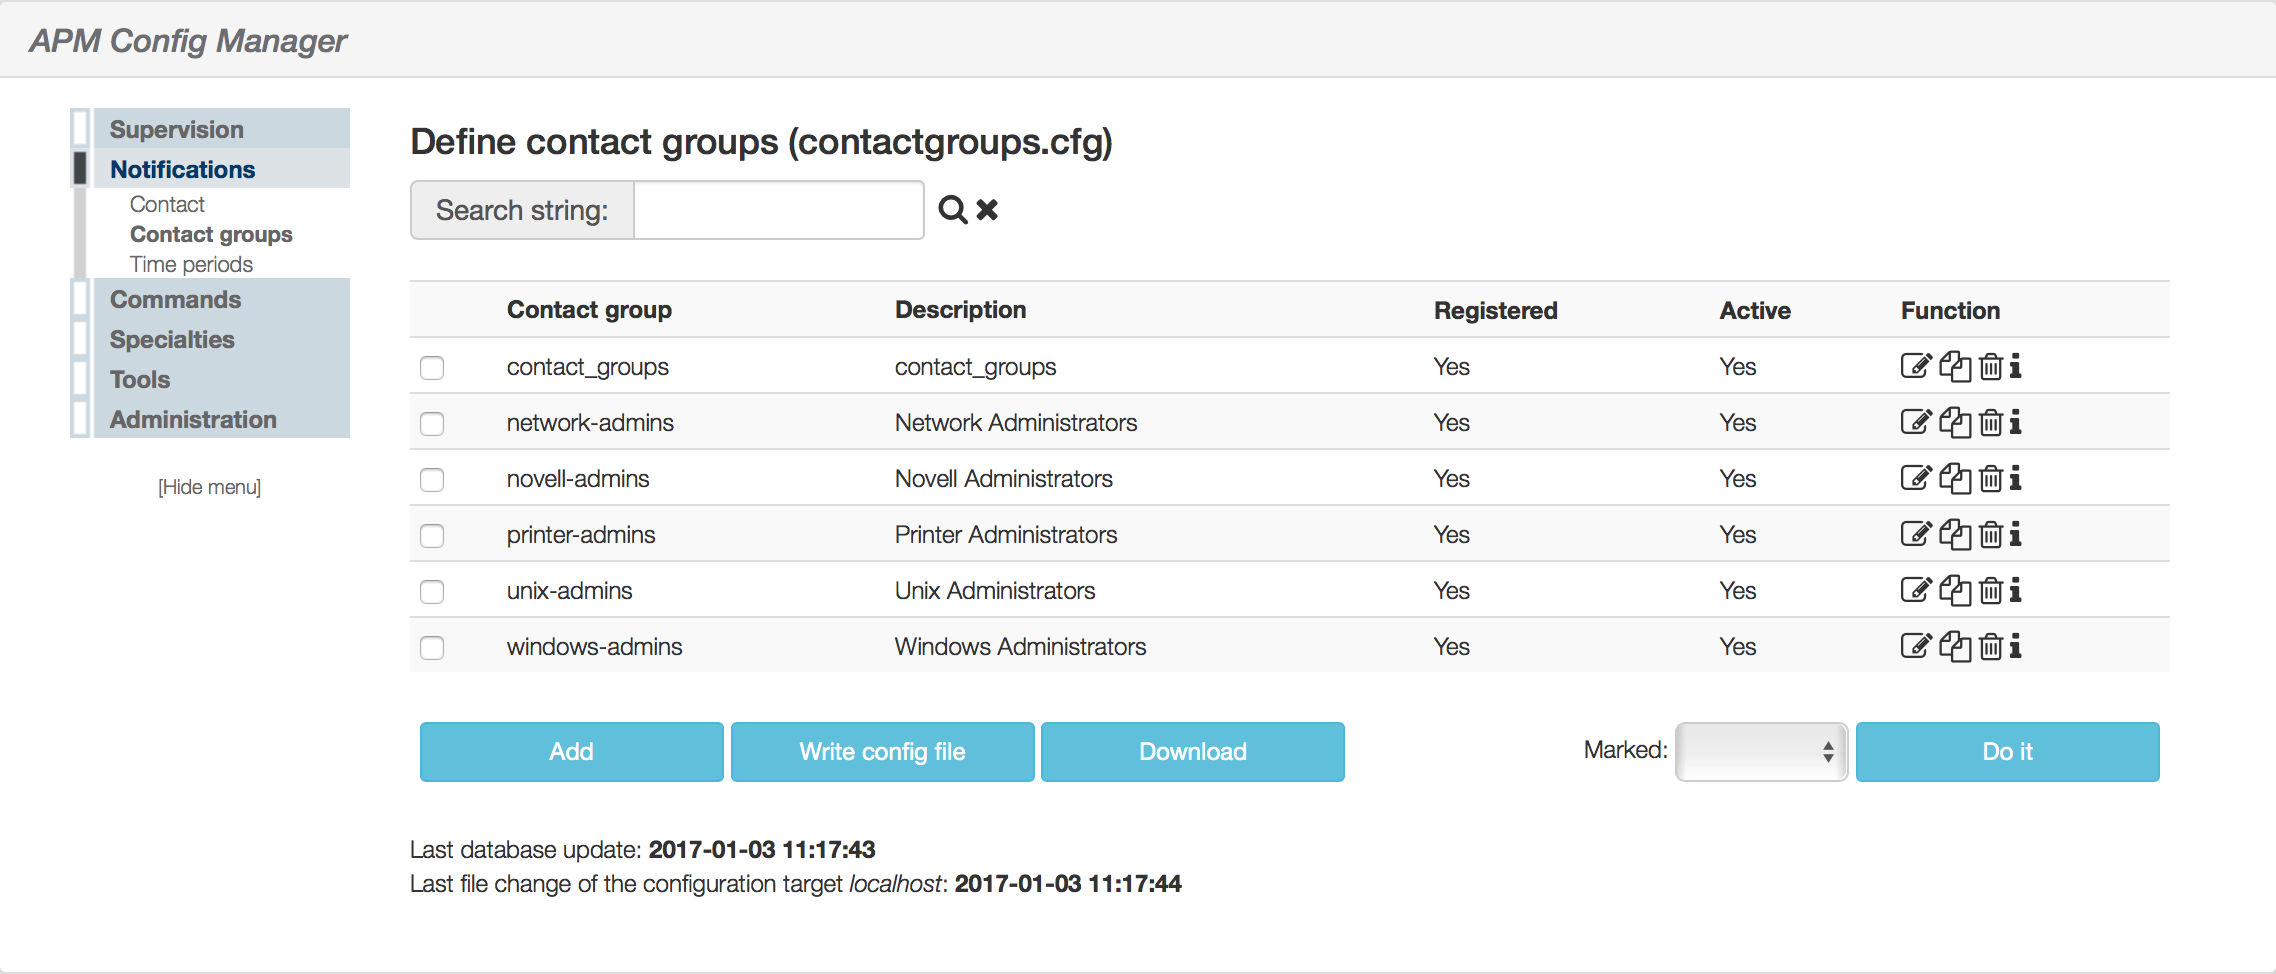
To facilitate the use of Contact groups, we’ve created for you a number of default Contact groups according to the Host groups template available in APM. If you want to quickly start using APM, you can use these pre-defined Contact groups and add to them the Contacts that you want. Here are the names of the pre-defined Contact groups:
- contact_groups
- network-admins
- novell-admins
- printer-admins
- unix-admins
- windows-admins
Each Contact group listed above relates to a Host group template as follows:
- Contact group template“novell-admins” relates to the “Novell Servers” Host groups template.
- Contact group template“printer-admins” relates to the “Printers” Host groups template.
- Contact group template “unix-admins” relates to the “Unix Servers” Host groups template.
- Contact group template“windows-admins” relates to the “Windows Servers” Host groups template.
- Contact group template “network-admins” relates to the “Network Devices”, “UPS Servers”, “Monitoring” and “Apple Devices” Host groups templates.
Note: Any devices that doesn’t fall into one of the above definitions, goes into the “contact_groups” template and will automatically have this default Contact group associated to them.
¶ Some important points
Here are some important points to consider about the logic behind how APM deals with associations between Hosts, Services, and Host groups.
1. Associating a host with a host group is done in the “Host” definition entry under the “Host groups” field.
2. Association of a service with a host is done in the “Service” definition entry under the “Hosts” field. This is done automatically (for host and service) when you use the auto detection engine of blësk to export devices into the APM module.
3. Another important point is how the auto detection of blësk deals with contacts that should be associated with a host or service. By default, only one contact (admin) is created and this contact is a member of all available contact groups.
Note: All pre-defined contact groups relate to their corresponding host groups are associated with them by the auto detection engine during exportation of devices to be monitored by blësk.
4. Services associated with a host, have their contacts already defined in their configuration file template according to the type of service. For example, by default a WMI service template will have the “windows- admins” contact group. The same applies for all the other different service templates.
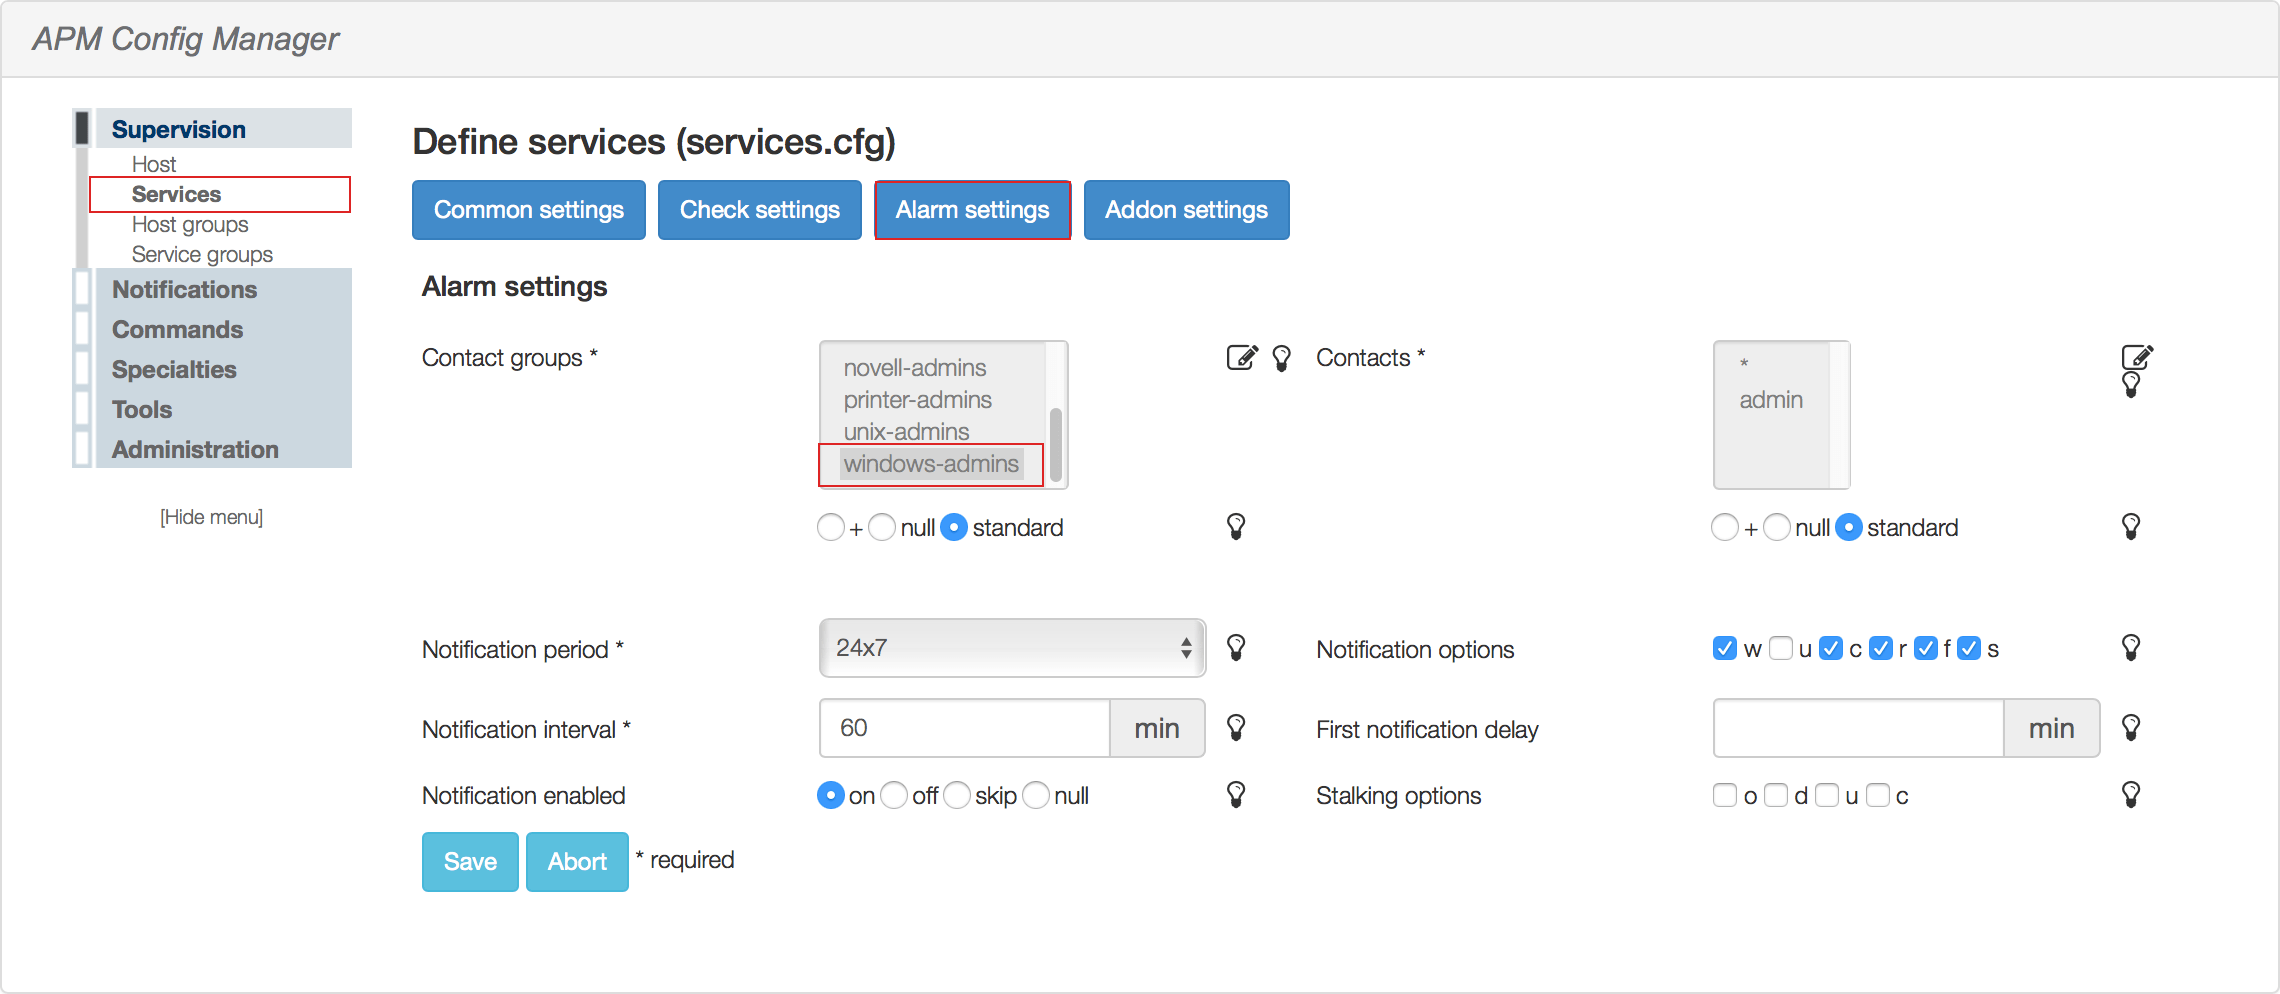
5. Finally, pre-defined host groups are available and are used by the detection engine to classify devices according to their type. This association is then automatically linked in the “Host groups” field of the “Host” definition file for each host.
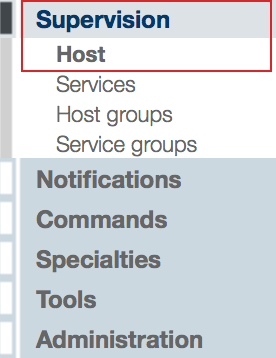
We don’t use the Host groups definition entries located under the “Supervision” left panel of the Administration section of APM to manage hosts with groups.
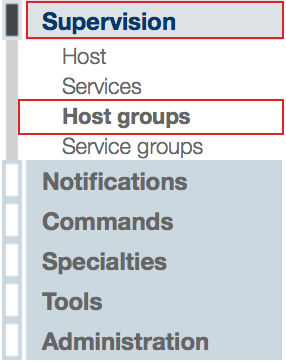
6. You may still use it if you wish, or use it in combination with our default approach which consists of using the “Host” definition entries located under the “Supervision” left panel of the Administration section.
¶ Best practice
It is recommended to use the auto detection engine of blësk (called NDD) to add new devices to the APM module. This will save you a lot of time when you have many devices to monitor and will also make it possible for the system to use imported devices to populate the other blësk modules at the same time.
1. Before scanning your network with the auto detection engine of blësk (NDD), it is a good idea to first create all the groups (Host groups) under which you want to display the different devices you want to import into the APM module for monitoring.
¶ Create a Host group
To create a new Host group, go to “APM | Configure | Administration | Supervision | Host groups” then click on the “Add” button.
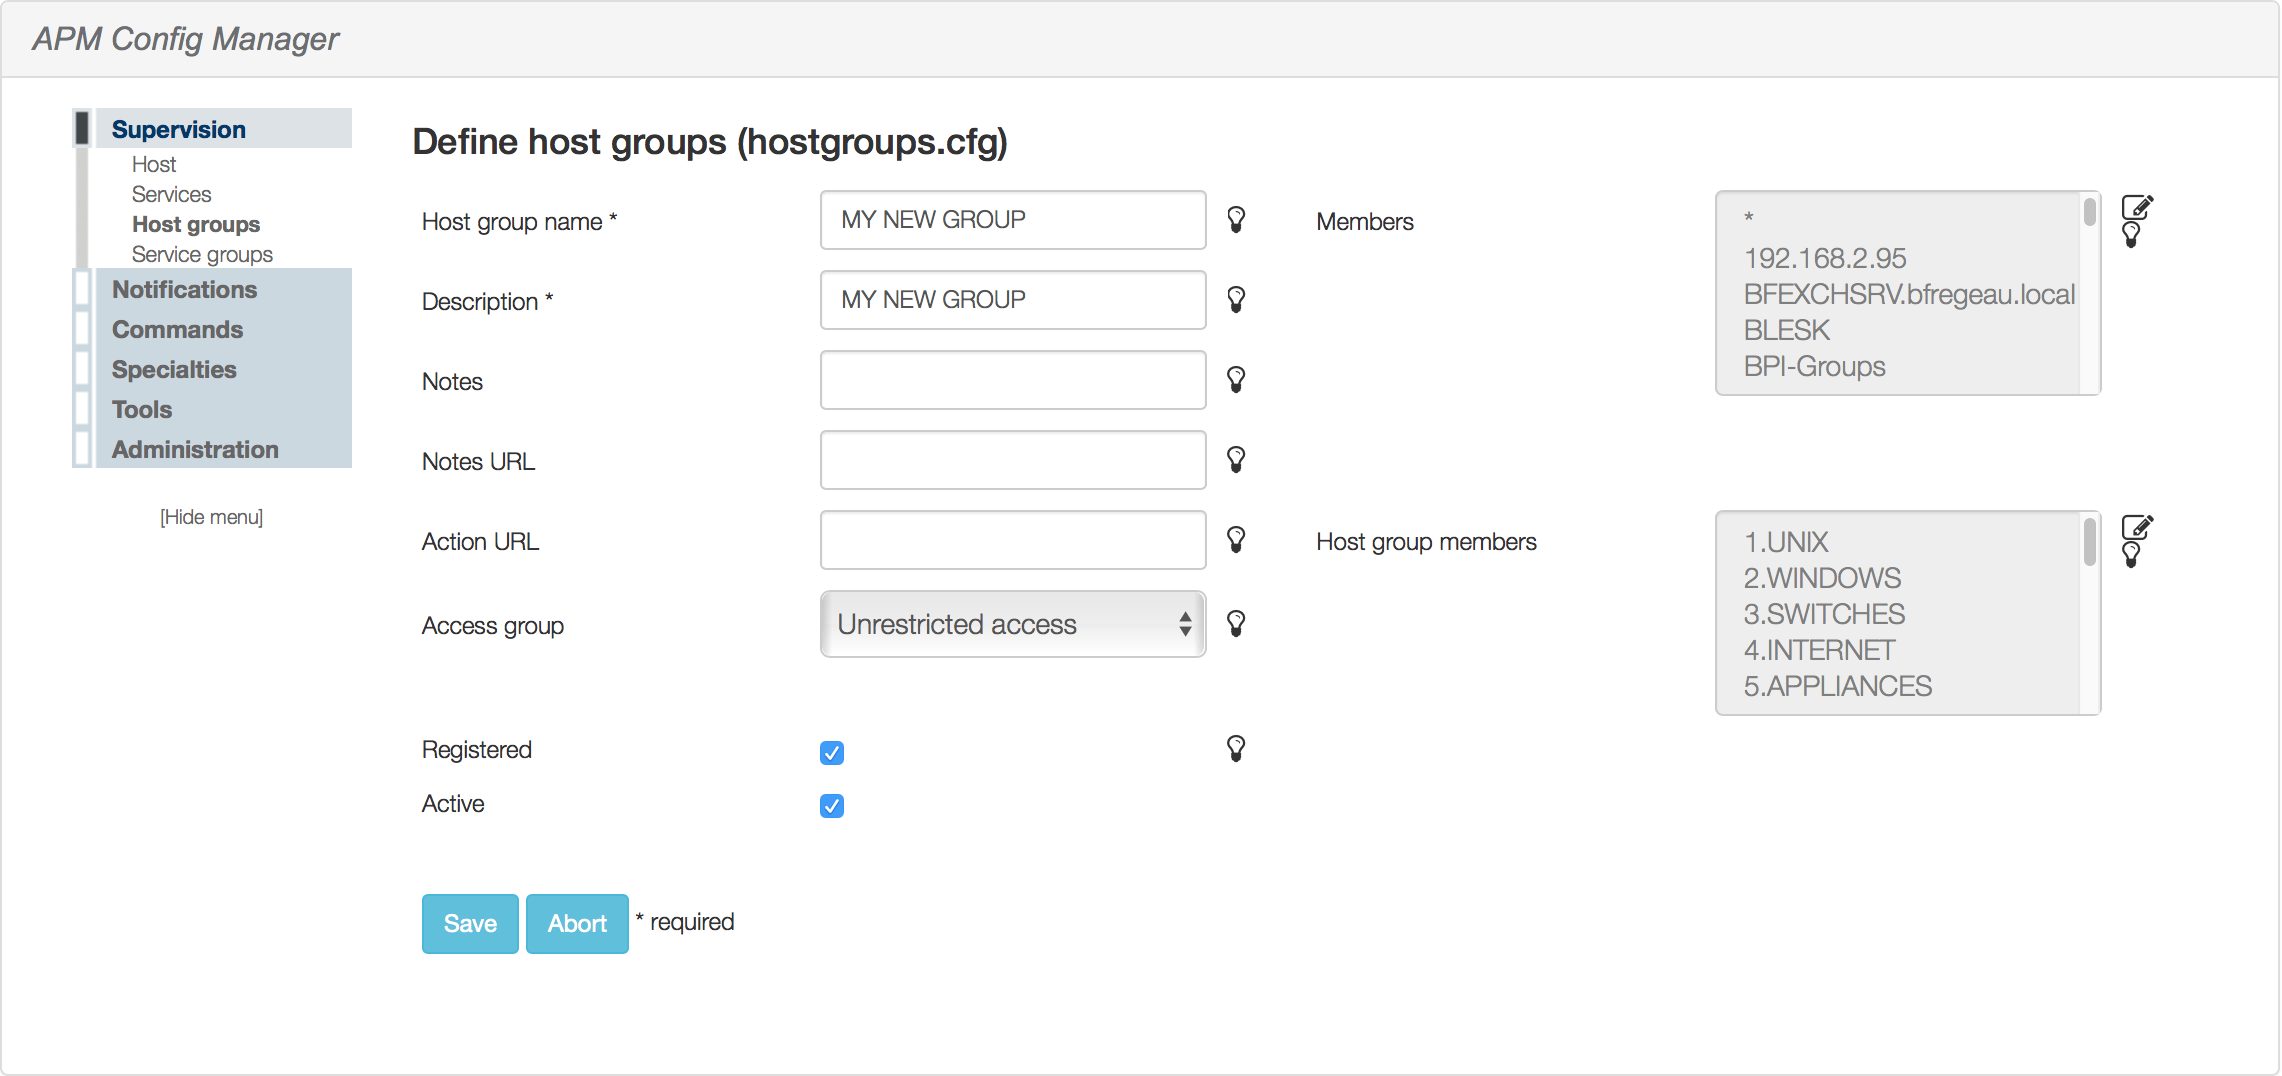
Then define a name for your Host group and a description. Don’t forget to activate the Host group by checking the boxes “Registered” and “Active” on the page before clicking on the “Save” button.
2. Once all of your “Host groups” have been created as explained above, it’s time to go to the detection engine (NDD) and start a new scan to detect devices and export them into the APM module for monitoring. We assume that all require credentials have already been entered into the credential tab of the auto detection engine.
¶ Start a new scan
To start a new scan, click the icon located at the upper right corner of the main page of blësk, then click on the “Auto Detection” link that appears on the menu.

This will redirect you to the NDD module (the auto detection engine) where you’ll have to enter the range of IP address to scan.
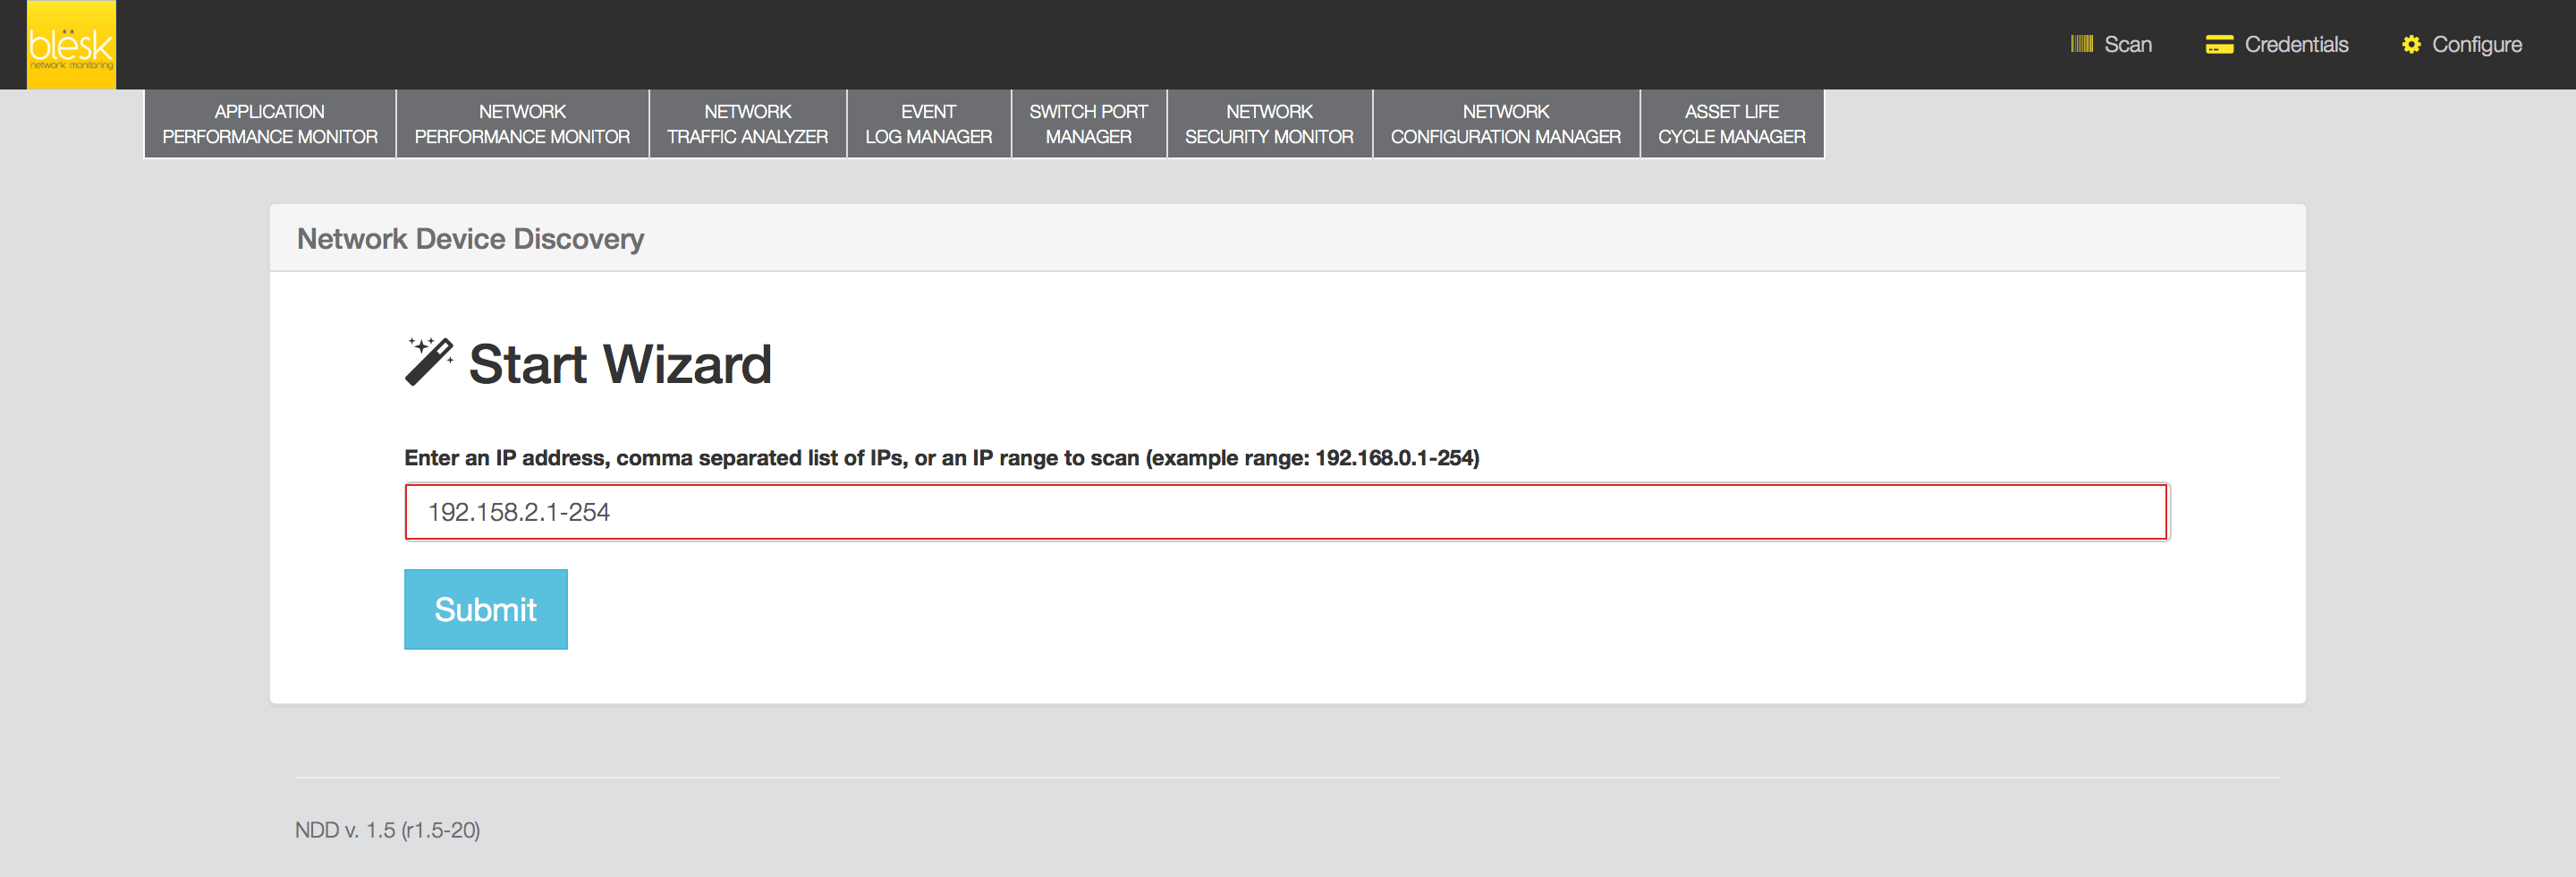
3. After a few minutes, tables will appear where you can see all detected devices sorted into different groups according to their types. The groups represent the pre-defined default groups mentioned previously in this document. If you have created custom groups in the “Administration” section of the APM module, you can use them here by selecting devices and moving them into the custom groups before exporting the devices to APM.
¶ Move devices into another group
To move devices into another group, select them from the default group under which they are listed and select from the pull down menu at the top of the default group the new group under which you want to place them.
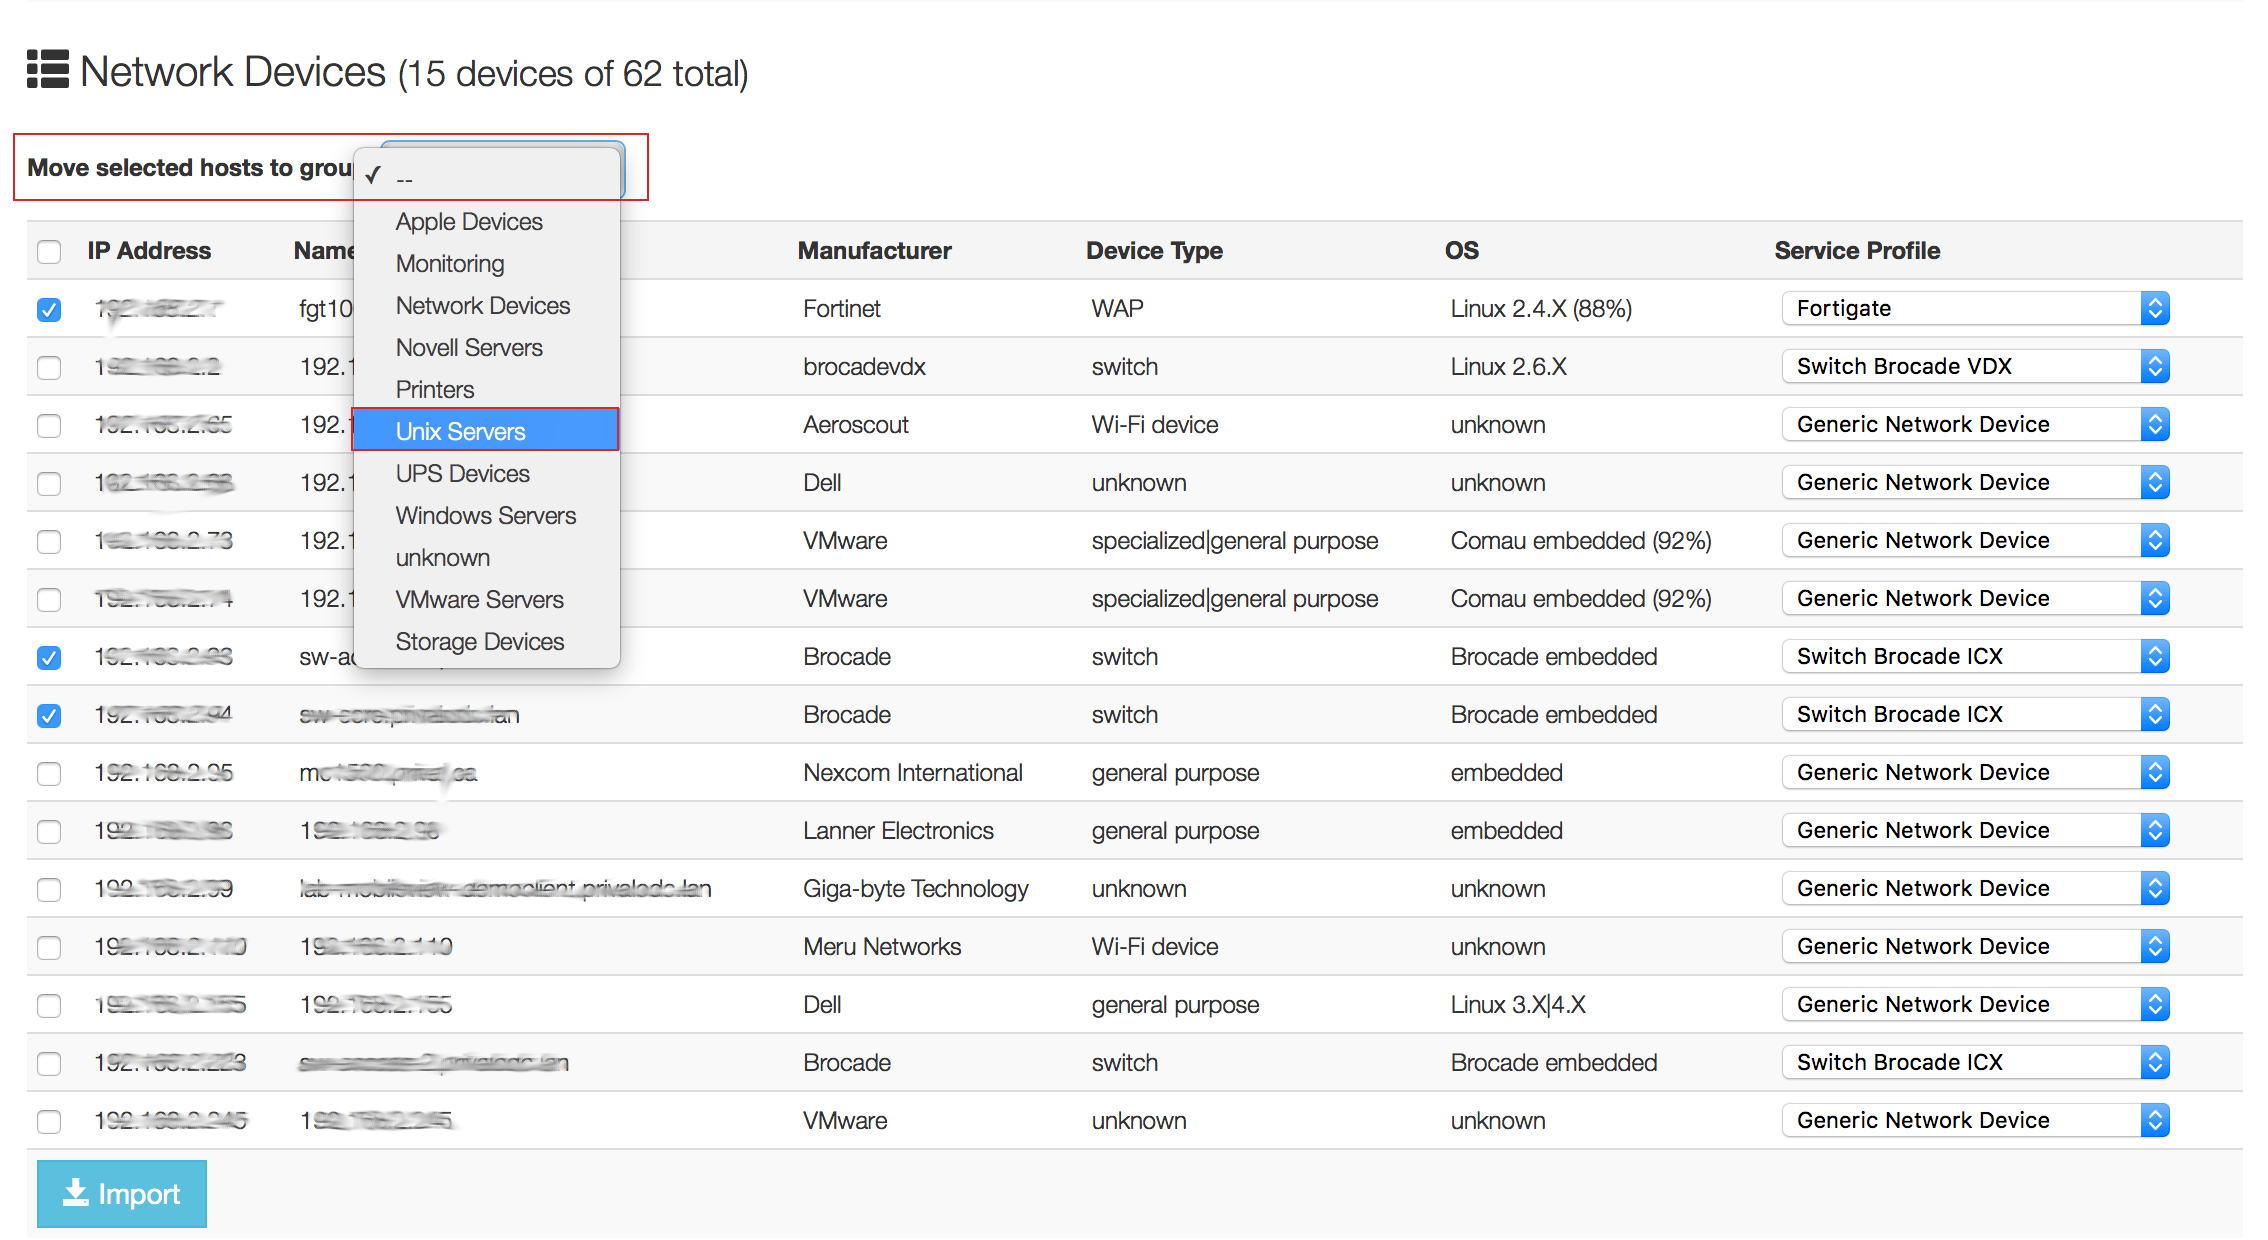
4. This will move the selected devices into the new group, and this new group table will now appear. From there you can select devices available inside this new group table and click the “Import” button to import them into the APM module for monitoring.
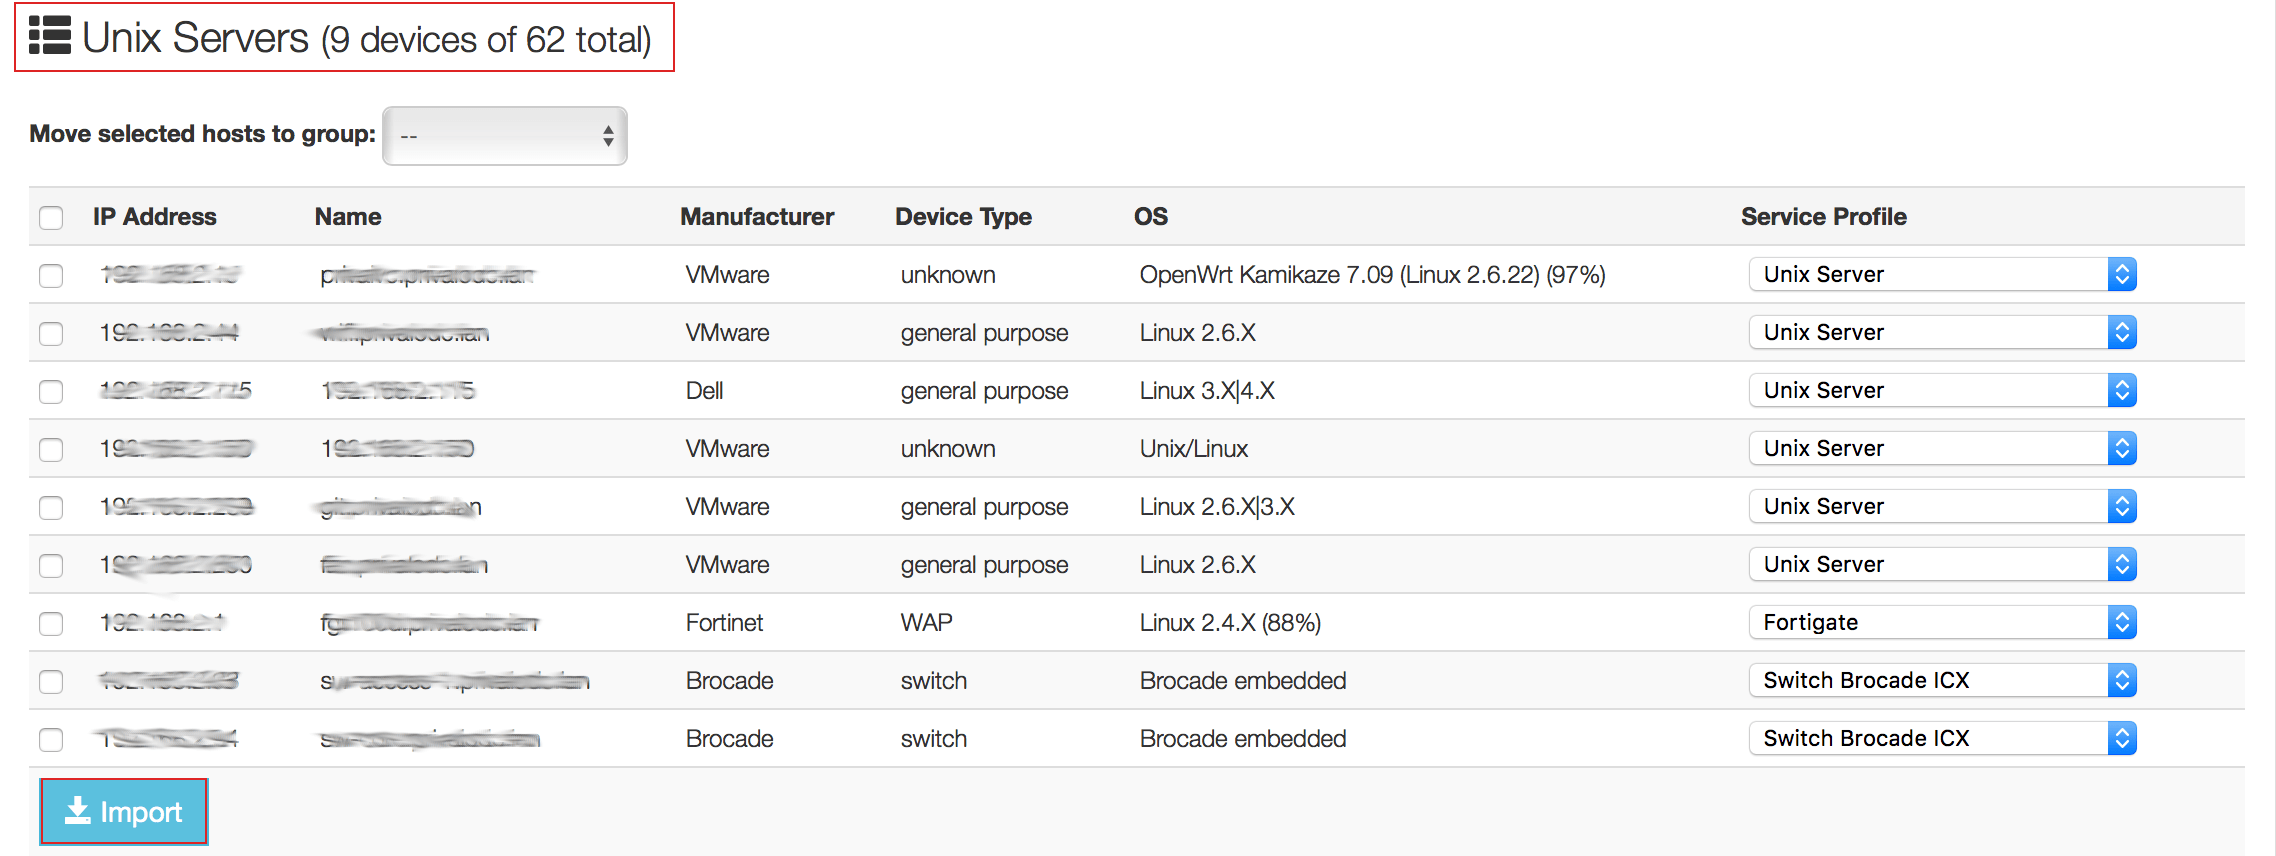
In this way, the devices that we have imported into the APM module of blësk are already in the correct group under which we want them to appear. We will not have to manually move them into the correct group under the “Administration” section of APM.
Note: Using the auto detection does not affect the contact groups because all services template already have their contact group defined in the default configuration of the service in question.
¶ Windows Firewall
APM uses the WMI protocol by default to remotely connect to your Windows Server and request information from the WMI database. This approach avoids the need to install an agent on the remote Windows server to monitor service availability. This is known as an agentless monitoring technique.
On Windows servers where the firewall is turned on, it may happen that the WMI protocol is blocked, causing the monitored Windows services to return an Unknown state.
To avoid this situation, it is recommended that if you have a firewall running on your Windows servers that you verify that the following elements are respected. It is possible to use a GPO to push these firewall rules.
| Active | True |
| Program | All |
| Action | Authorize |
| Security | Required Auth |
| Protocol | 6 |
| Local Port | 135, 139, 445, 49154 |
| Remote Port | All |
| ICMP Parameters | All |
Table - 1