¶ Introduction
There is two way to grant access to WMI for a remote user, either you add a user to the Administrators group or you follow the steps below to grant access to WMI without using administrator rights. This part shows how to set up remote WMI access on a Windows 2008 R2 SP1 server. This server was set up as a member server of a workgroup.
¶ Create a new user
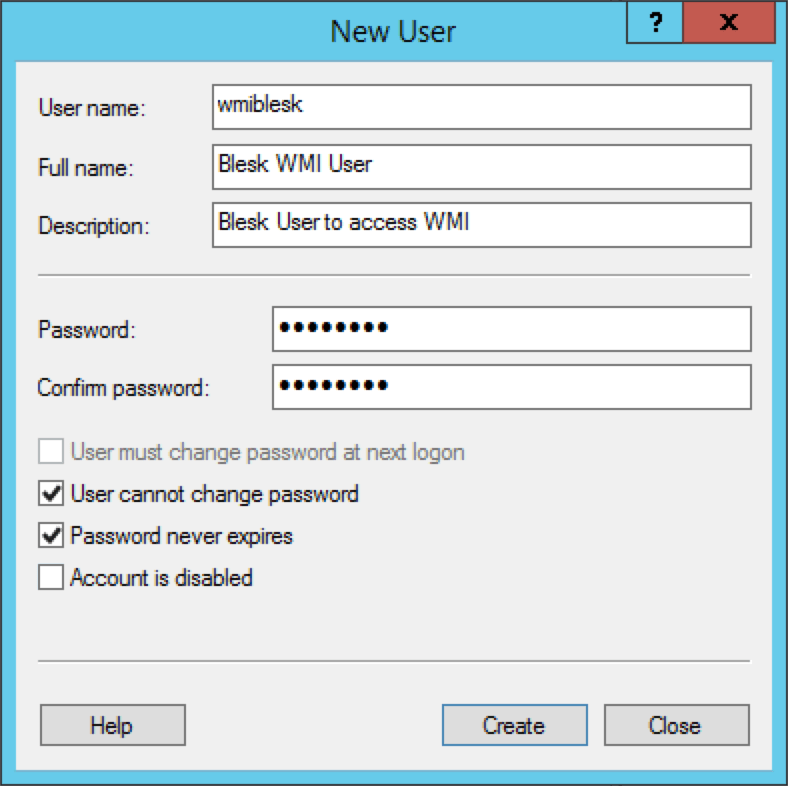
We create a new user and after that we will give the user access to do remote WMI queries.
- Go to « Server Manager » by right-clicking on « Computer » in the start-menu and select « Manage »
- Click your way down to Configuration -> Local Users and Groups -> Users
- Create a new user.
- Set « User Name » to any name you like.
- Check « User cannot change password »
- Check « Password never expires »
- Click
Create

¶ Change user settings
- Edit the user just created and go to the tab « Members of »
- Click add and add the group « Distributed COM Users »
- Click
OK - Also add the group « Performance log users »
- Click
OK

¶ Grant privileges to WMI
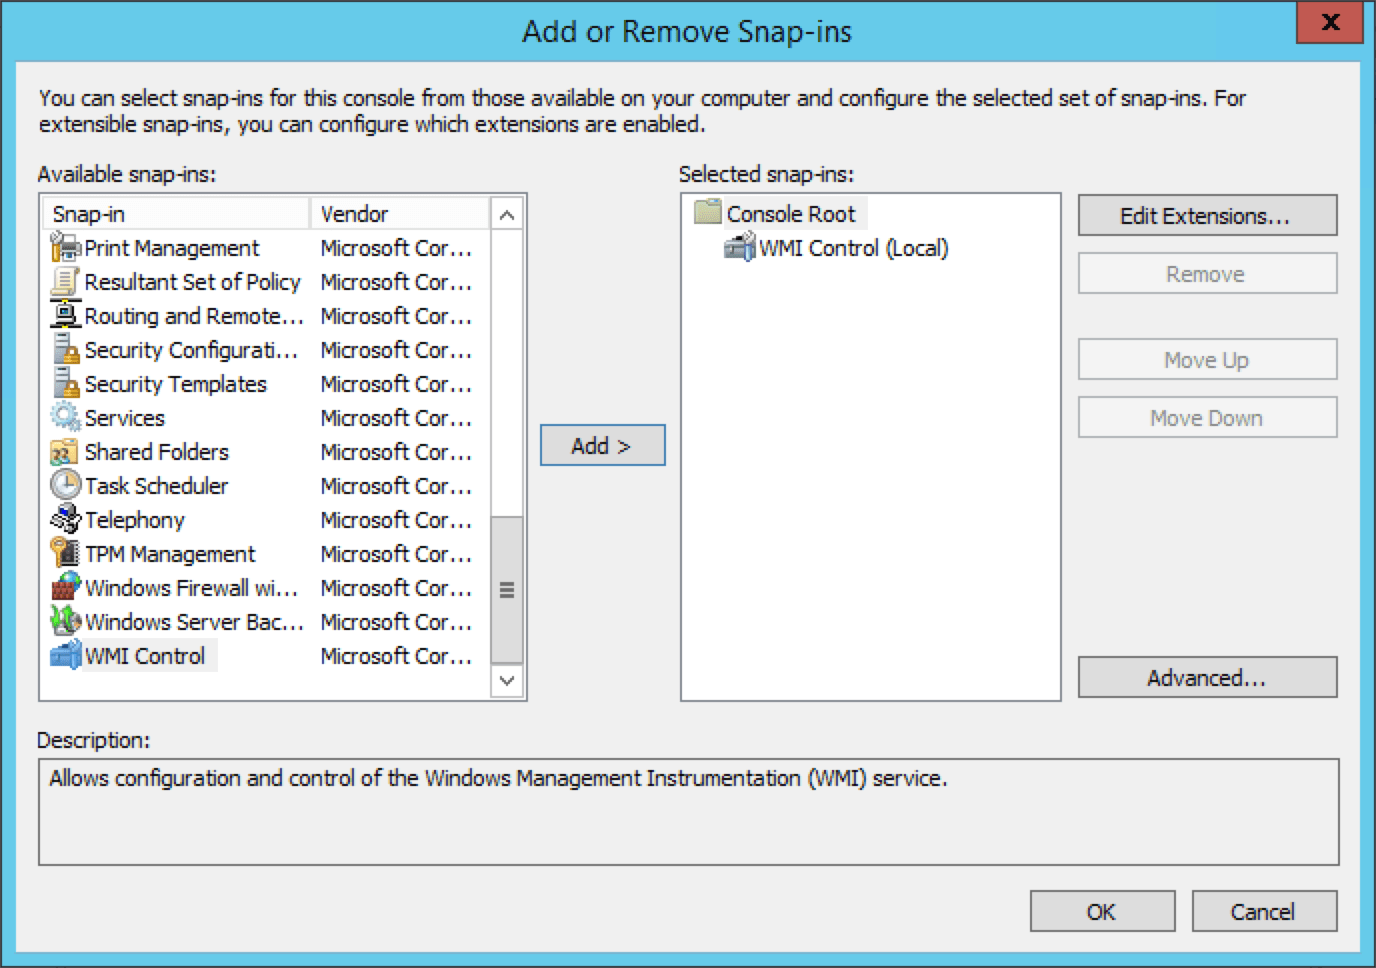
- Open « MMC » by going to start menu and run the command « mmc »
- Go to File -> Add/Remove Snap-in…
- Add « WMI Control » for the local computer

- Click
OK - Right-click on « WMI Control (local) » and select « Properties »
- Go to the « Security » tab
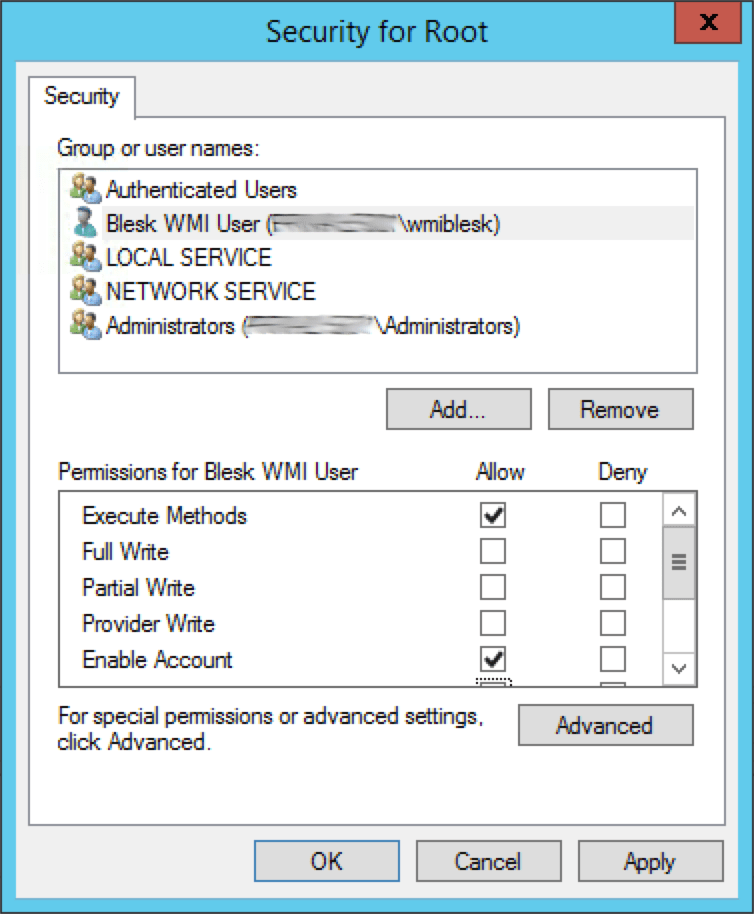
- Select « Root » and click on « Security »
- Add the user earlier created and set the following permissions :
- Execute methods
- Enable Account
- Remote Enable

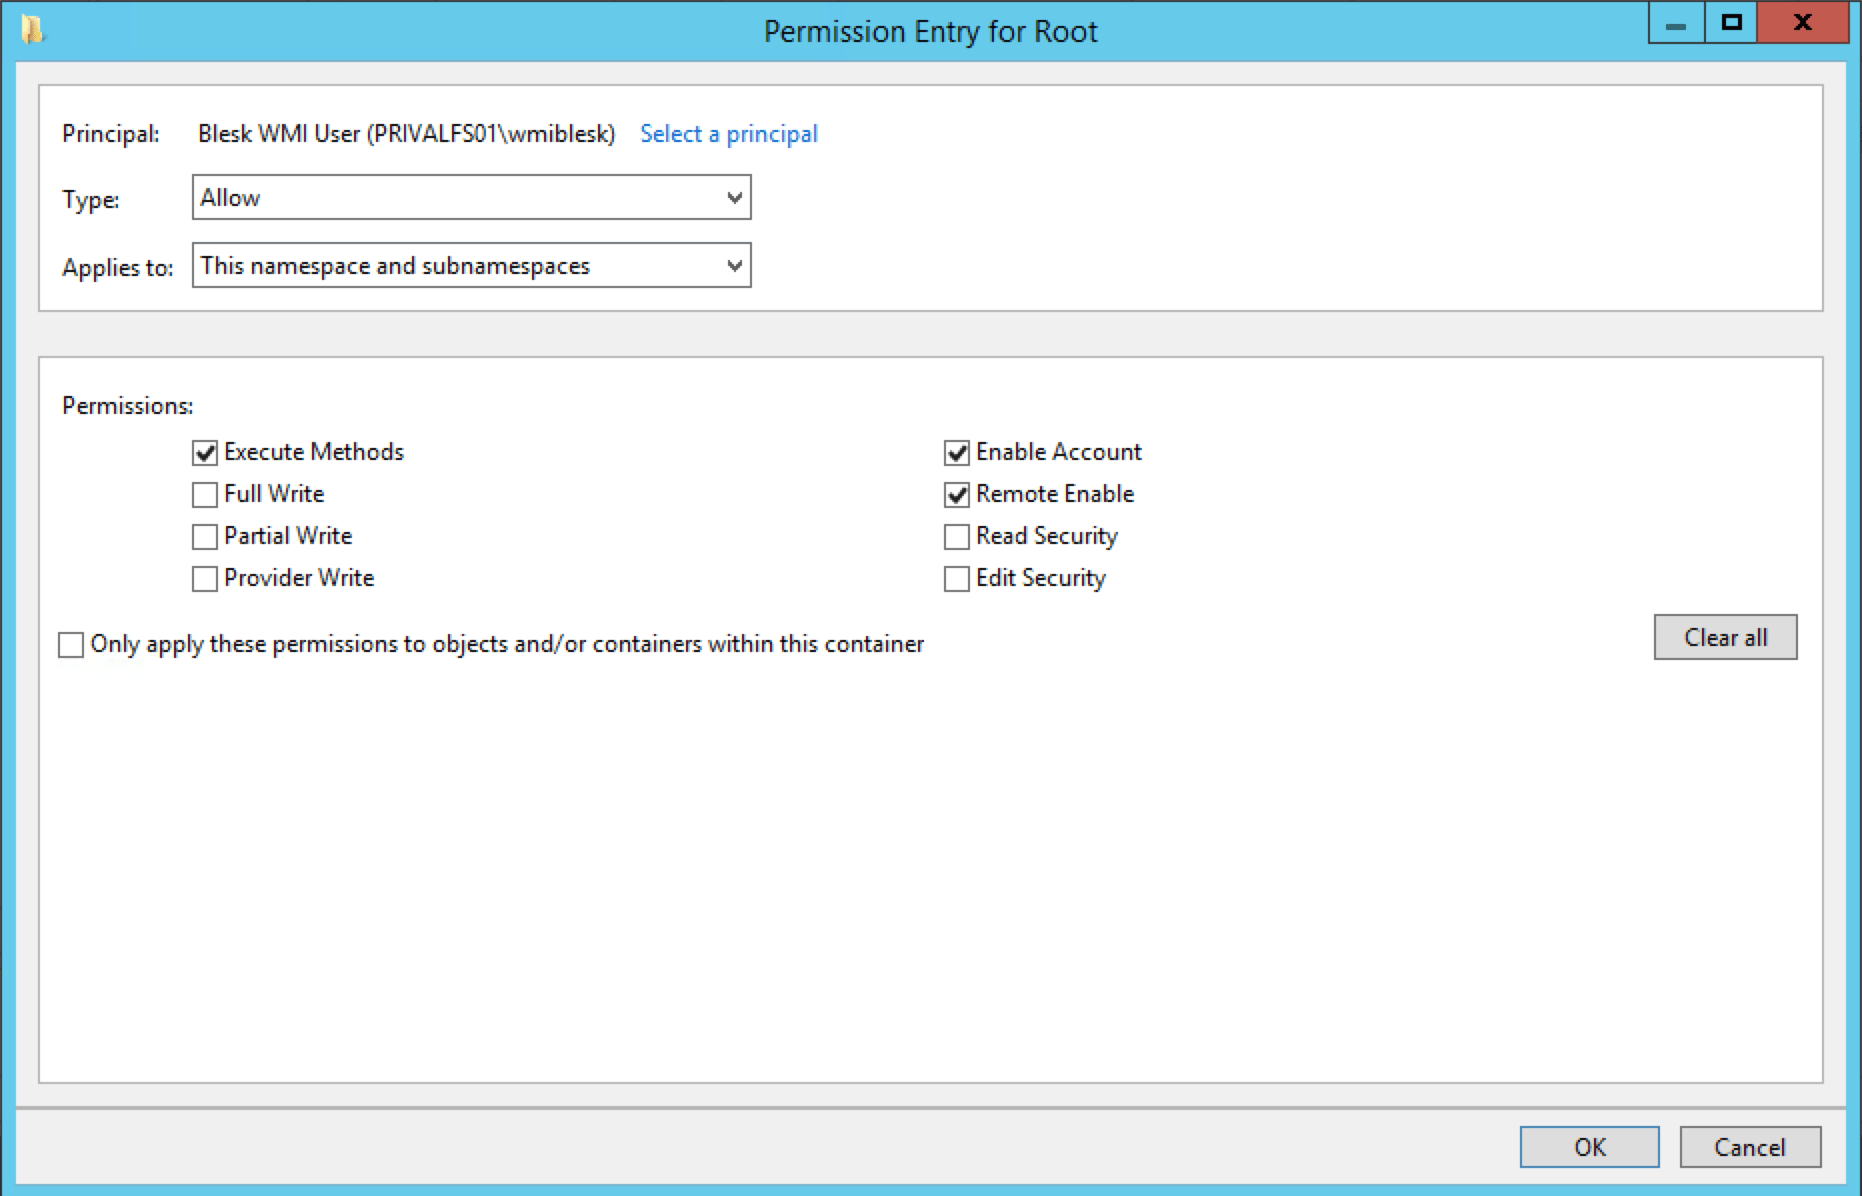
- Click on « Advanced »
- Select the WMI user and click on « Edit »
- Select to apply this to « This namespace and subnamespaces »

- Click
OKfour times.
Done!