¶ Step one
At the beginning save/write the ISO image to the preferred media. Select the media to boot your computer and press Enter to begin the installation.
If you install on a virtual machine, then power on this virtual machine. Right-click on the virtual machine and Open Console to the virtual machine. Select the appropriate Boot media to load the blësk ISO image from local/network drive.

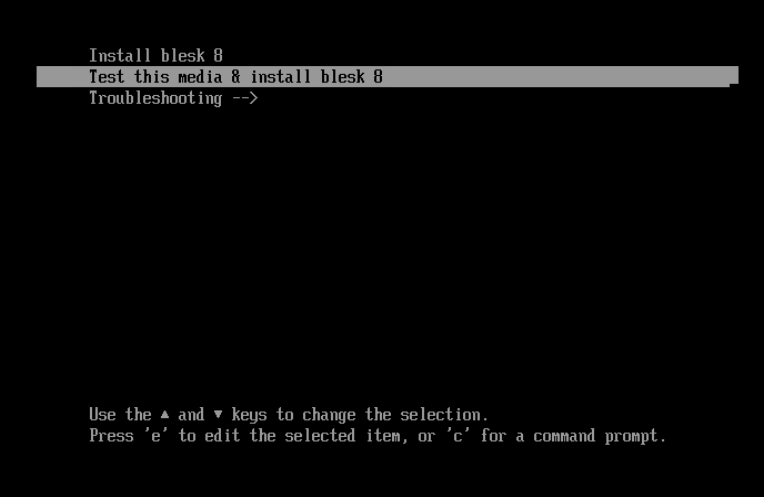
In this step of the installation process there will be three options to choose from (as shown on Image - 2). If you would like to test the media prior to installation, please select the second option “Test this media & install blësk 8”, which is an optional step. You may select option 1 “Install blësk 8” to continue installing blësk without testing the media (recommended).
¶ Select Installation Language
In this step, select the language and keyboard settings to be used during the installation process (as shown on Image - 3). Click <<Continue>> to continue to Installation Summery page

¶ Installation Summery
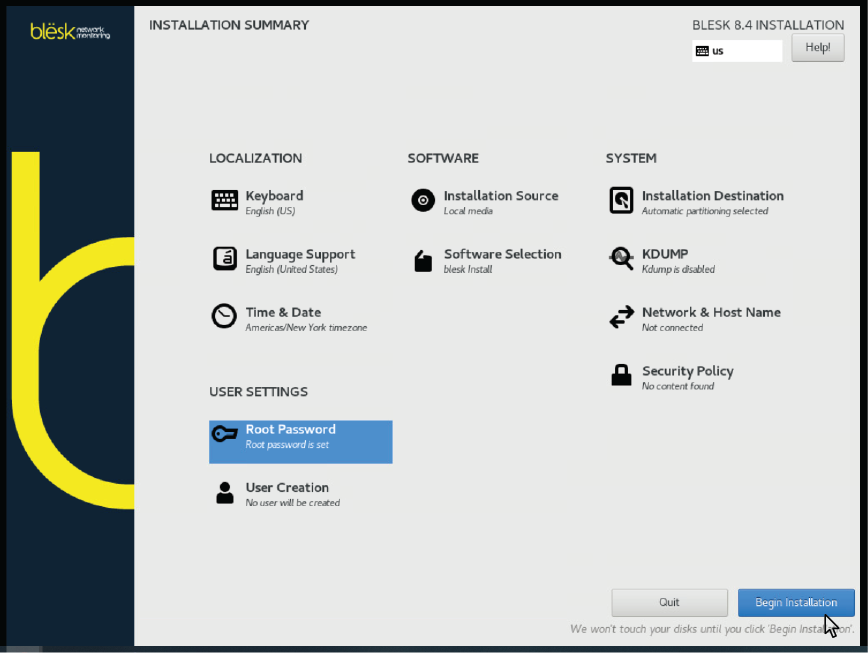
In this step of the installation, you will need to choose the following from the Installation Summary page (as shown in Image - 4):
- Installation Destination
- KDUMP
- Network & Host Name
- Root Password
- Time & Date

¶ Installation Destination
In this step, select the media you would like to install the blësk to as shown in Image - 5. Under Storage Configuration, you have options to select Automatic or Custom.
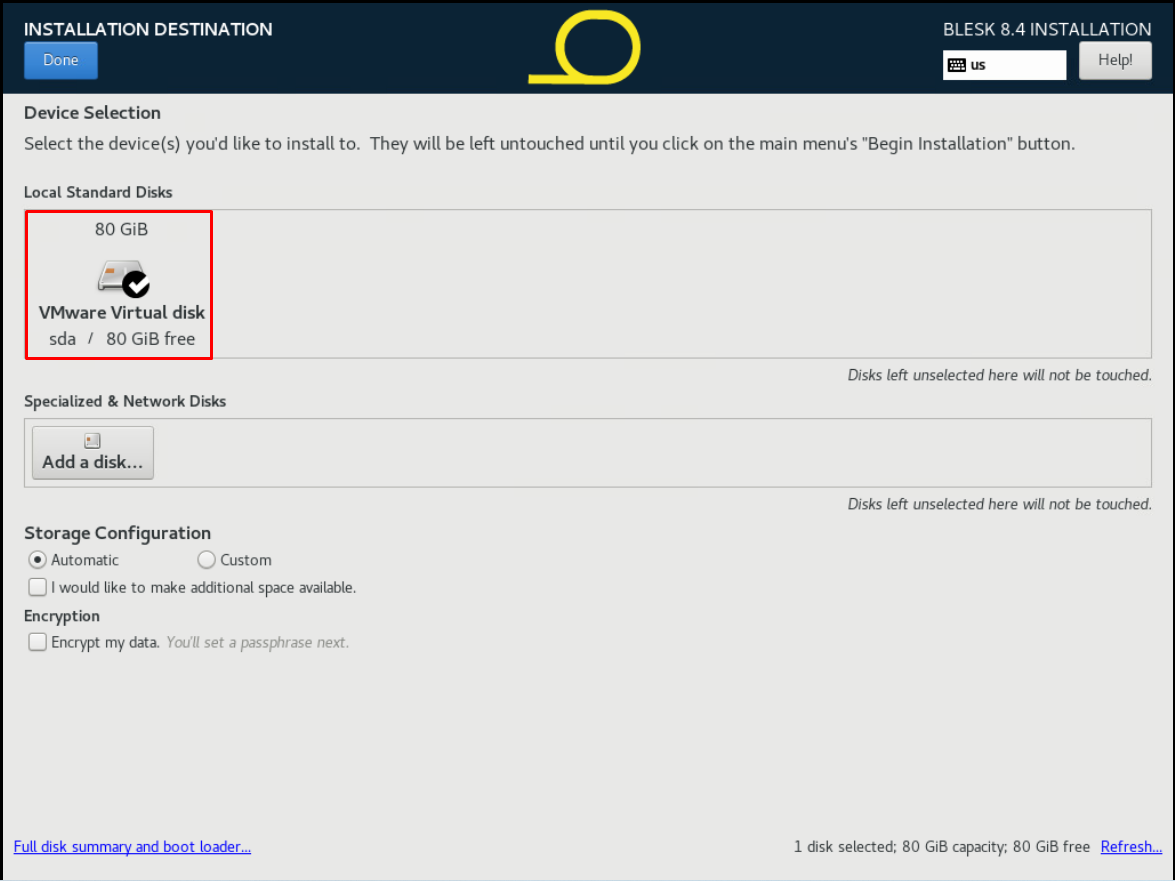
In this documentation, we will select the custom Configuration procedure.
¶ Custom Storage Configuration
To continue with Custom Storage Configuration, select Custom and click on Done button to continue with Custom Storage Configuration.

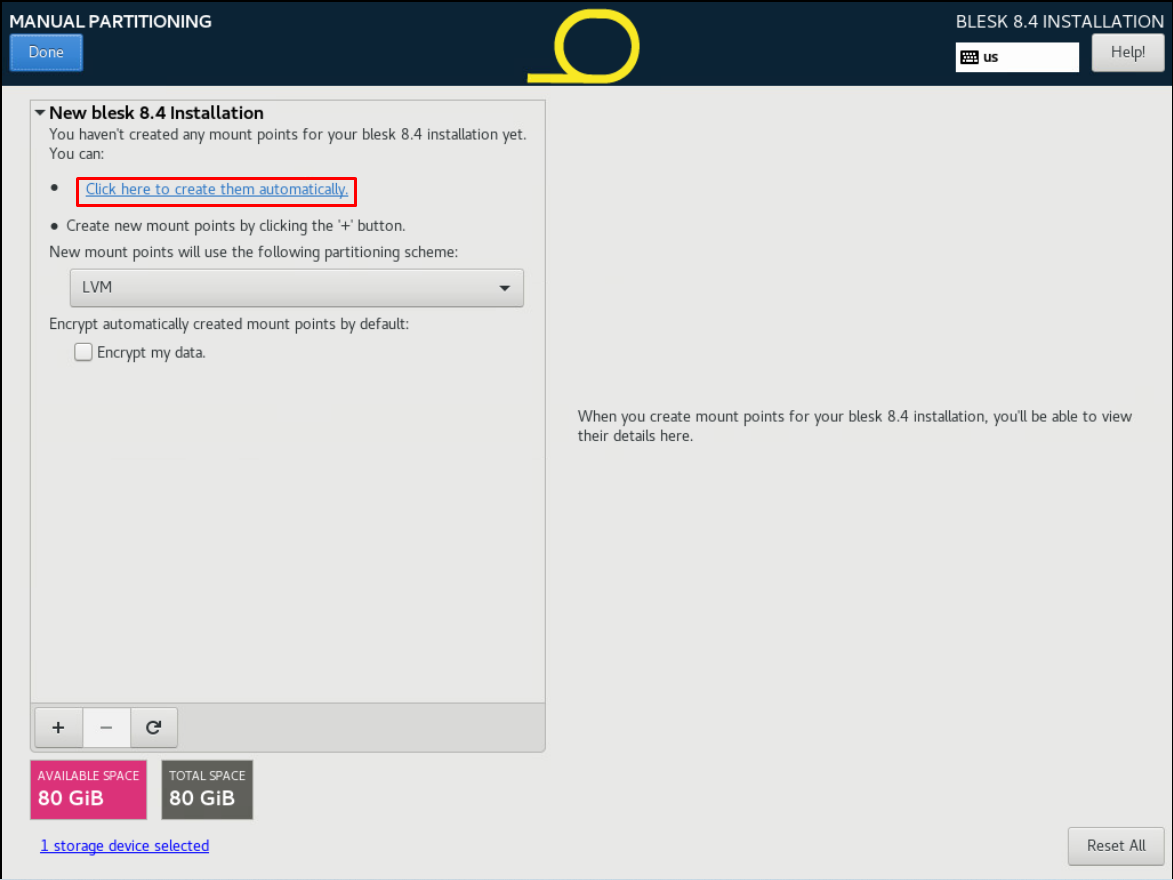
On the next screen click on the “Click here to create them automatically” link to create partitions automatically.
At this point storage for blësk-home needs to be allocated by providing value into the Desired Capacity box while the blësk-home option is selected.
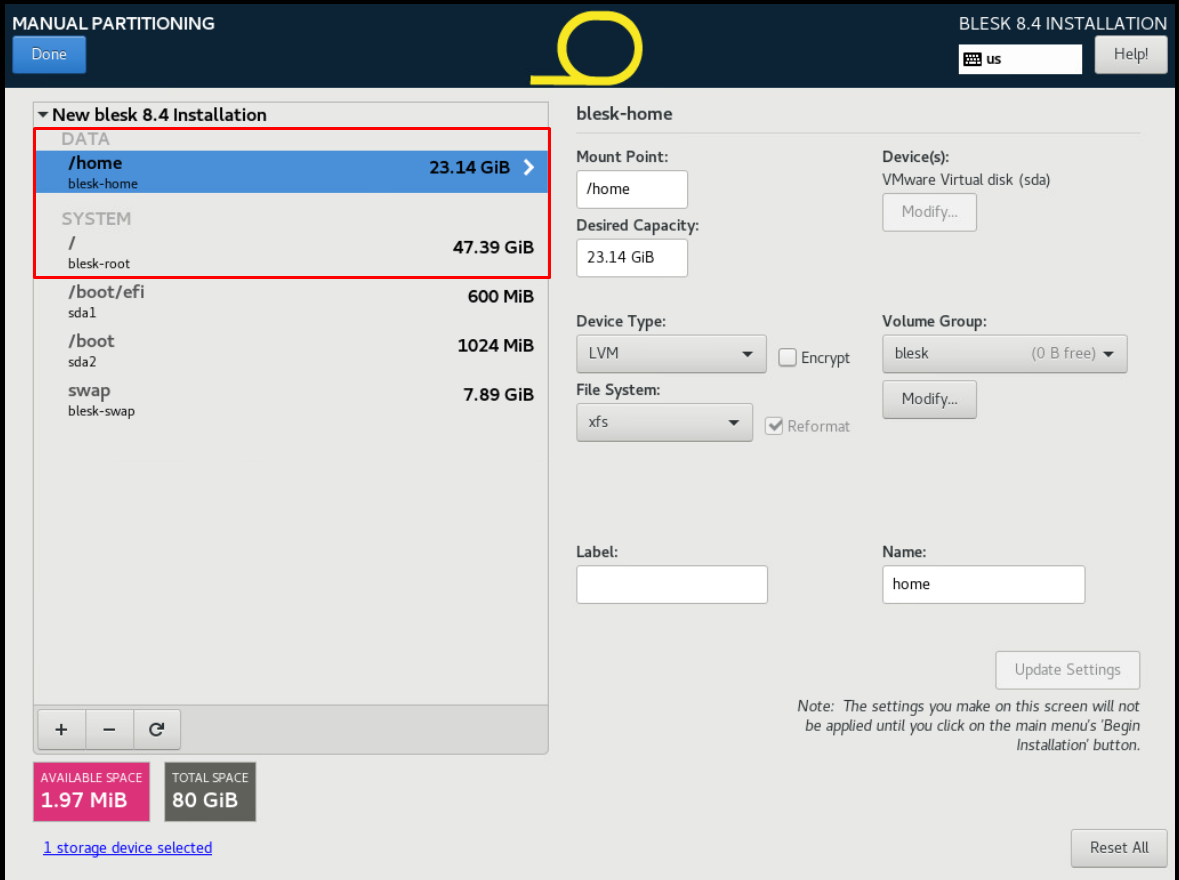
The allocation will entirely depend on the availability of storage and the amount you would like to allocate for blësk-home. For this demonstration purposes, we are allocating 2GB for blësk-home. Click on the Update Settings button to accept the changes.
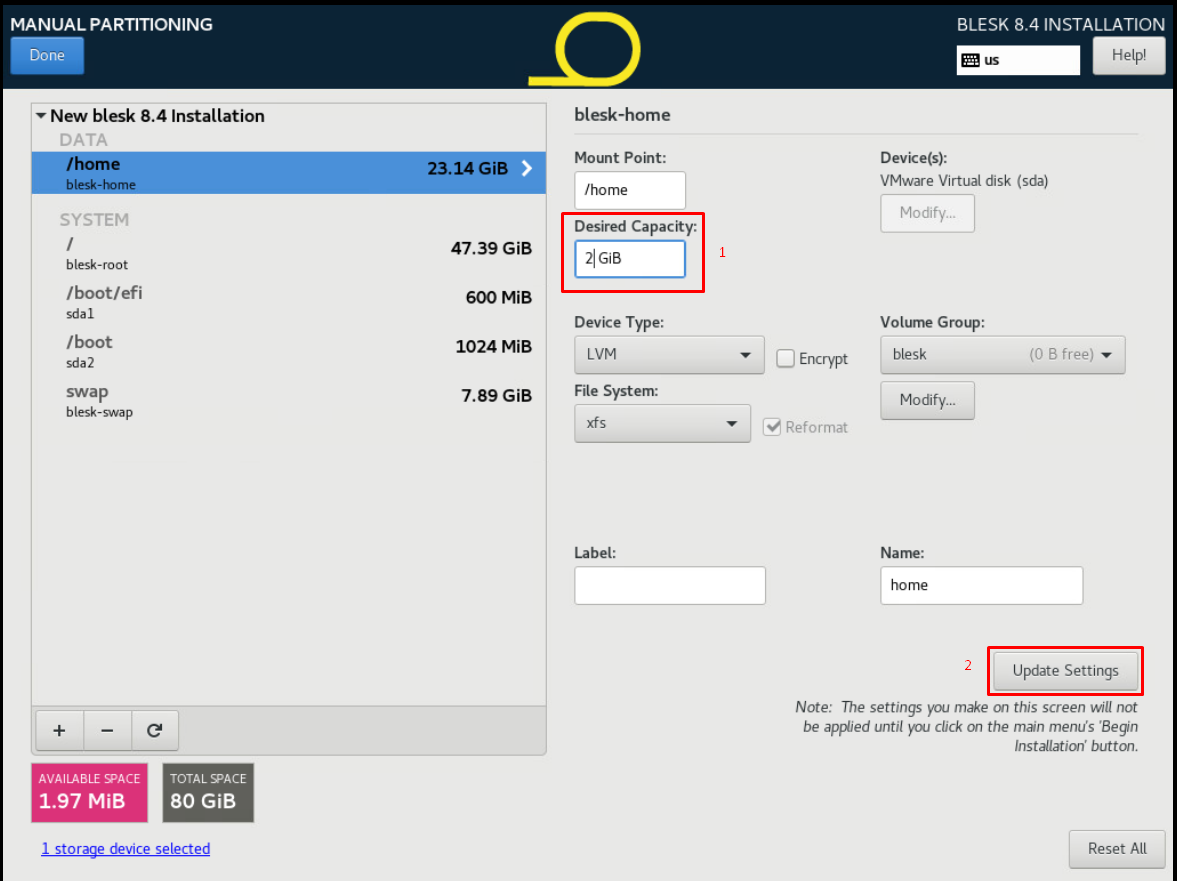
Rest of the storage needs to be allocated to blësk-root. To allocate storage to blësk-root, click on the blësk-root and provide the value to be allocated in the Desired Capacity box. Click on the Update Settings button to accept the changes.

Click Done to accept all changes and to continue.

¶ KDUMP
In this step, deselect Enable kdump checkbox (as shown on Image - 12) and click on <<Done>> to save the settings and return to the Installation Summary screen.

¶ Network & Host Name
At this point of the installation, add the Hostname and click Apply to save the changes.
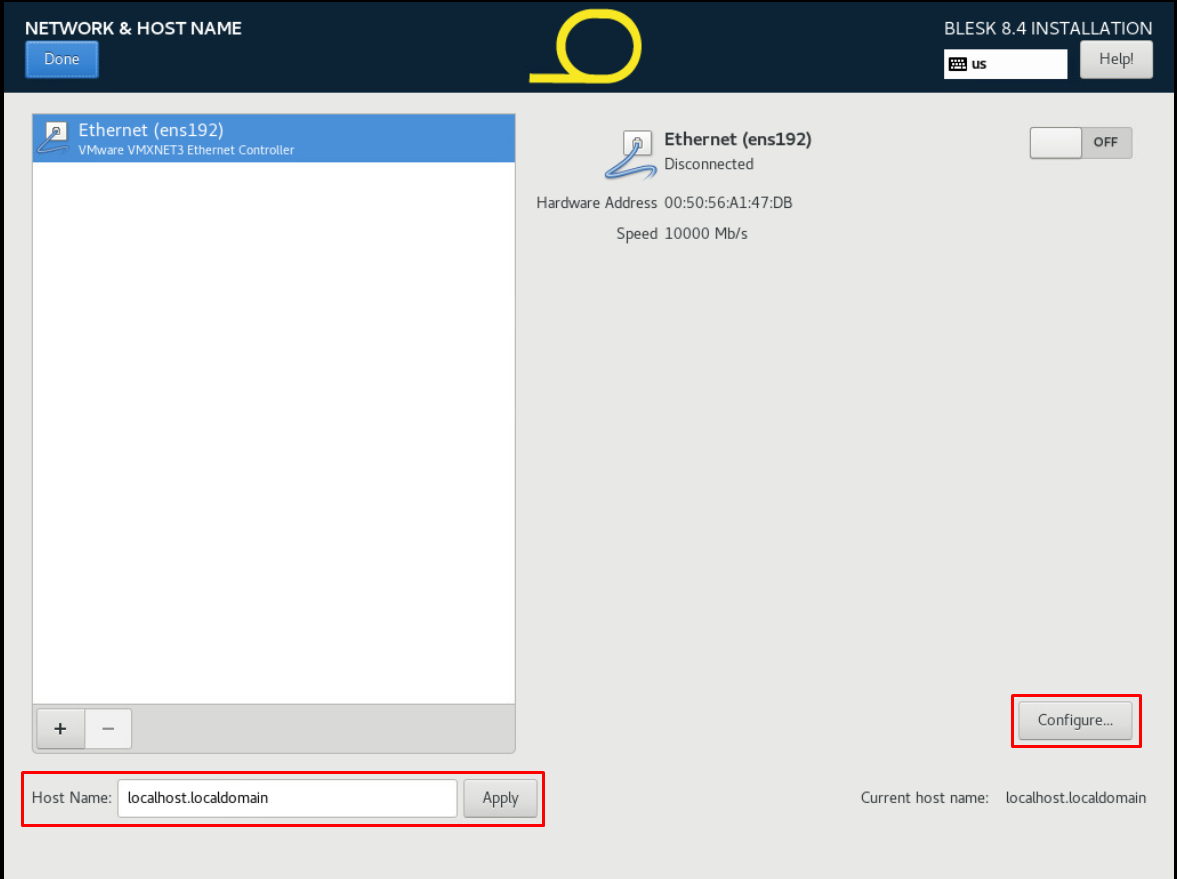
Click Configure from the bottom right-hand corner to navigate to the Network Configuration page and follow the following steps:
Step 1 - Under the General tab check Connect automatically
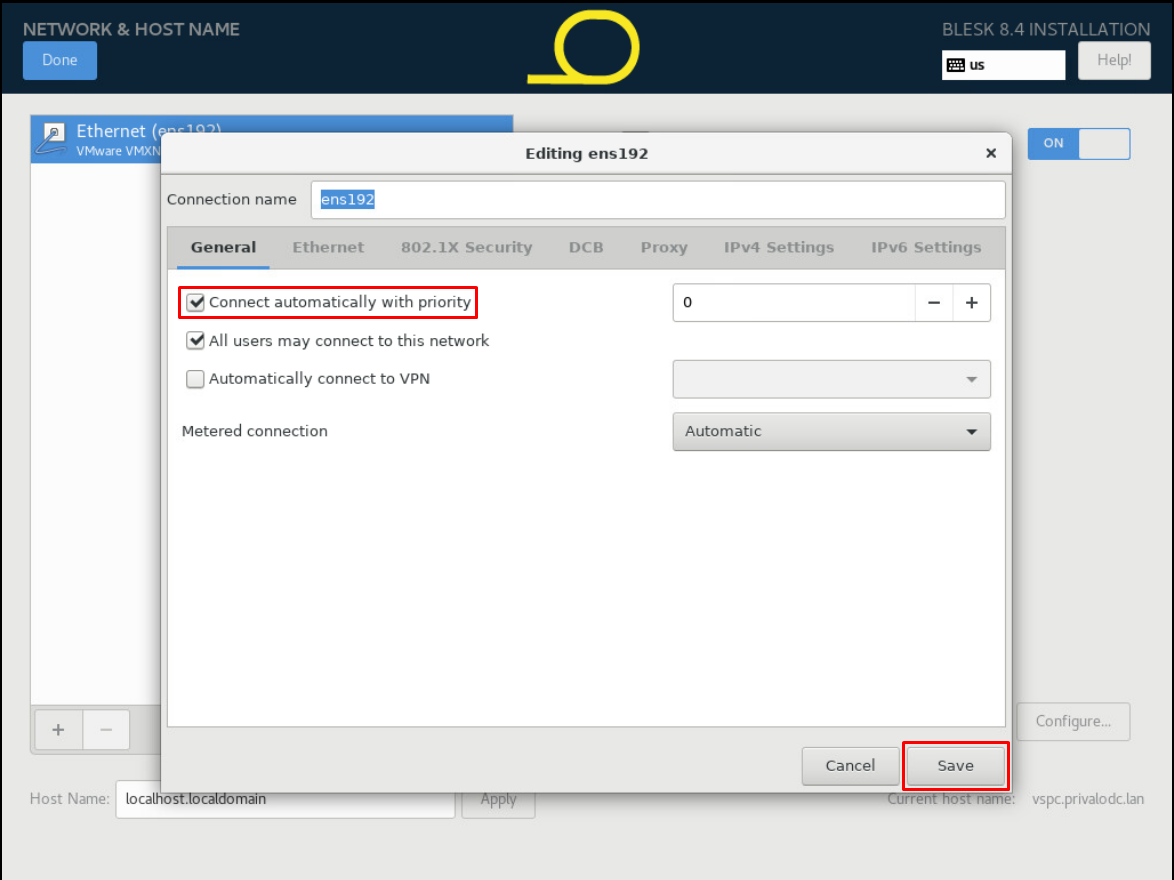
Step 2 - Click on IPv4 Settings tab to access the IPv4 settings.
Step 3 - It is recommended to use a static IP address for your blësk server. Select Manual from the Method drop down menu.
Step 4 - click the <<Add>> button to add an IP address.
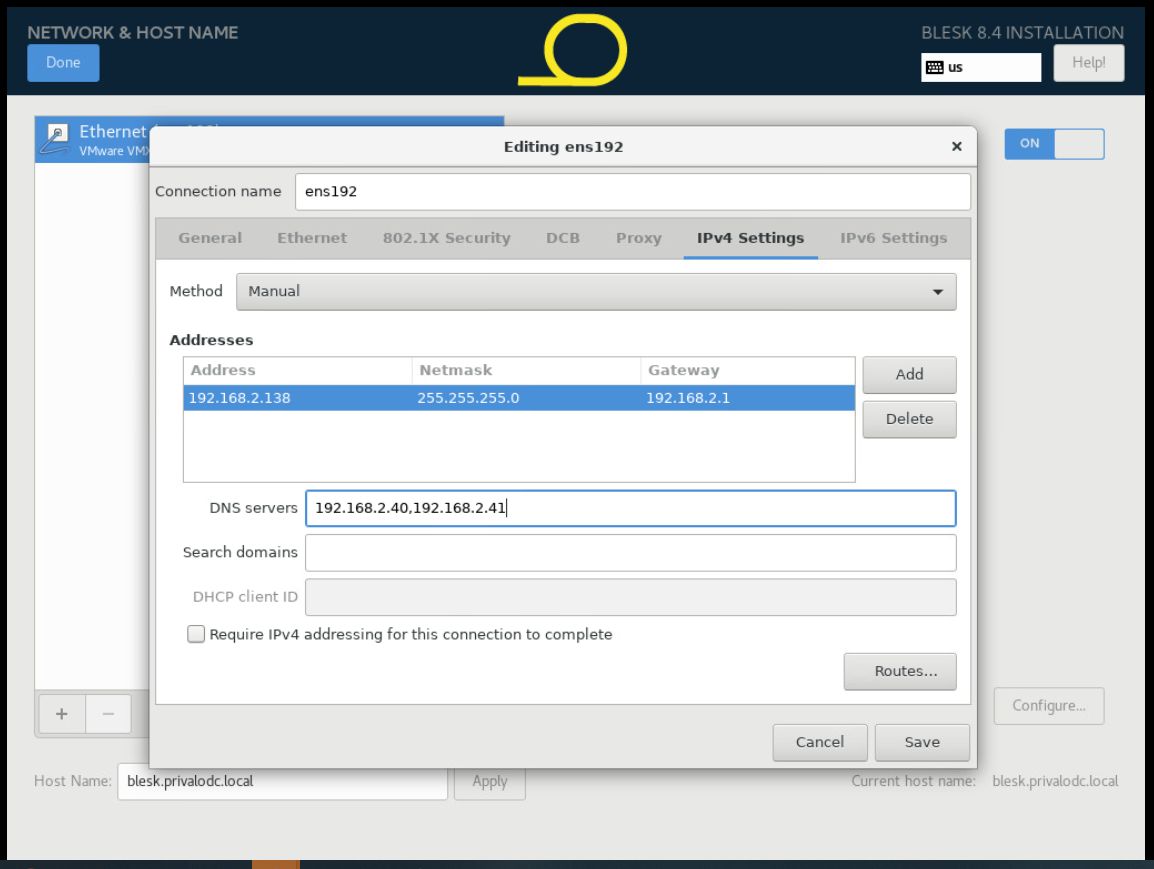
Step 5 - enter the IP address, subnet mask, and default gateway.
Step 6 - add the DNS server information in the DNS servers box below, separated by a comma.
Step 7 - Click on IPv6 Settings tab to access the IPv6 settings and select Ignore from the Method.
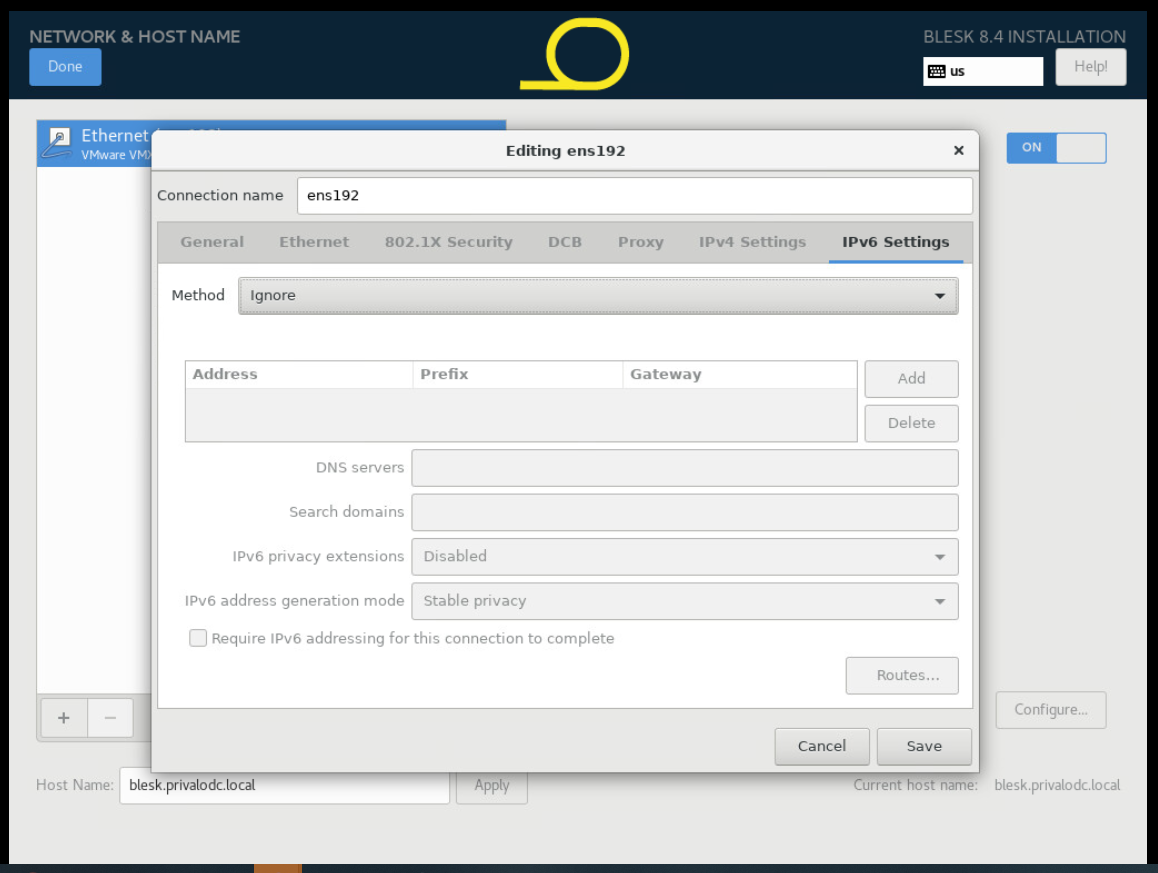
Step 8 - click <<Save>> to save the settings and return to the Network & Host Name screen.
At this point of the installation, toggle the Ethernet setting to ON to check the settings. This will also check on your network to be sure the defined IP is not already used by another device.
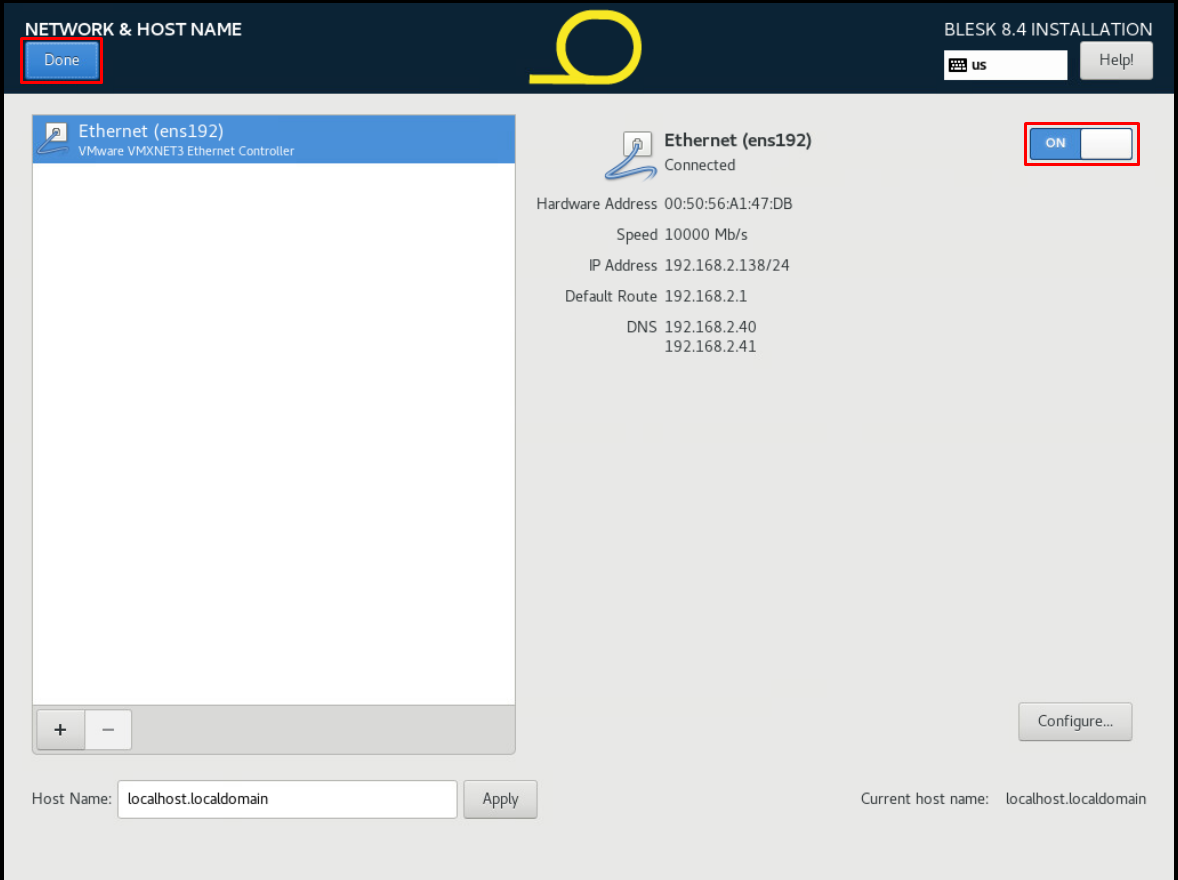
Click on Done to save all changes.
¶ Root Password
At this stage, click on the <<Root Password>> under USER SETTINGS to navigate to password creation page (as shown on the Image - 6) to create Root Password for blësk. Enter and confirm your new password and click <<Done>> to return to the Installation Summery page
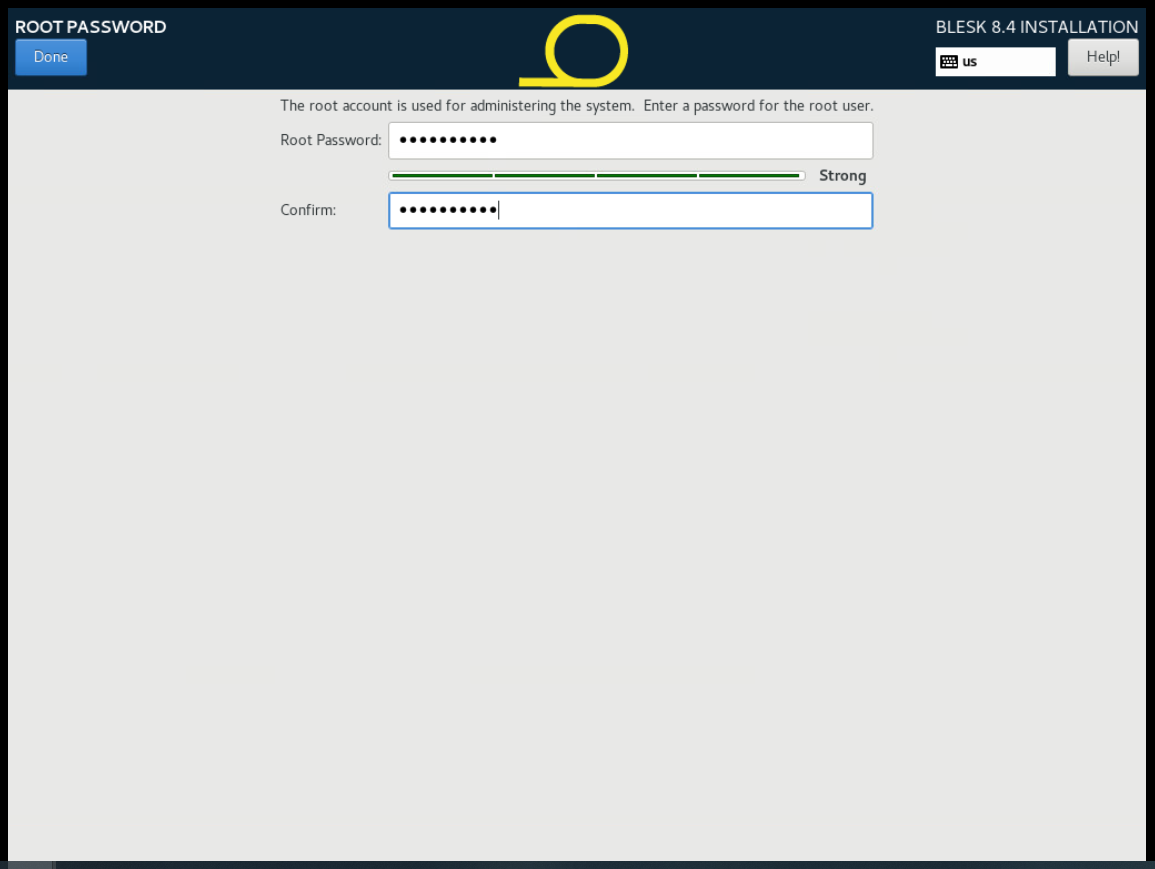
[Note: User creation is an optional step and can be left as default.]
¶ Time & Date
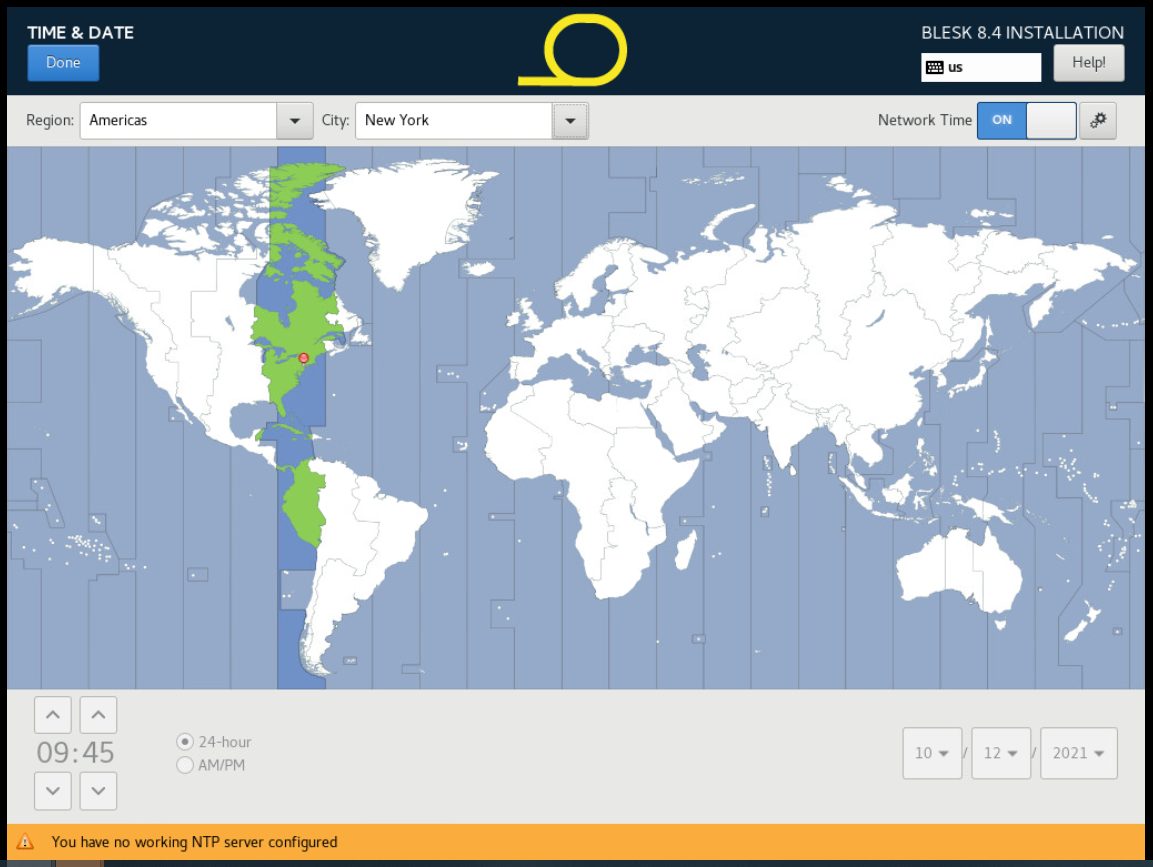
Click Time and Date icon to navigate to the Time & Date setting screen and adjust the time to match with your local time zone. Click Done save and exit.
¶ Begin Installation
At this stage of the installation process, click on <<Begin Installation>> button to begin installing blësk OS (as shown on Image - 8)
¶ Installation Progress
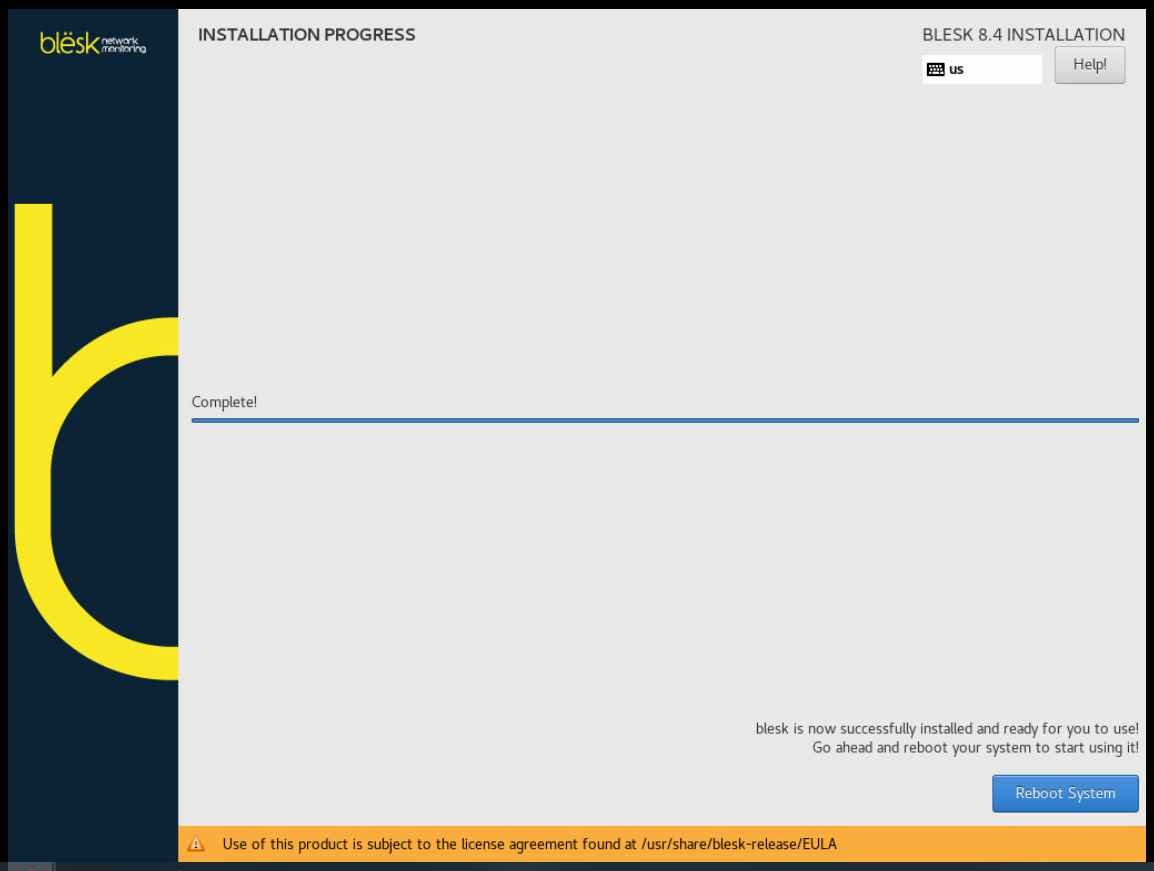
This step of of the installation may take several minutes before a Reboot will be required to before you may use blësk.

¶ Reboot System
This brings you to the end of the installation process. blësk is now successfully installed and ready to use! Click on Reboot System from the bottom right hand corner of the screen (as shown on Image - 9) to Reboot.
¶ Finalize the configuration
To access the blësk web interface, enter the URL/IP address of your server in a web browser. At the configuration screen you need to enter the following:
- The email address of the system administrator.
- The <<Community string>> used by SNMP to send requests to the devices on your network.
- The IP address or host name of the mail server that will be used to send notifications.
- In the last field, enter the IP address of one of your core switches (Layer 3).

¶ Accept the Agreement
Read and accept the blësk License Agreement Terms and Conditions, then click <<Submit>>.

¶ Activate the software
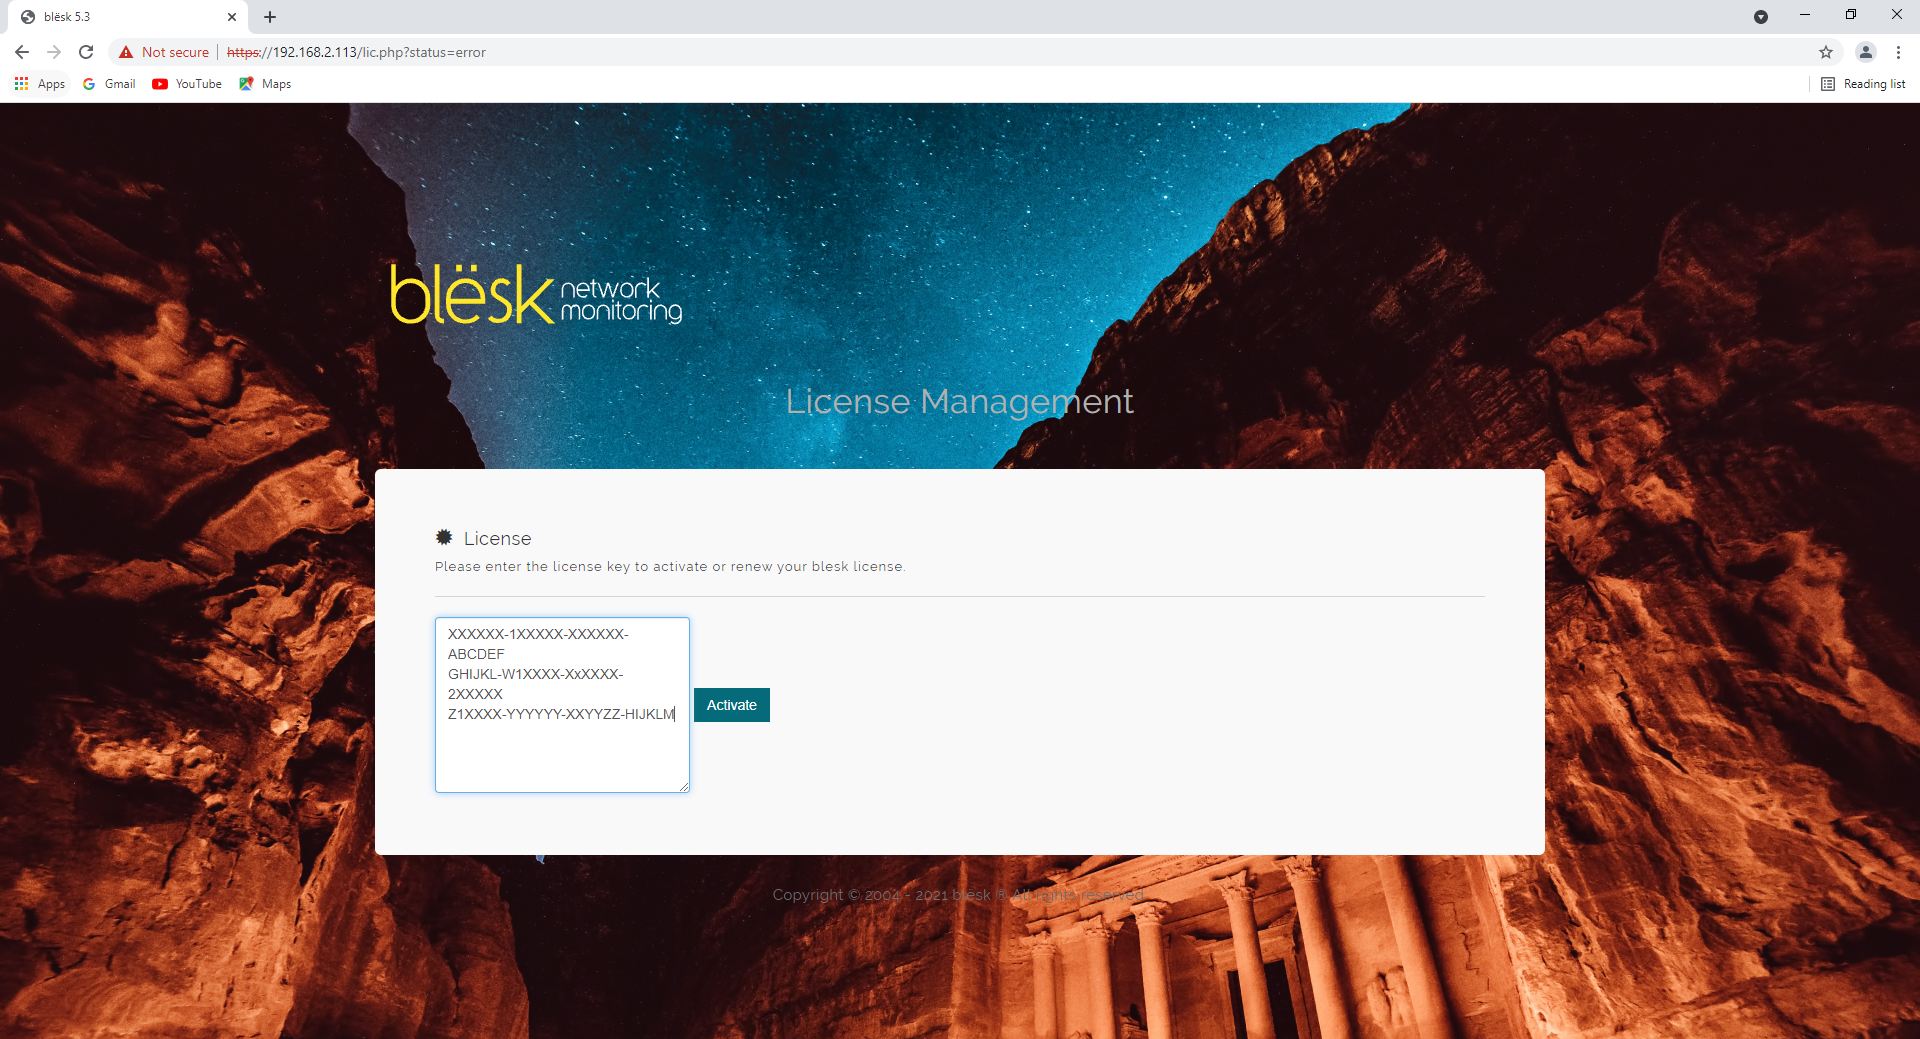
On the last page of the setup, you will activate your server by entering the blësk license key. You should have received the license key via email at the time of download. In case if haven't receiving the license key (which is unlikely) or lost the license key, please contact us.
¶ System Resource Verification
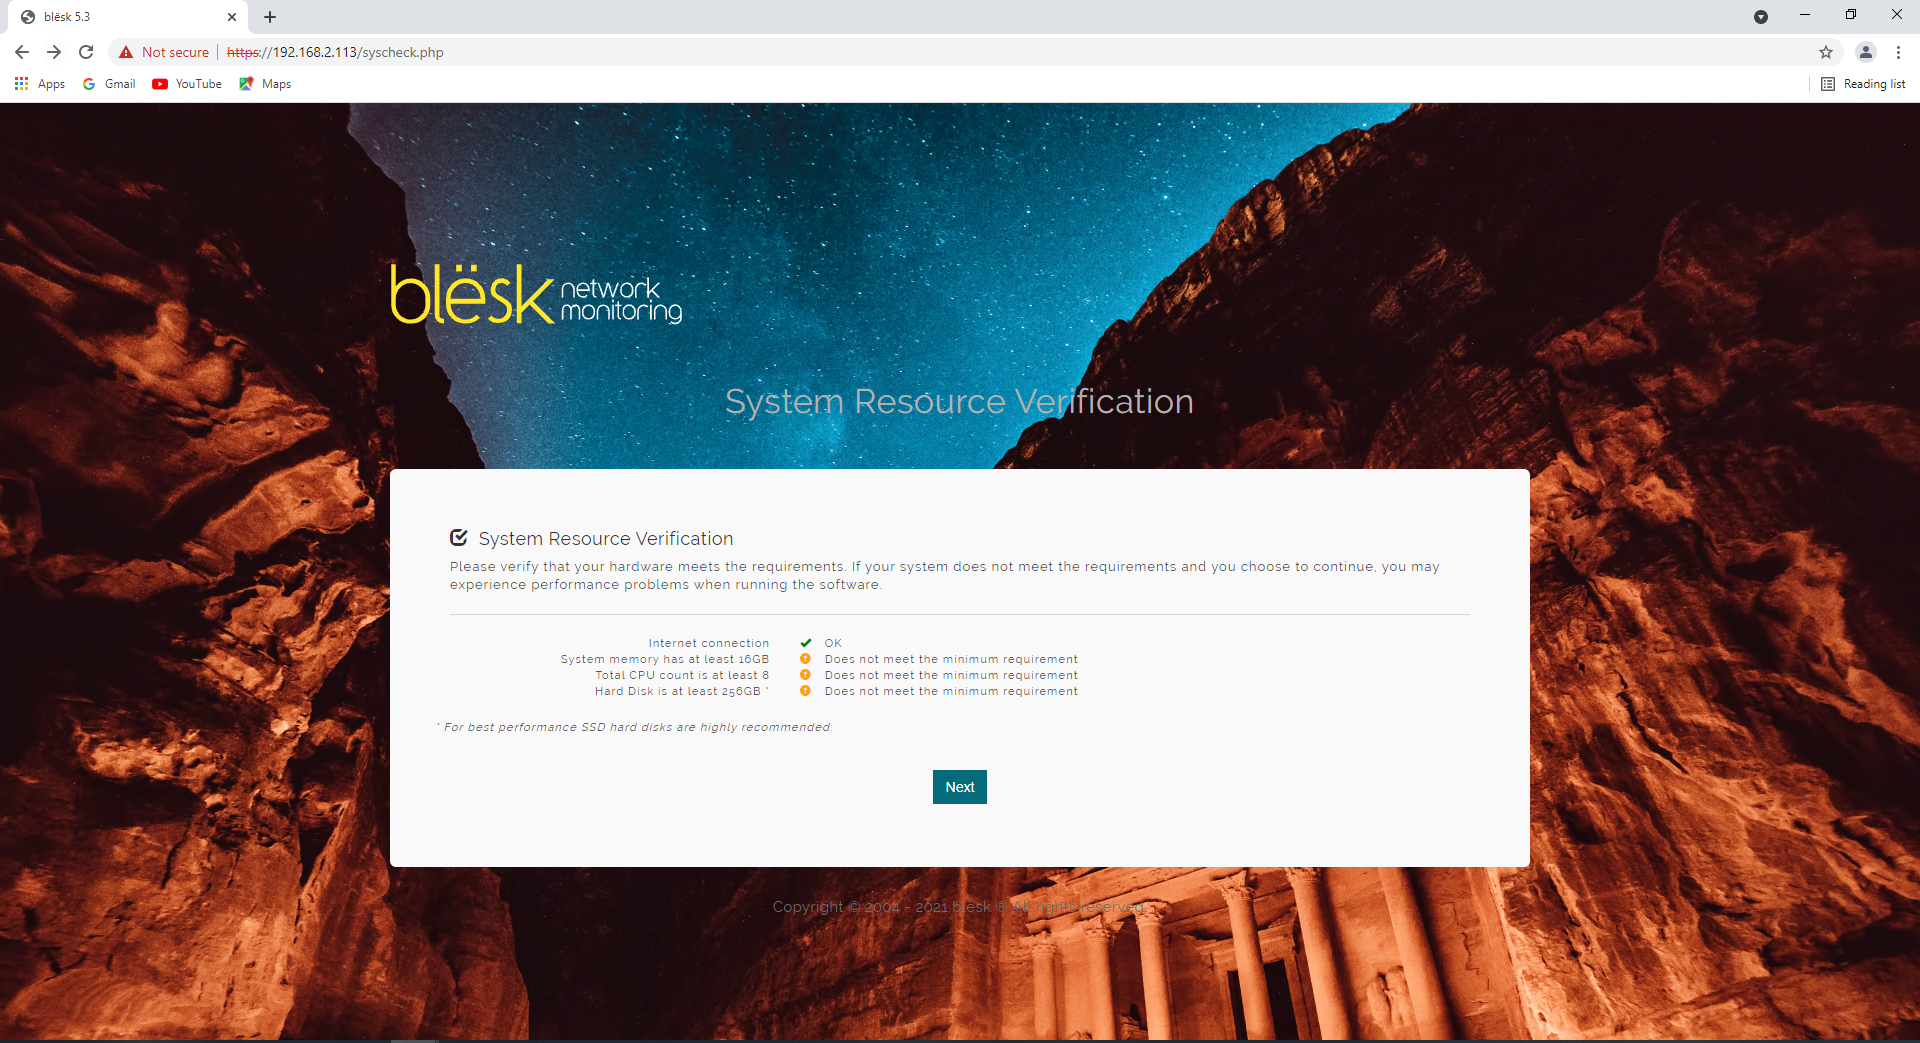
This step of the installation will allow you to verify whether the resources are optimum to run blësk on your system.
¶ Auto detection wizard
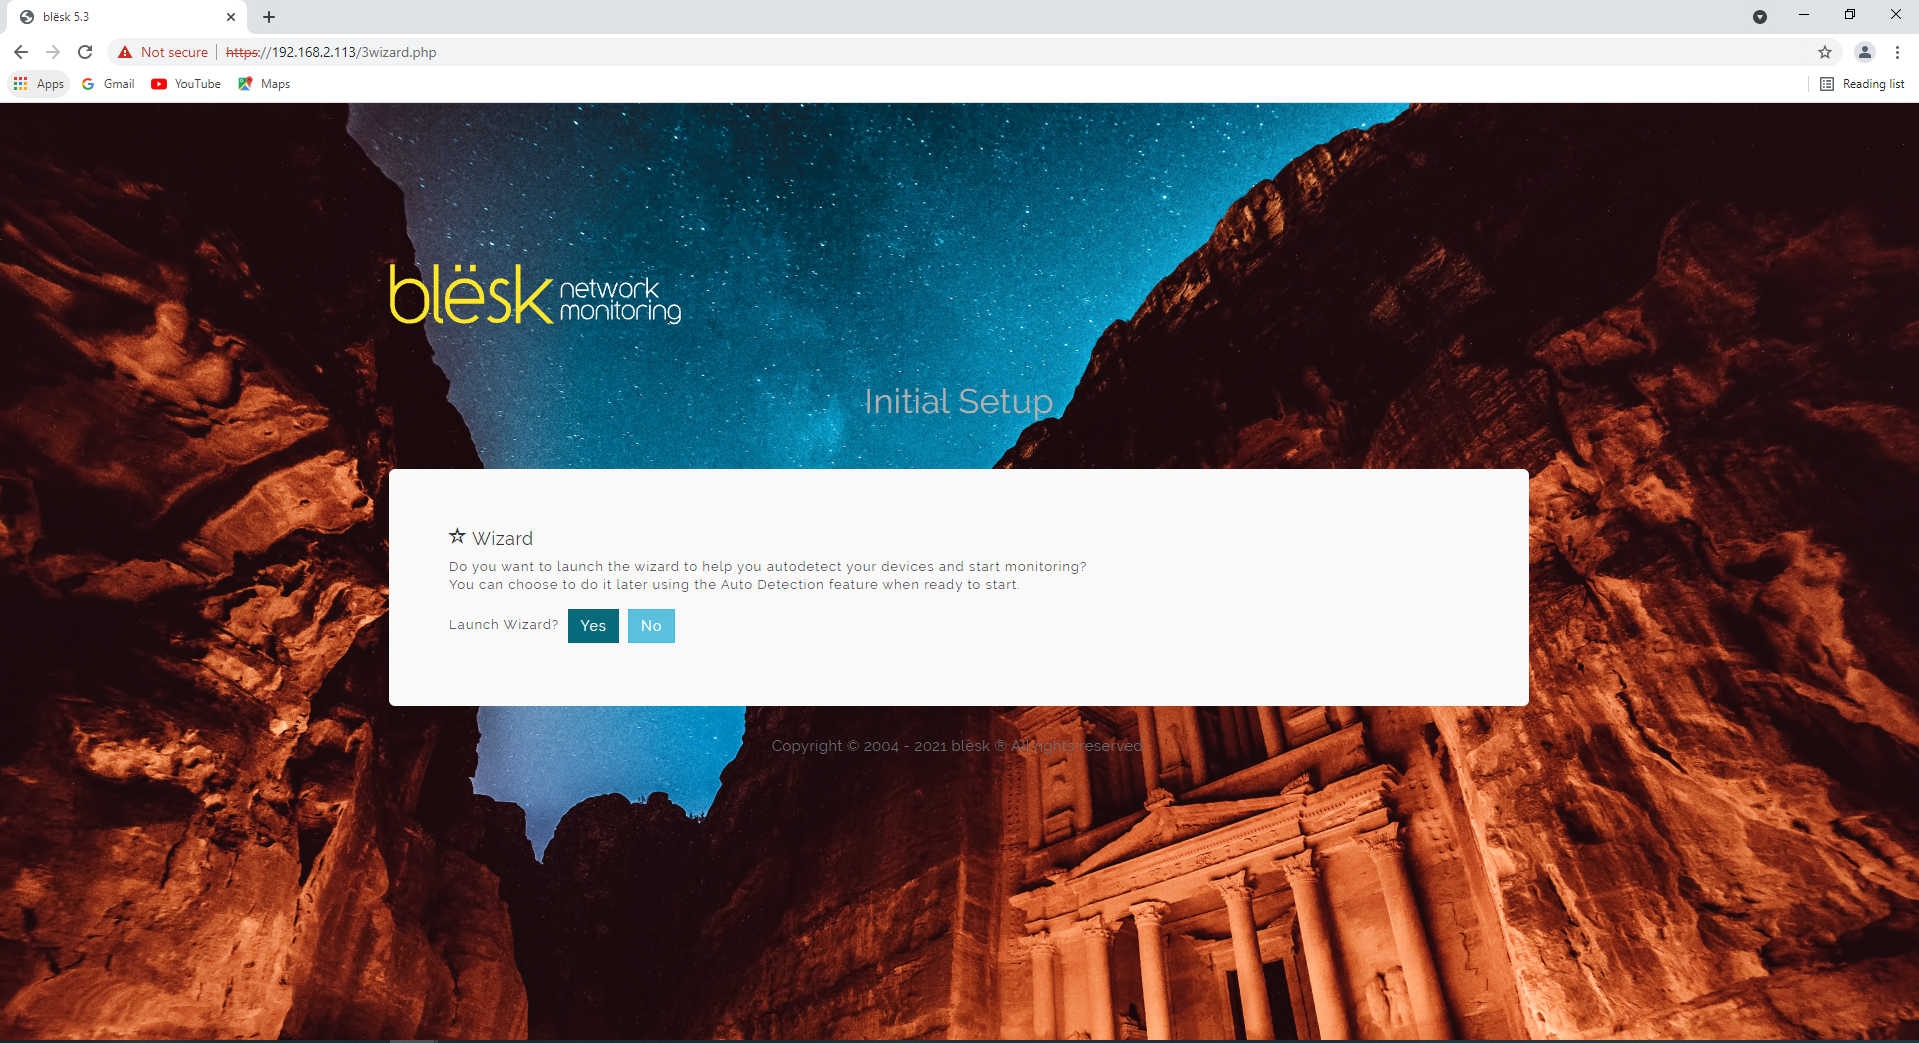
During the initial setup stage, you have the possibility to launch the wizard to help you scan and auto detect your devices. This action can be done after the initial setup but if you choose to do it during this stage, here the steps to follow to help you use it correctly.
Clicking on the <<Yes>> button will open an authentication box asking for user ID and password.
Use admin/admin to login.
[Note: If you wish to skip this step at this point, it can be done later with the Auto Detection wizard.]
¶ Credentials
Before being able to scan and detect devices, we need to provide credentials which will be used to correctly authenticate on different hosts to collect data and other needed parameters.
¶ WMI Credentials
At this stage you will be asked to define credentials used to monitor Windows machines. We use WMI protocol for this purpose in order to be agentless. You can also choose to go with SNMP with windows if you prefer to. However, SNMP protocol requires to be installed and configured on windows.
Click the <<Add>> button to add a new entry and repeat the step for any additional WMI credential that you may have. If you have some Windows machines which are not on the domain, just use the local administrator account and corresponding password for WMI. Once completed, click the <<Next>> button to continue.

¶ VMware Credentials
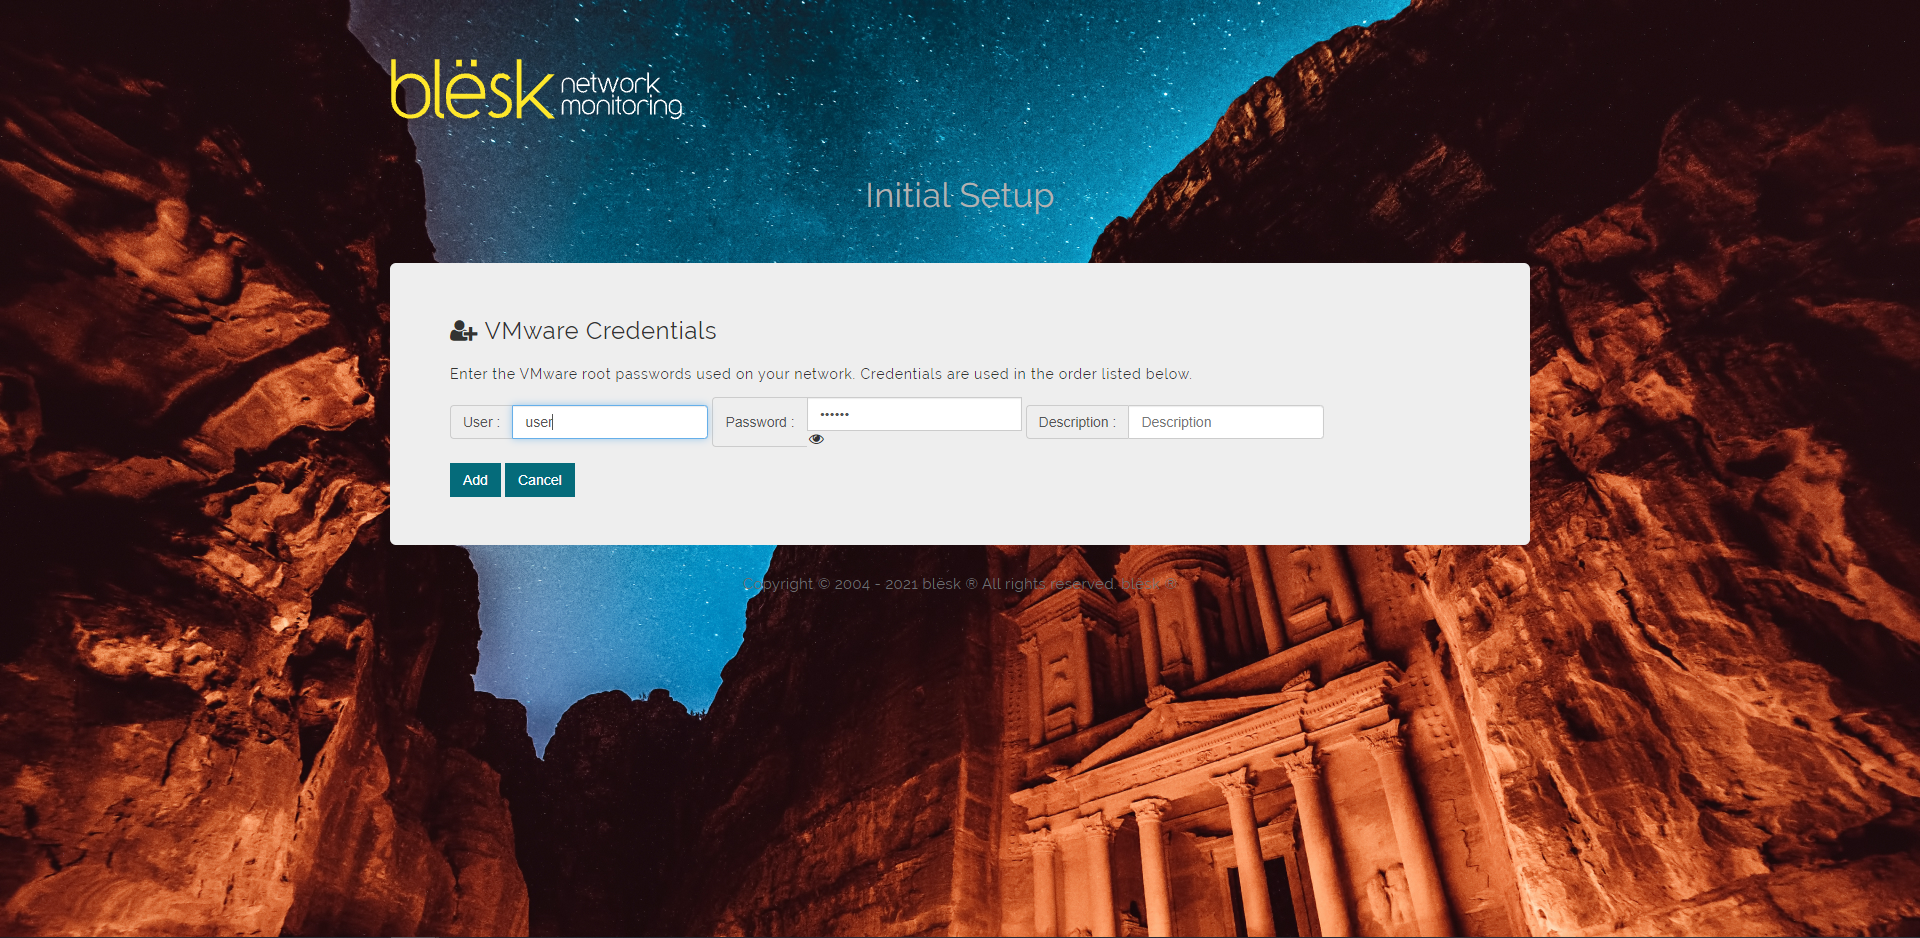
In this step, you will be able to create any credential needed to authenticate on VMware ESXi servers. Usually, it is the super-user called root with its password.
Click the <<Add>> button to add a new entry and repeat the step for any additional username and password that you may have. When completed, click the <<Next>> button to continue.
¶ SSH Credentials
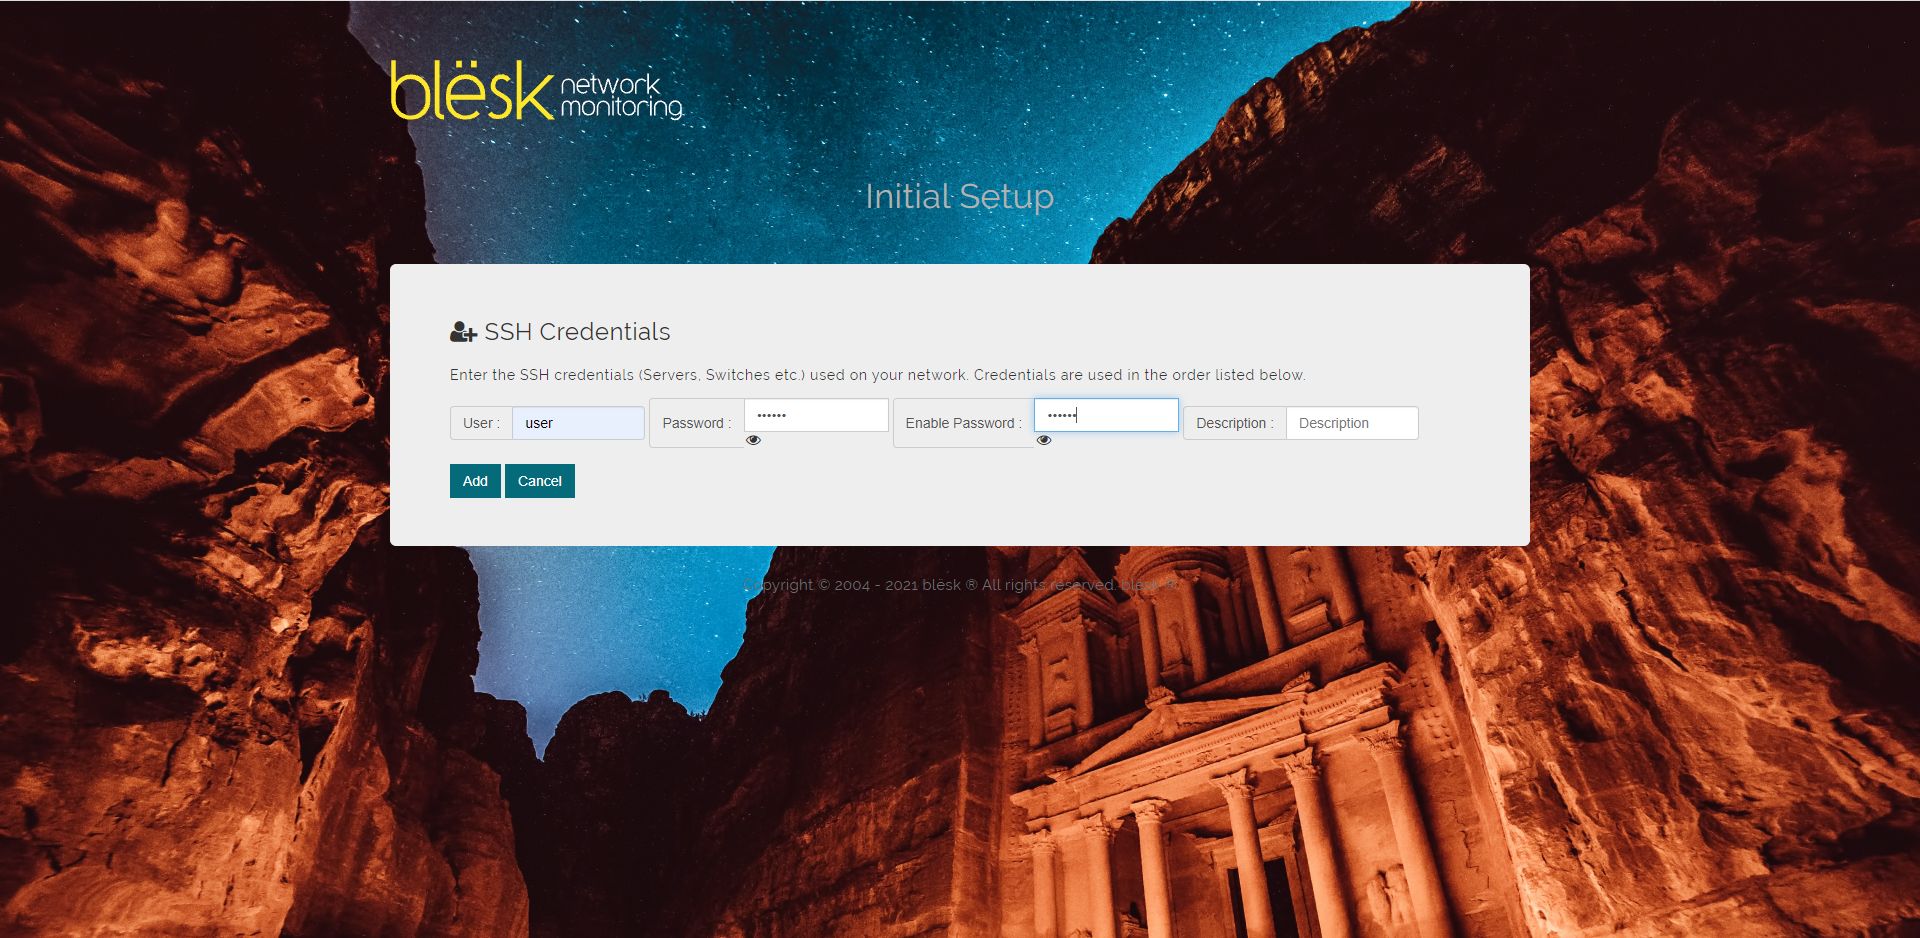
This step will let you create credentials required to authenticate on different network devices like Switches and Firewall. Click the <<Add>> button to add a new entry and repeat the step for any additional access that you may have.
If the device is a switch and required an “Enable Password“, then define it on the corresponding field, if it is a Unix server, you can leave the “Enable Password” field empty. When completed, click <<Next>> to continue.
¶ Telnet Credentials
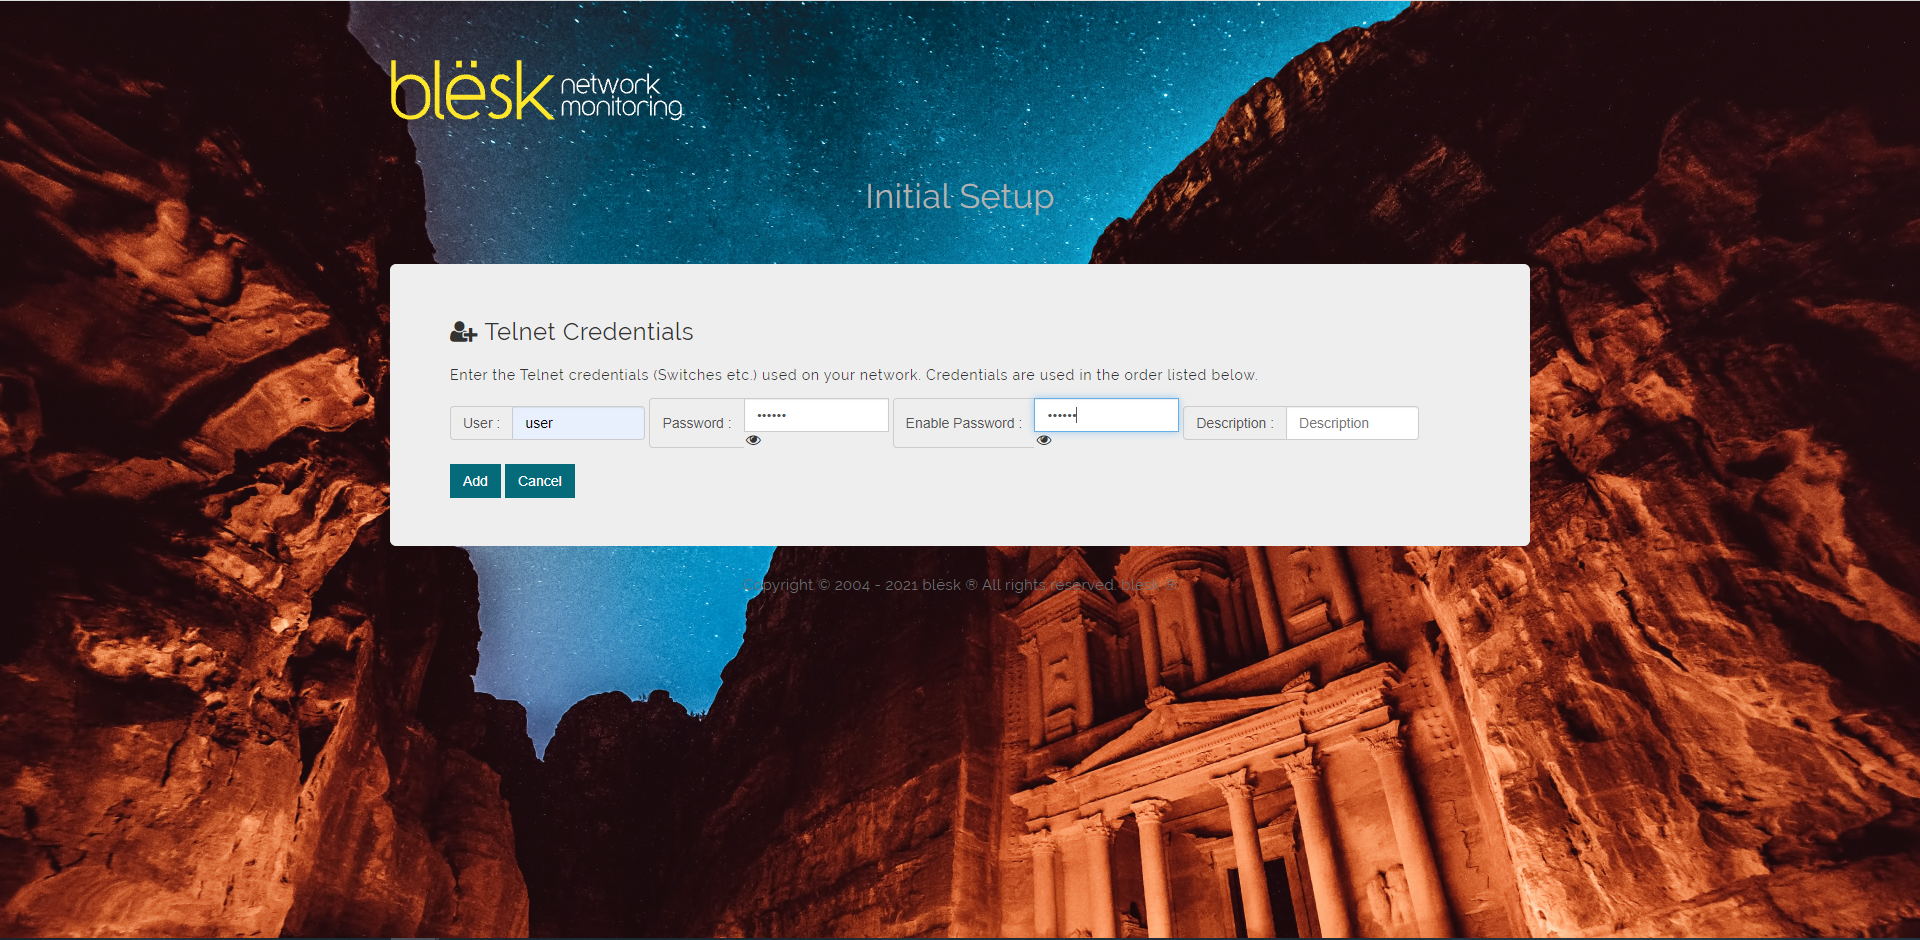
In this step, you will need to create credentials required to authenticate on different network devices, such as Switches and Firewall.
Click <<Add>> to add a new entry and repeat the step for any additional access that you may have. If the device is a switch and required an “Enable Password“, then define it on the corresponding field. When completed, click <<Next>> to continue.
¶ Start Wizard
Once all the credentials have been created, you will be redirected to the auto detection engine where you will be able to start scanning the network to detect devices to be imported into blësk.
blësk requires credentials to get the most information out of the devices on the network. Be sure your devices are configured correctly and you have proper access prior to running a discovery.
Start by scanning a small range of IP like a /24 subnet or if you know the device that you want to import, then list them separate by a comma.

Click <<Discover>> to begin the scan. It can take few seconds to few minutes depending on the number on IPs to scan.
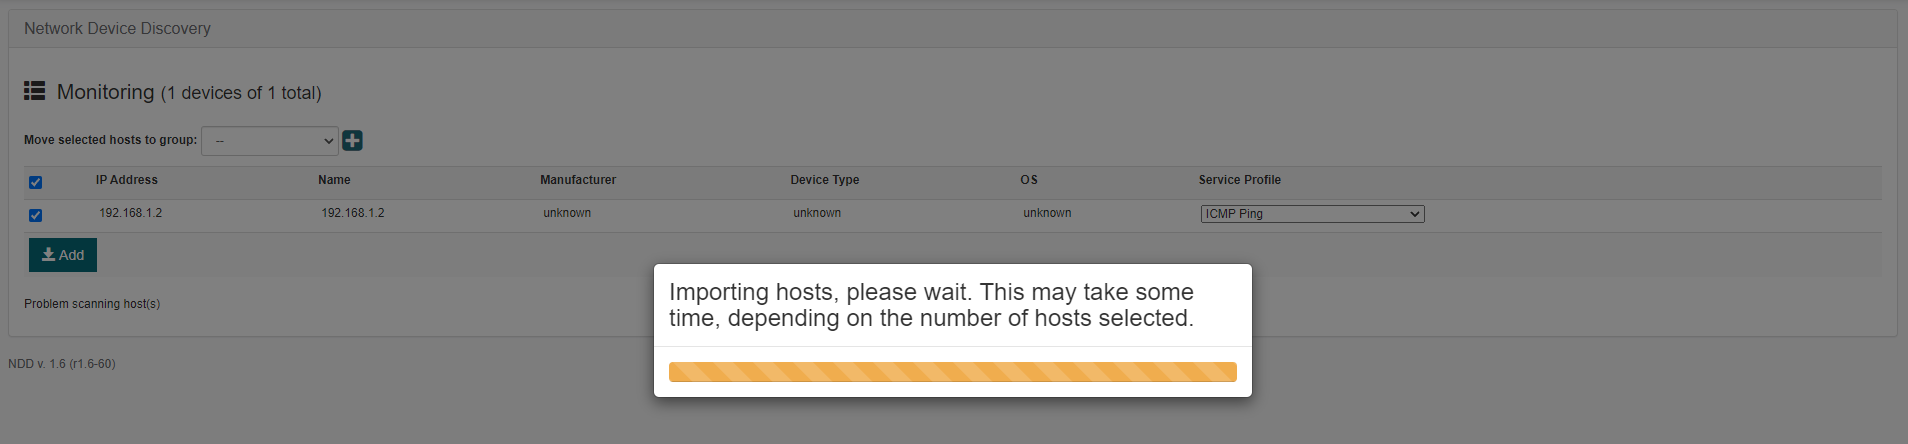
Discovery wizard will display a list the IPs as it shown on Image - 26.

Select the IP address you would like to add to a Monitoring group and click <<Add>> to continue adding the IP(s).
For information on using and managing your blësk server, please refer to the blësk Documentation on Using and managing your blësk.