¶ Introduction
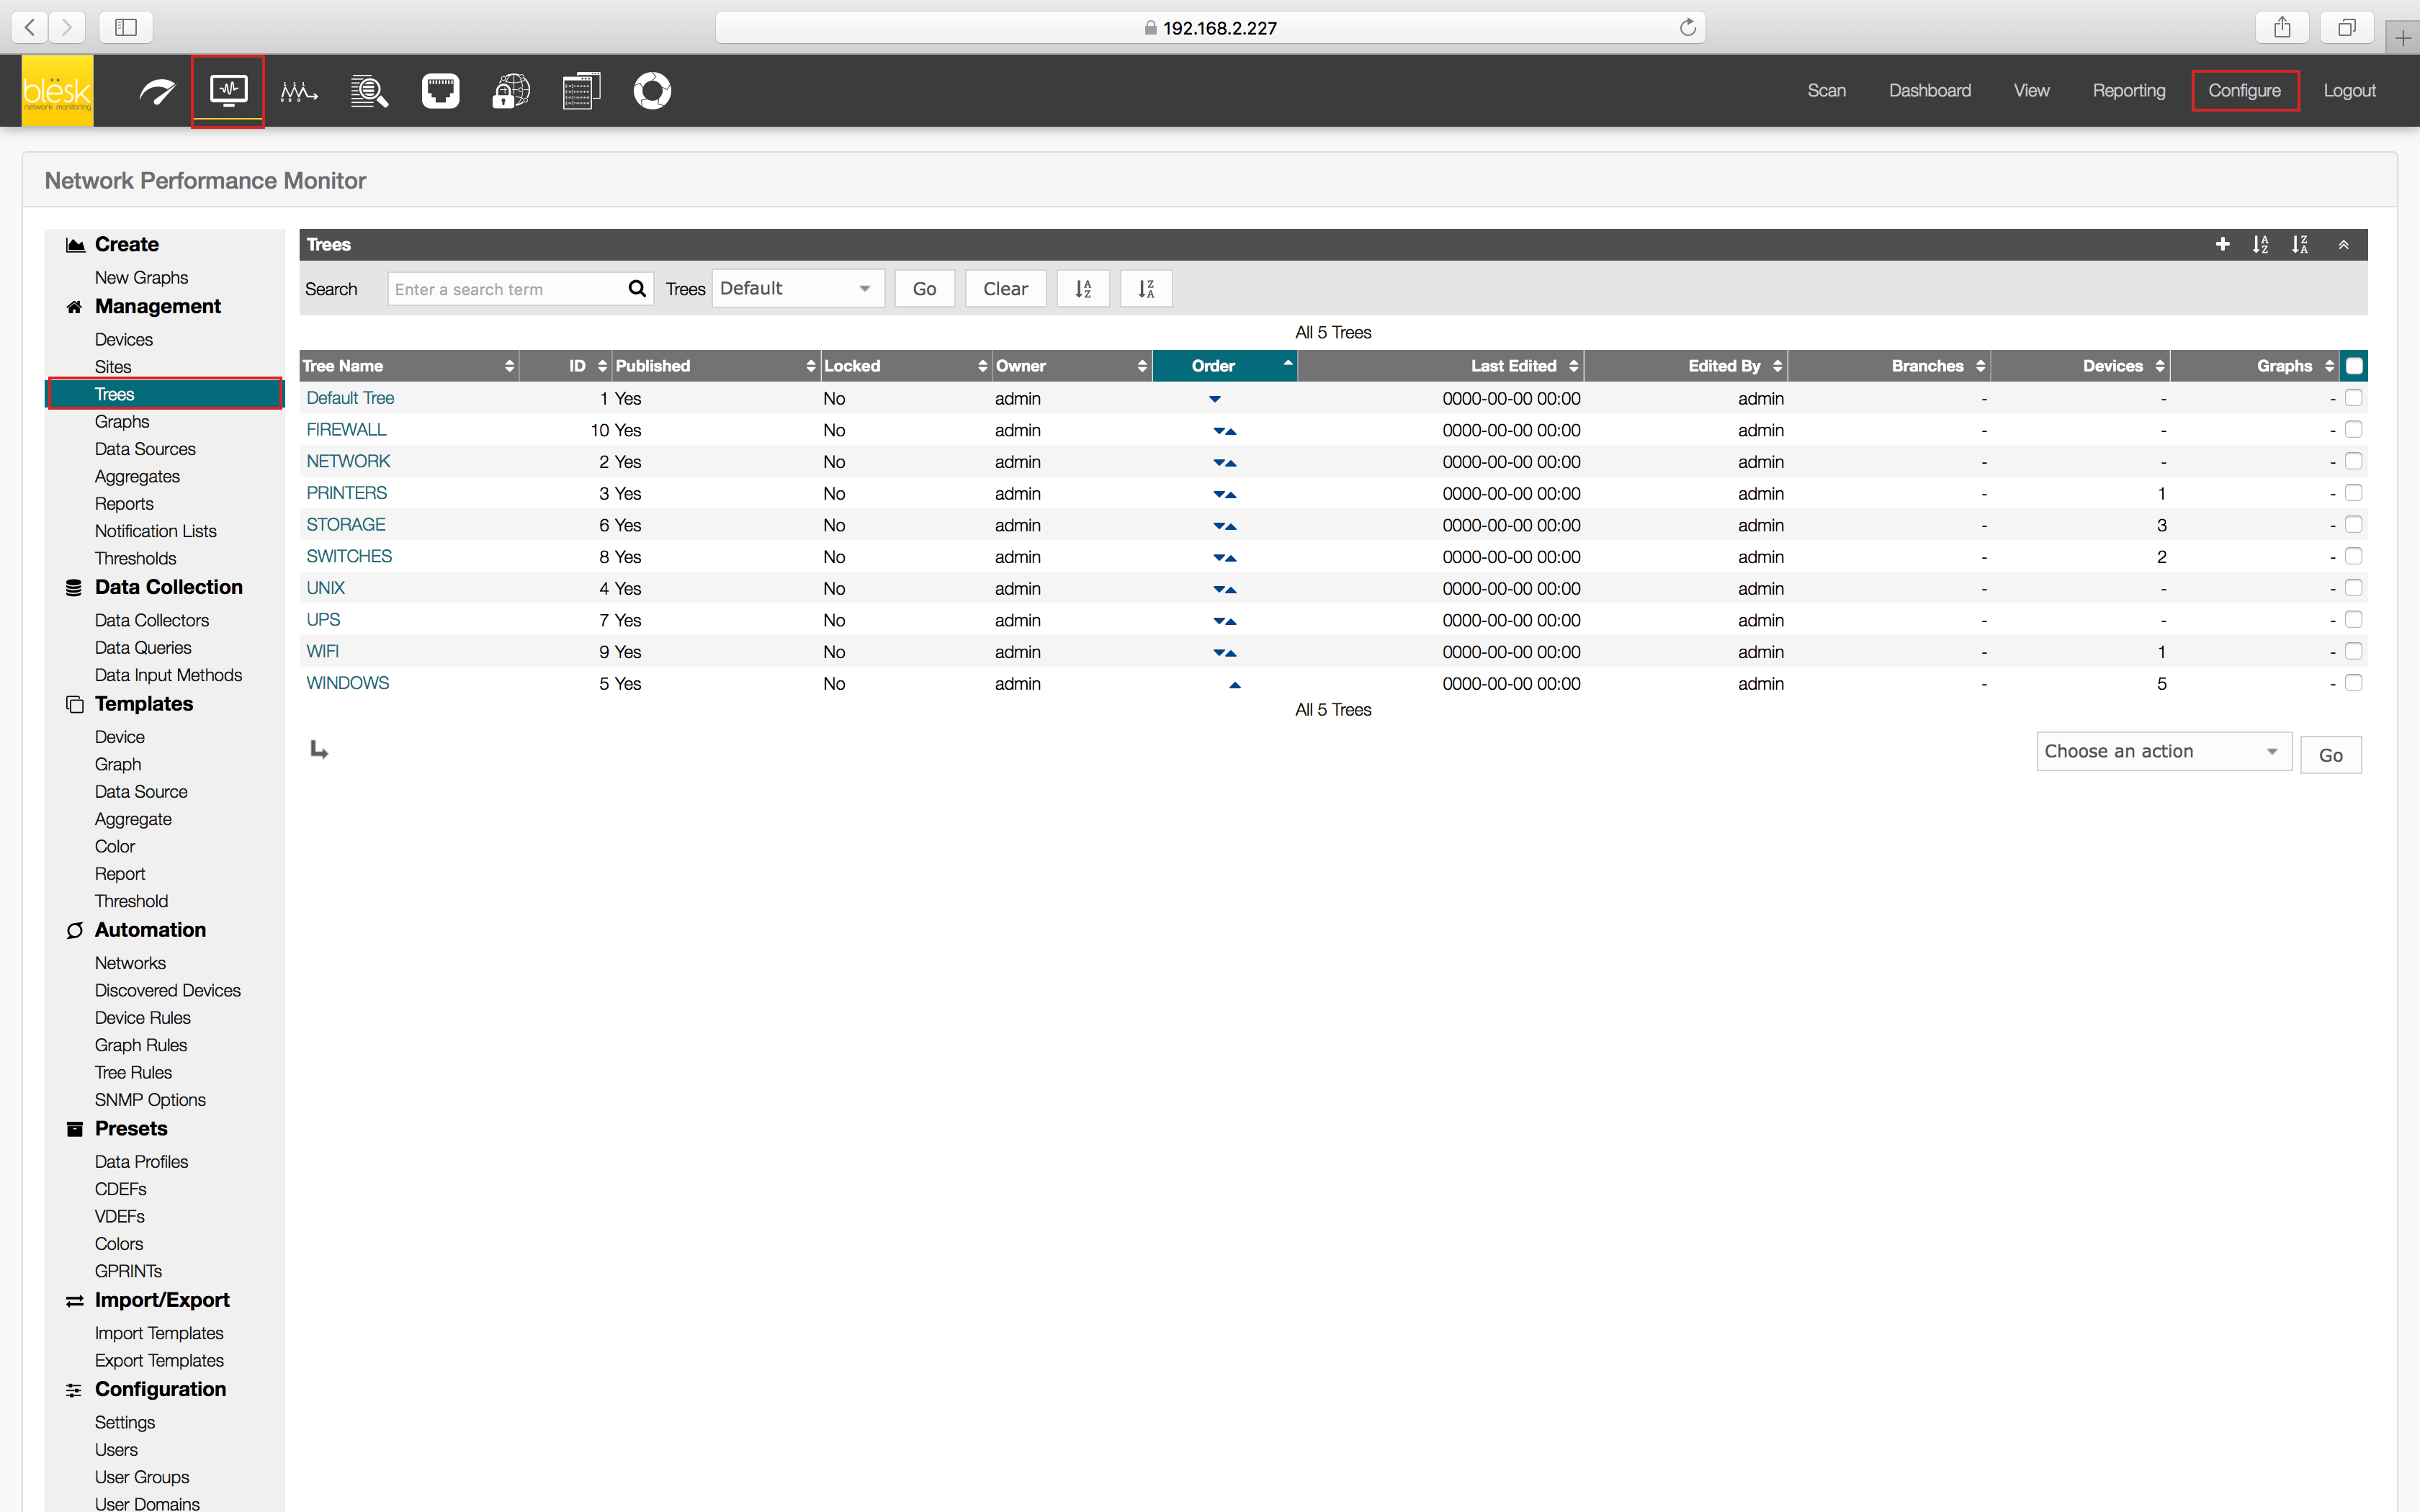
The NPM tree lists sub-trees, hosts, and graphs in a tree-like interface. It is the main user interface for the Dashboard tab. There can be more than one tree which allows for a granular definition of the tree structure.
Before creating the NPM tree, think about a good structure for it. Changing the tree later is going to involve quite some manual work, so it is better to have this set up correctly beforehand.
NPM already has a default tree defined.

¶ Creating an NPM tree
1. Click on the “+“ link to the top right of that table.

2. Enter a name, for example, Customer A. Click on the Create button.

You created a new NPM Tree called Customer A which you can now use to add all Customer A-specific entries. Using separate trees for customers or business units will enable you to better allow or deny access to these for specific users.
¶ Adding sub-trees and devices
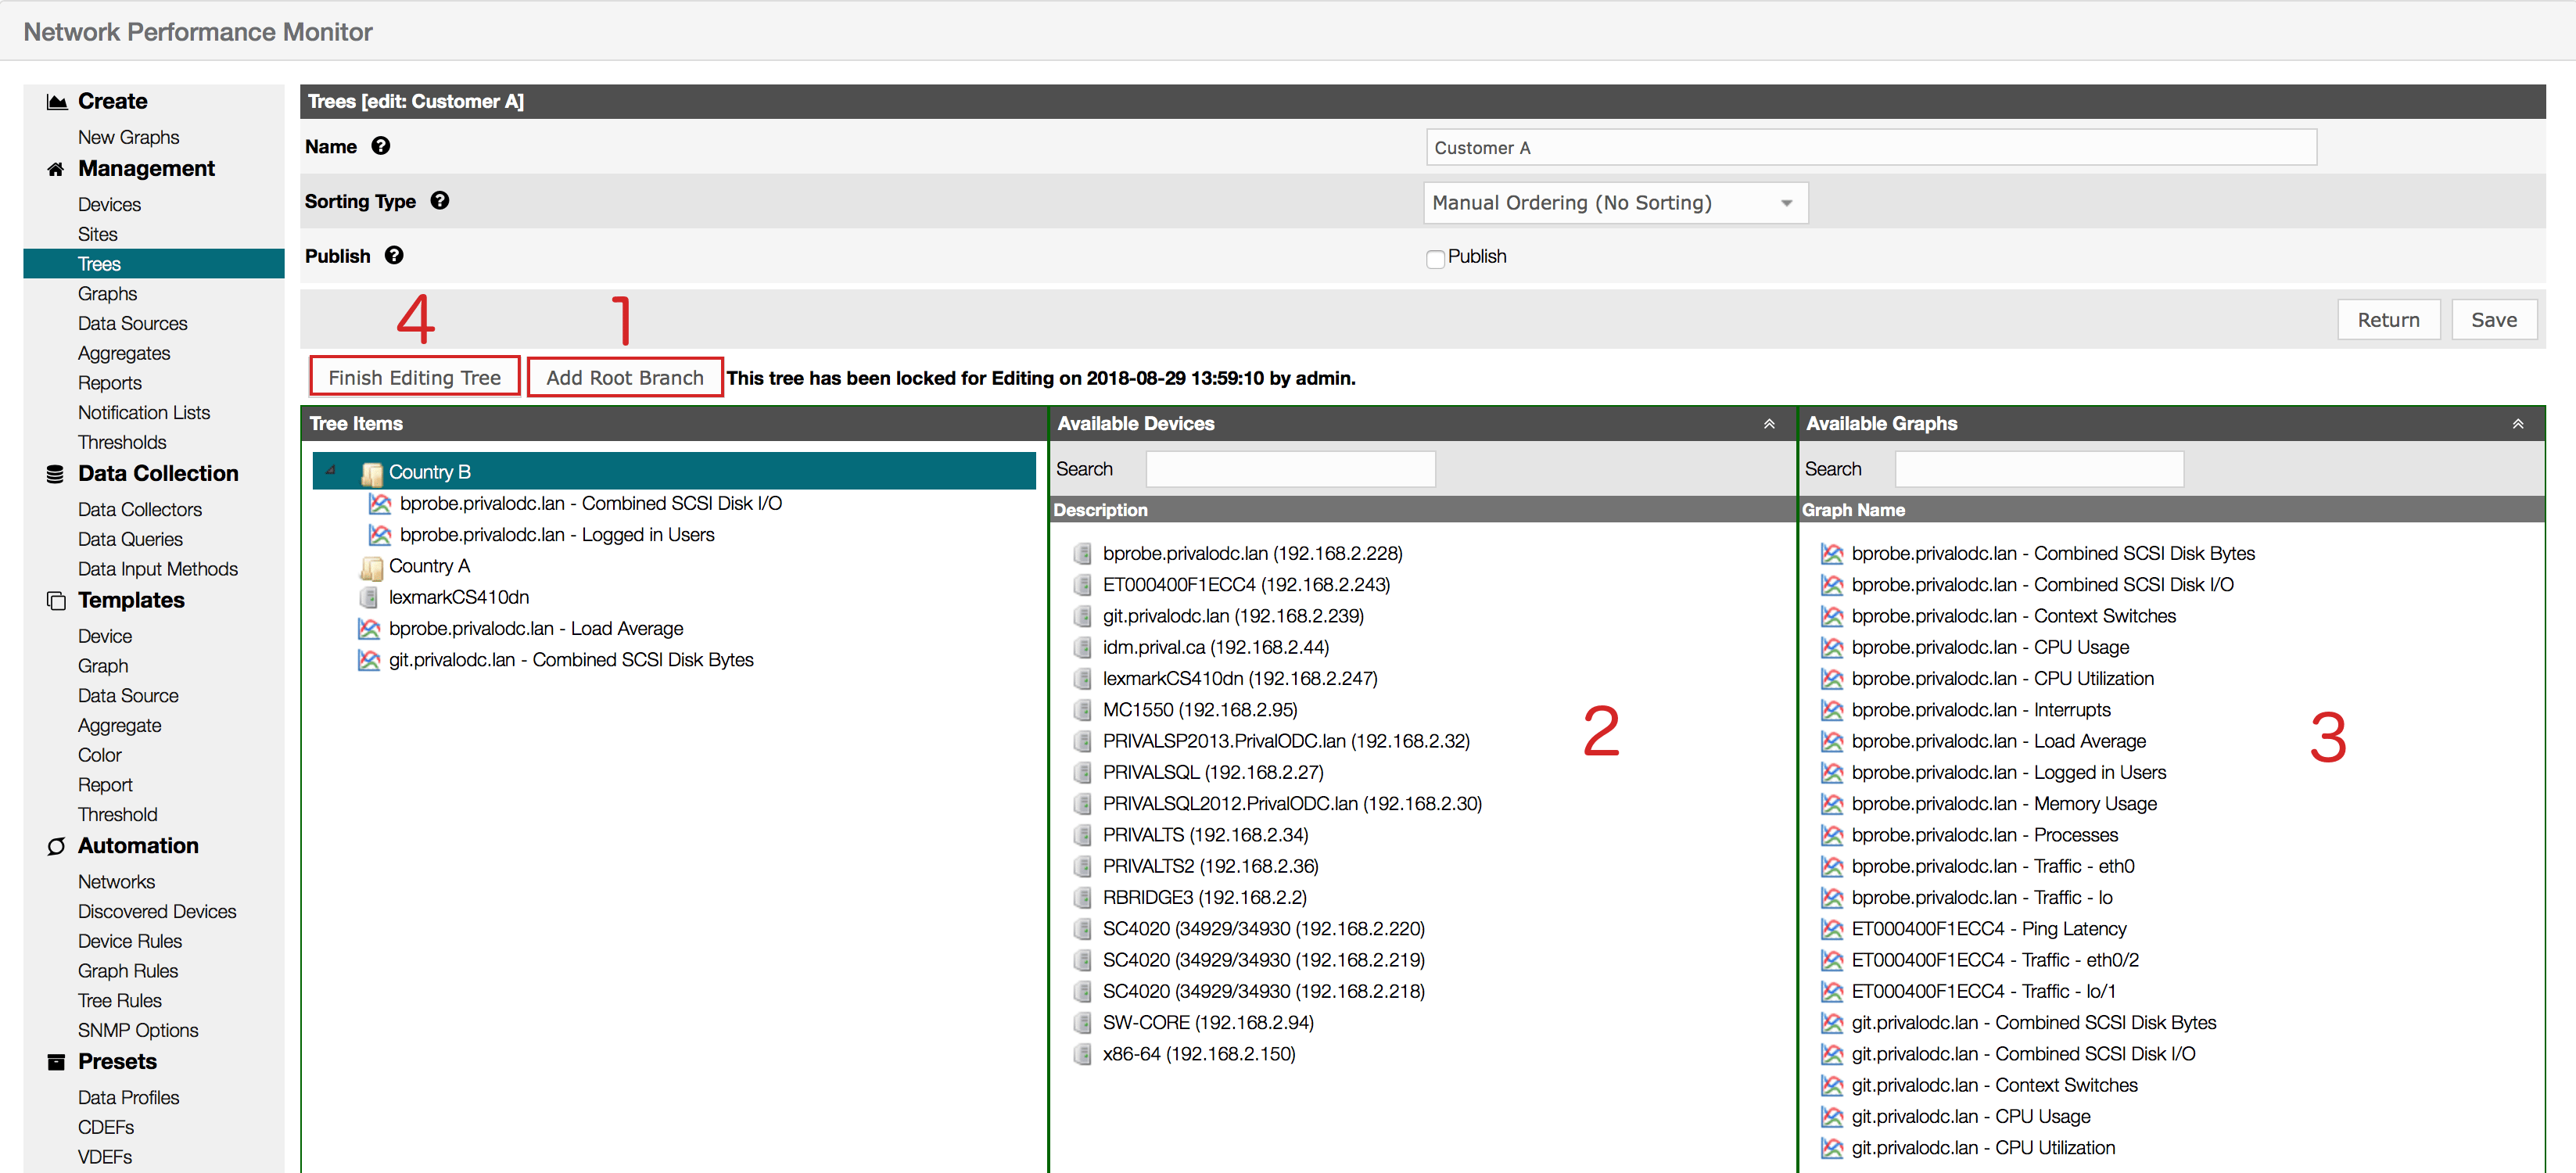
1 . Click on Edit Tree to edit this tree before being able to add items to it.

2. Click the Add Root Branch to create a new branch on the Tree Items (1), then from the available devices and graphs column on the right, select the items you want to add into the branch (2,3). Repeat for any additional branch you need. Once completed, click on the Publish check box to make it available to all then the Save and Finish Editing Tree button to close the editor (4).
