This Quick Start guide will help you to start using the blësk Network Security Monitor (NSM) after installing the blësk Network Monitoring system.
¶ Introduction
Vulnerability Management Service is a core service required to protect your critical business systems from compromise. Network Security Monitor (NSM) is a full-featured scan engine that executes vulnerability tests and PenTest against target systems. NSM allows to scan devices for vulnerabilities within the network by performing scheduled or manual scans. Vulnerability scans are conducted based on daily updated and comprehensive public feeds of Network Vulnerability Tests (NVTs), Common Vulnerabilities and Exposures (CVE) and Common Platform Enumeration (CPE).
Follow the steps below to configure your blësk NSM function to automatically scan a subnet of your network every month and automatically report the results to you by email.
¶ Connect
From the home page, click on the Network Security Monitor menu.

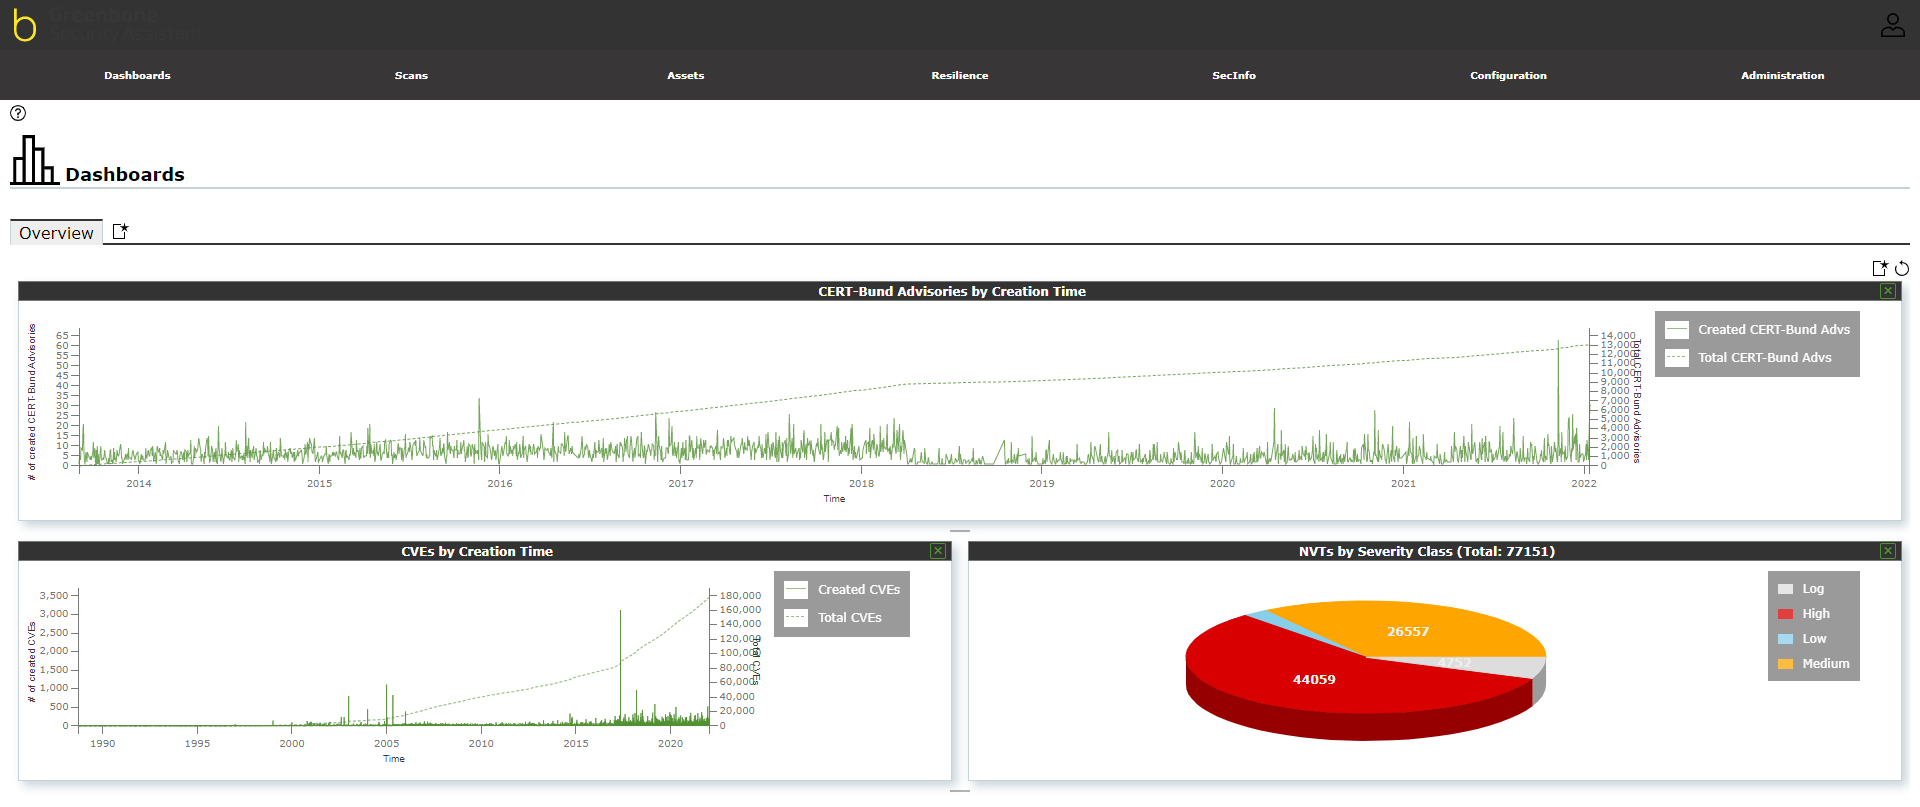
By default, the “Dashboard” of the NSM module will appear as Image 2. The dashboard is customizable and can be configured as per user requirements.
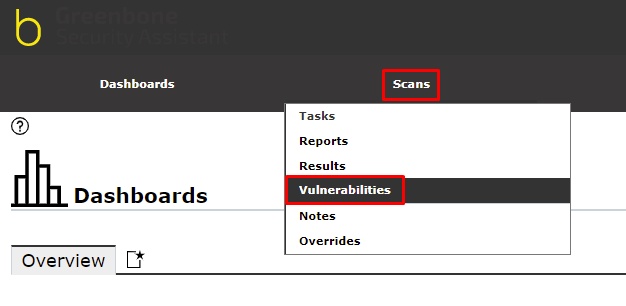
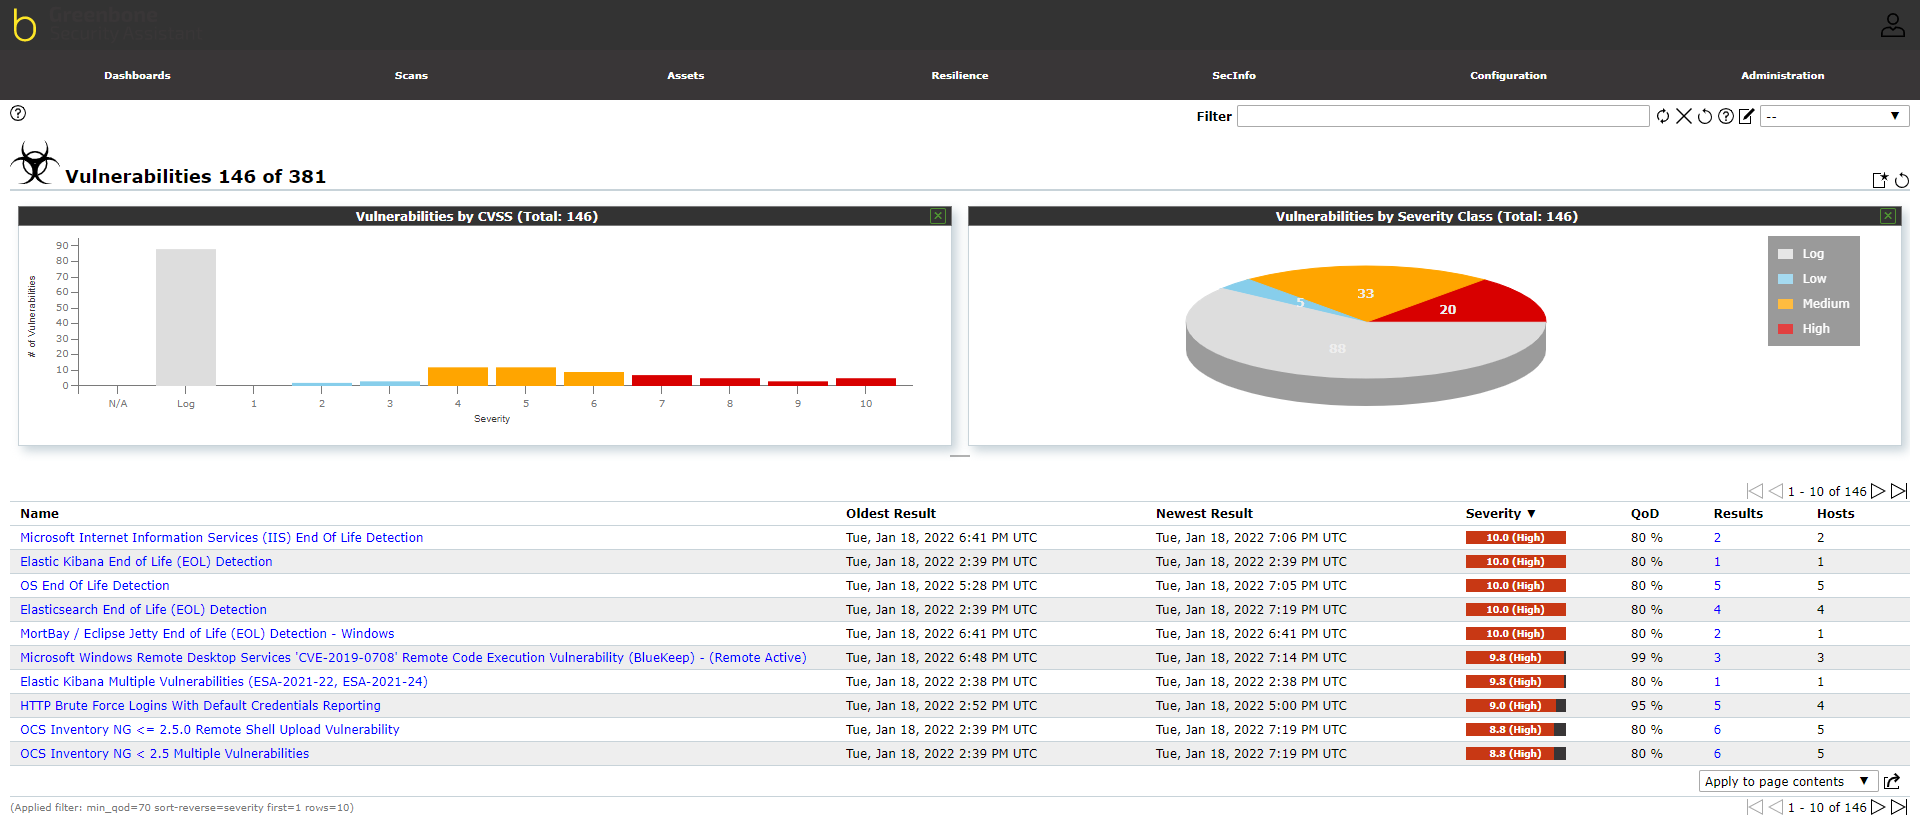
Click on the submenu “Vulnerabilities” under “Scans” menu to view list of vulnerabilities.
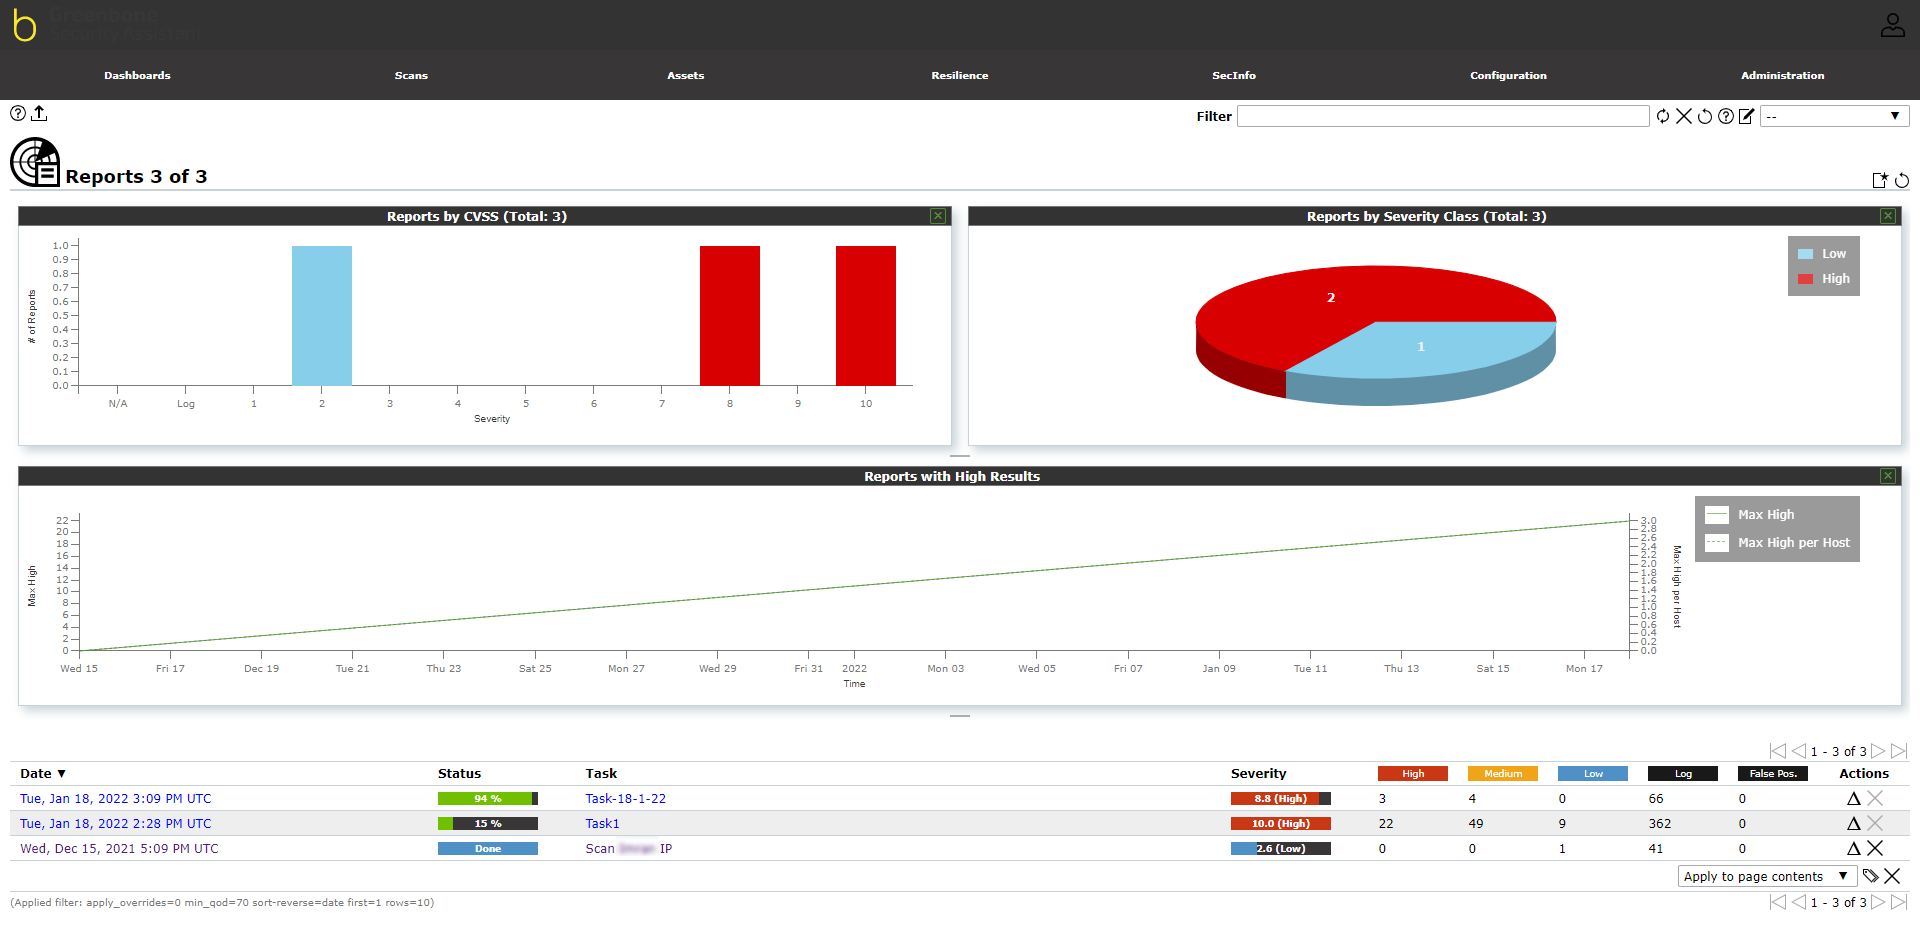
A graph displays the “Vulnerabilities” based on their Severity Class.
¶ Vulnerability databases
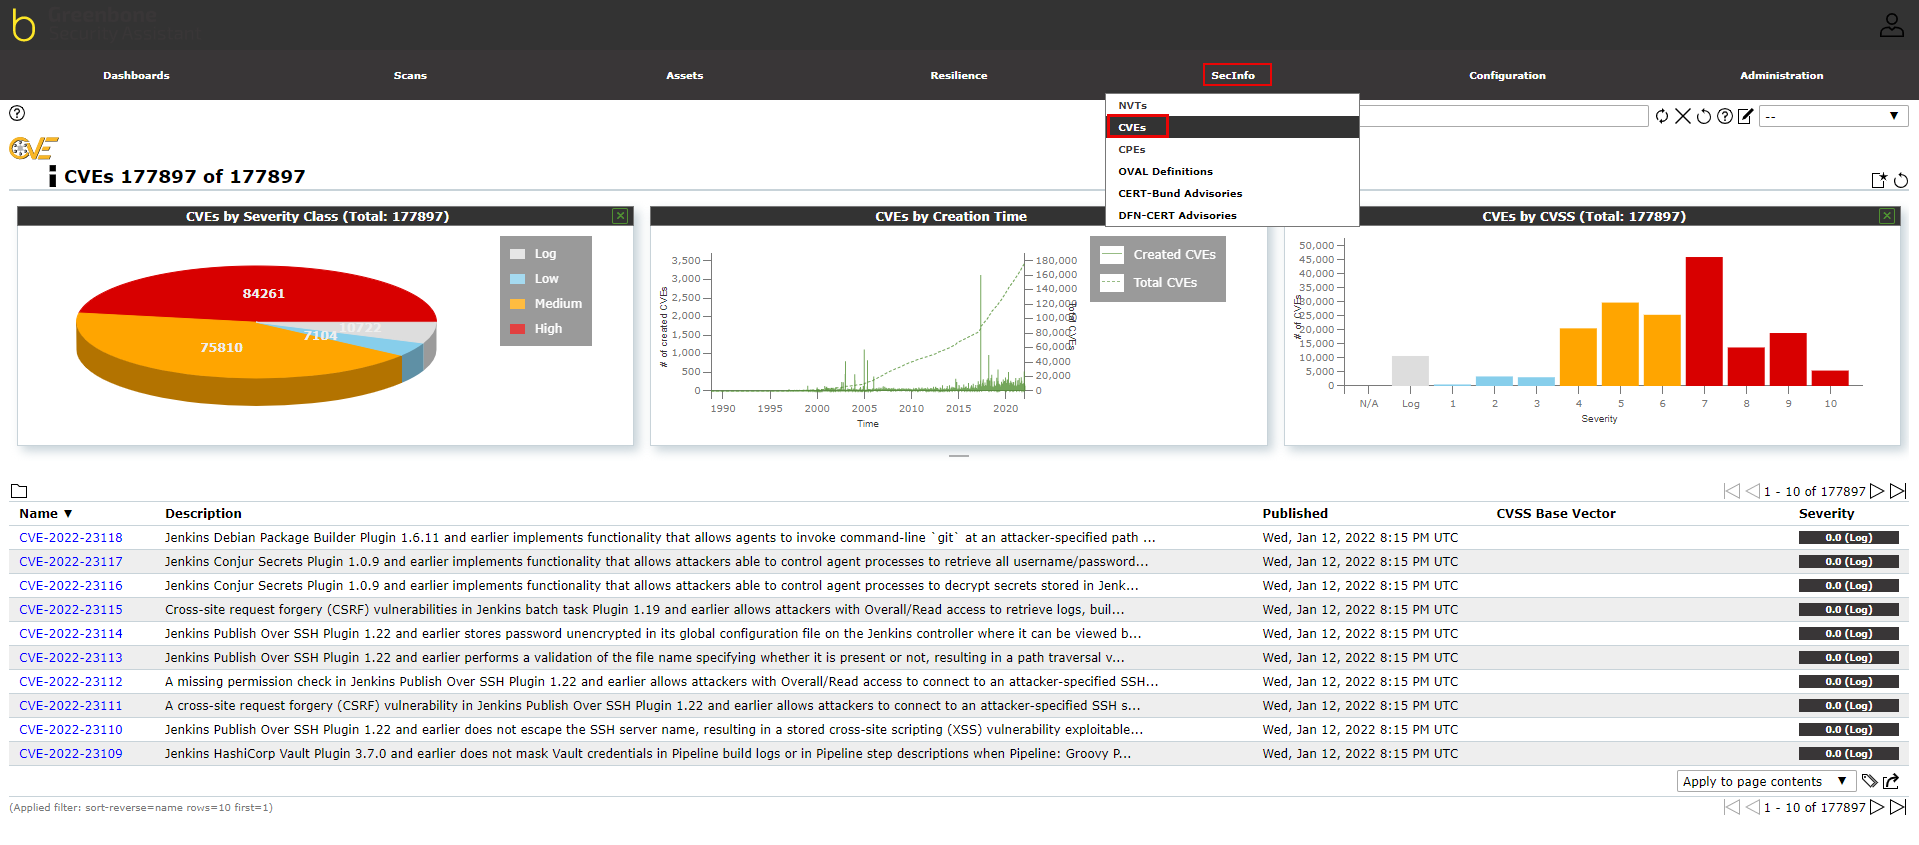
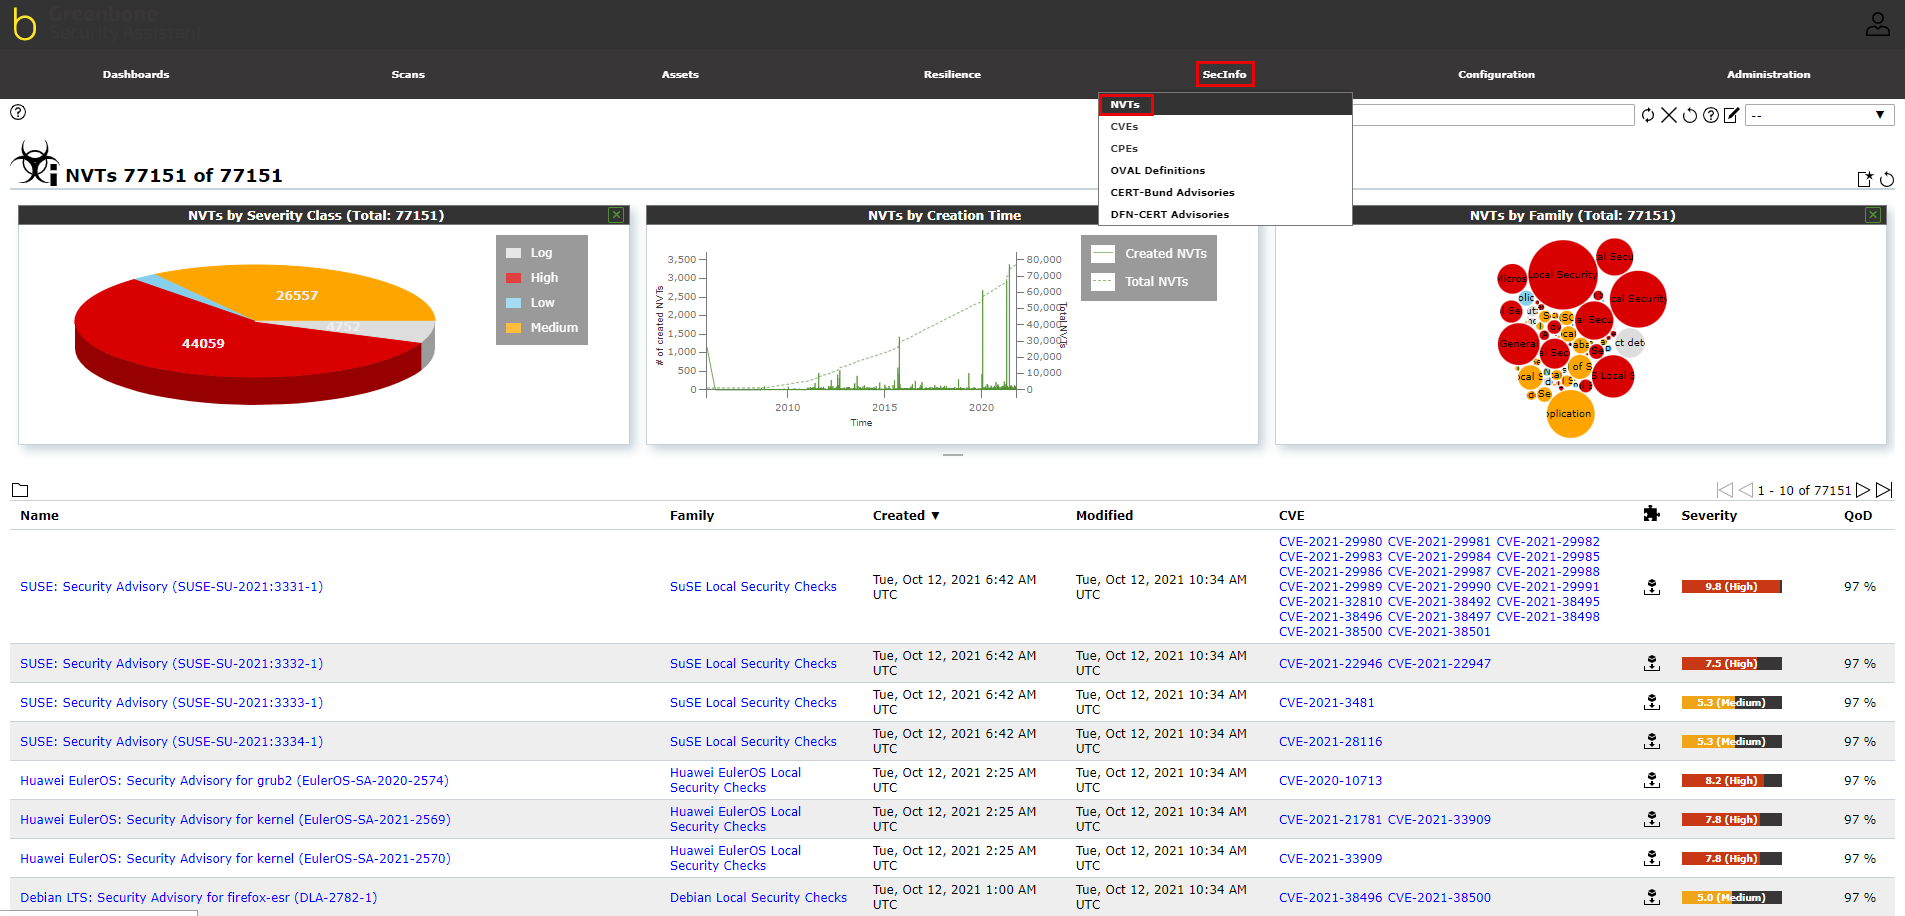
A list of vulnerability databases is found under the “SecInfo” menu from the top menu bar. There are several vulnerability databases available to view under this menu. The image below represents an example from CVE and NVT databases, which contains the list of vulnerabilities based on the live feed, their severity, creation time, and vulnerabilities by their type. This gives an overview of how vulnerabilities can affect your network security. The list of the vulnerability database updates every day.
¶ Configuration
In order to perform the scans, there are some configurations required to be performed and we will carry out all the Configuration at this step.
¶ Scan Configs
To configure the scans, navigate to the “Scan Configs” page from the Scan Configs sub-menu located under the Configuration menu.
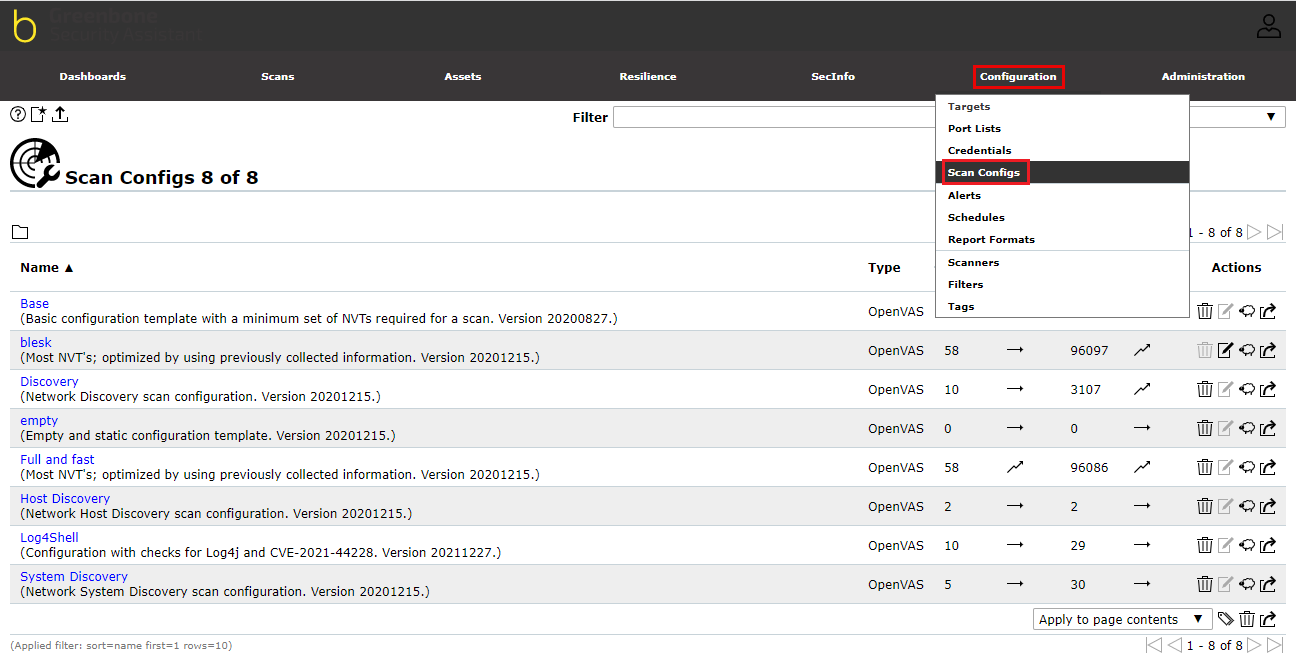
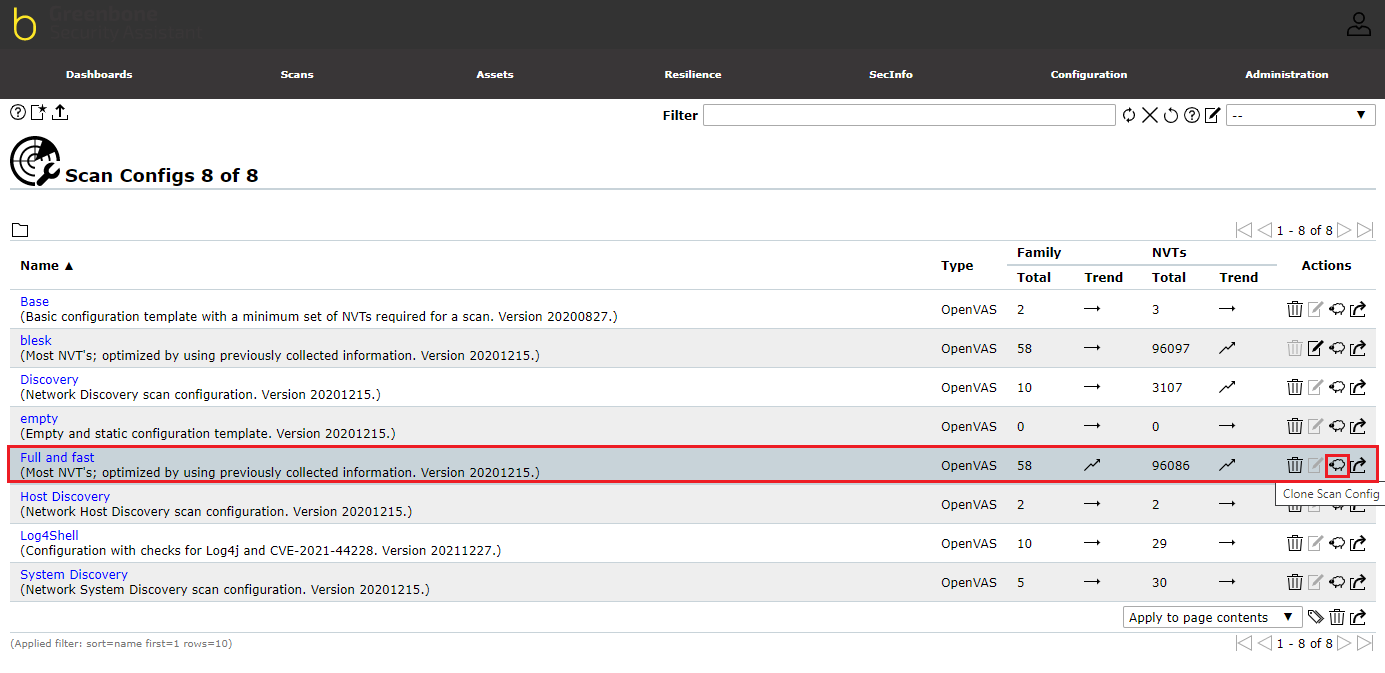
On this page, clone the “Full and fast” option from the list by clicking on the clone button as in the image below
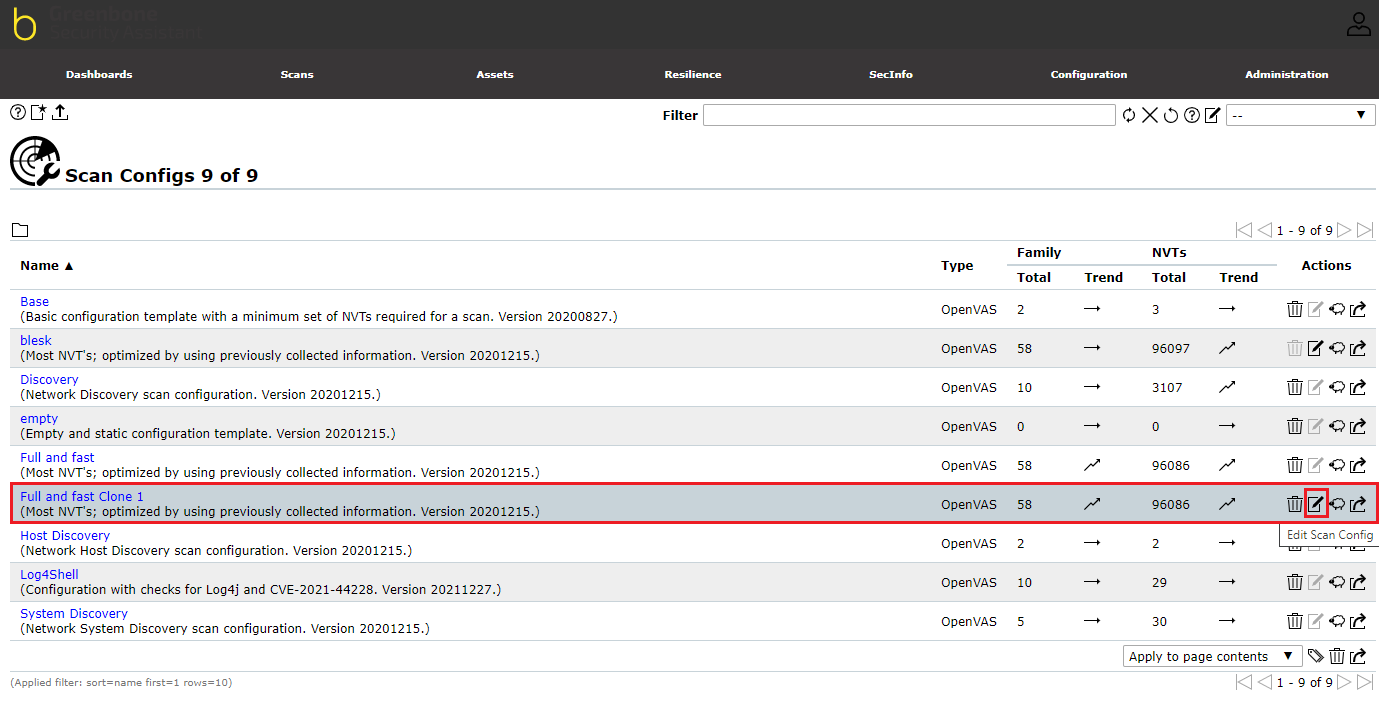
To edit the cloned option, click the edit button to open the edit dialog box to set the parameters
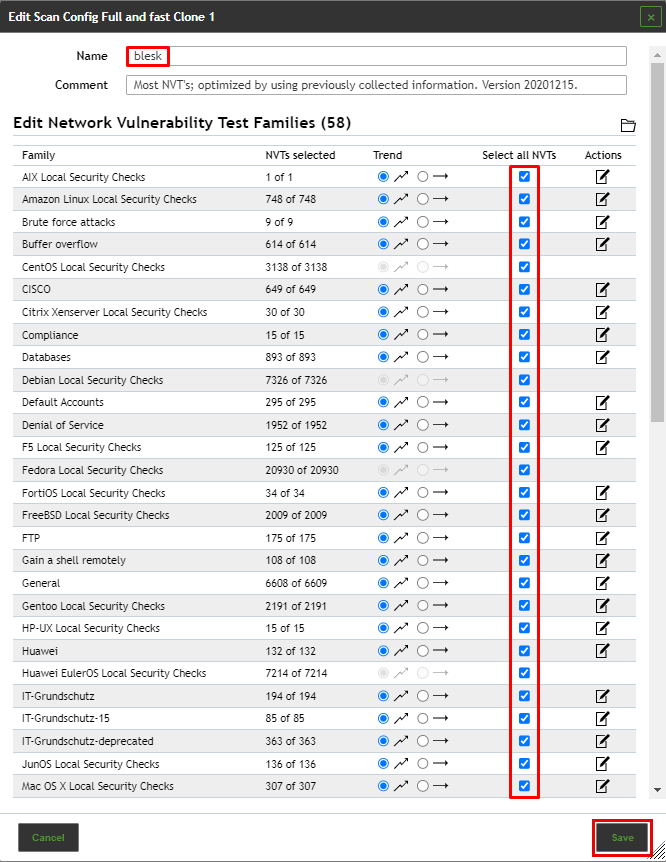
Make the following changes to the dialog box:
- Rename the Scan Config to blesk
- Under the Select all NVTs, check all the chek boxes
- Click the Save button to save the changes
¶ Configuration Alert
Click on Configuration | Alerts to go to the section where you’ll be able to define an email representing the person who should receive the scan result.

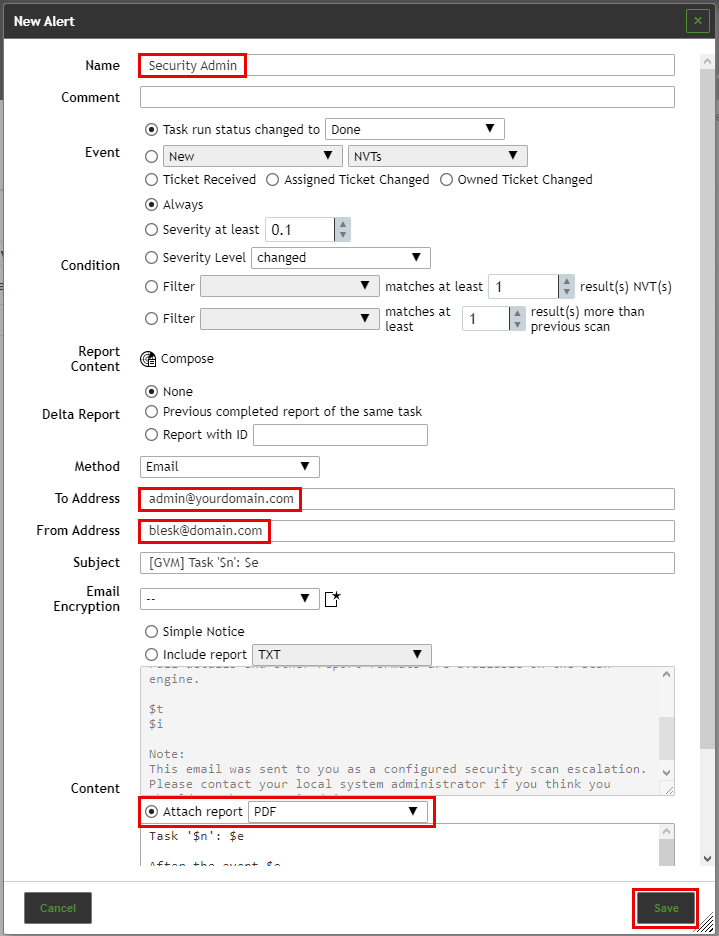
From the Alerts section, click on the star icon at the upper left of the page. This will open a window from where you can define a new Alert.
- Define a name for this alert.
- In the “To Address” field, define the email of the person who should receive the scan result.
- In the “From Address” field, define the email of the BLESK server.
- Check the “Attach report” radio button and select PDF to have the scan result attached to the email you’ll receive as a PDF.
¶ Schedules
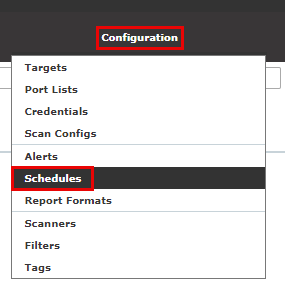
To view or to create a new schedule to run a scan, click on the “Schedules” submenu from the ”Configuration” menu from the top menu bar.
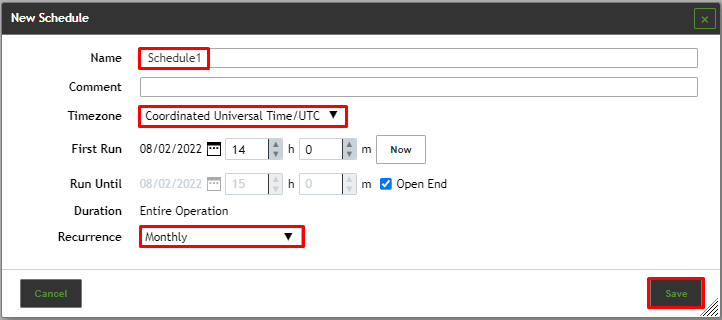
To schedule a scan task, click the add Schedules icon from the top left-hand corner, new schedule form will appear as the image below.

- Define a name for this schedule.
- In the “Timezone” pull down menu, select the time zone that corresponds to your region.
- In the “Recurrence” field, adjust the values to reflect ‘Monthly’.
- Click "Save" to save the schedule.
¶ Specify targets
To run scans against vulnerabilities, targets need to be specified. To access the “Targets” page to view a list of targets or to set a target, click on the “Targets” submenu from the “Configuration” menu from the top menu bar.
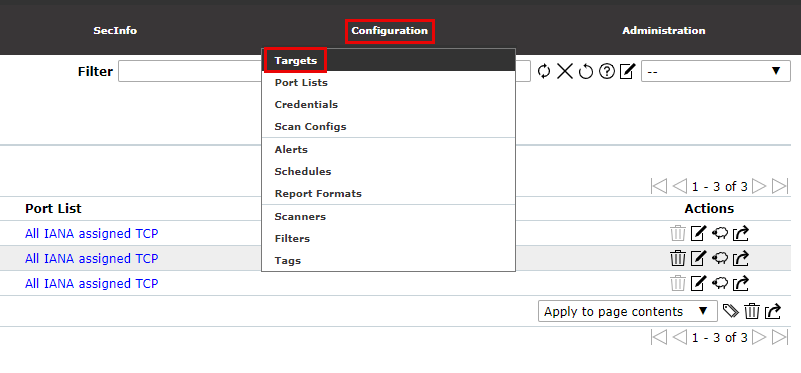
The list of Targets will appear as the image below.

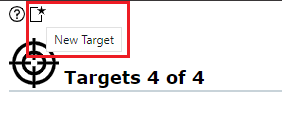
To add Target, click on add Target icon from the top left-hand corner of the page.
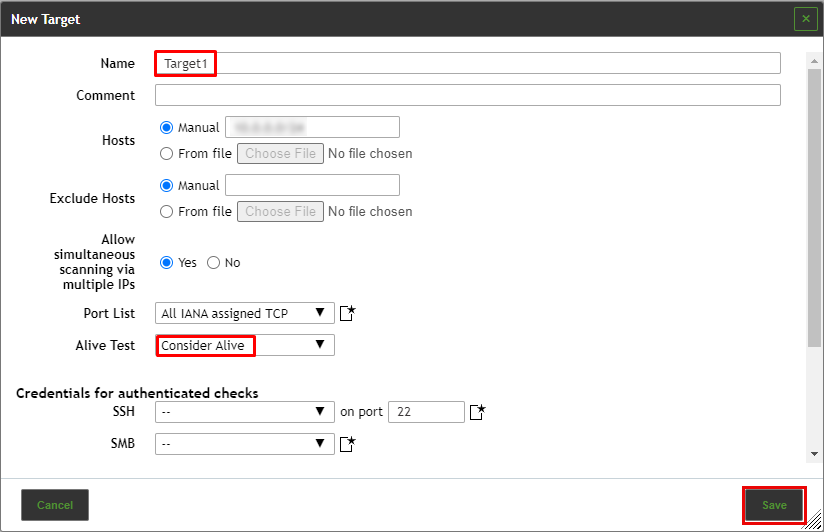
A popup form will appear as Image below. Fill out the information as the following:
- Give a name to the target
- Under the field called Hosts, select the radio button Manual if not already set, then provide the IP address or range of IP addresses
- From the dropdown box next to Alive Test select Consider Alive option
- Click
Save.
¶ Scans
In this step, we will configure the Scan Tasks and Run the Scan.
¶ Configure Tasks
Finally, we need to configure a task that will associate all previous configurations in order to automate the scan on the subnet we want to analyze and report the result to the recipient's email address. To do this, go to Scan | Tasks.
On the Tasks section, click on the star icon at the upper left of the page. This will open a window, which will allow you can define a new Task.
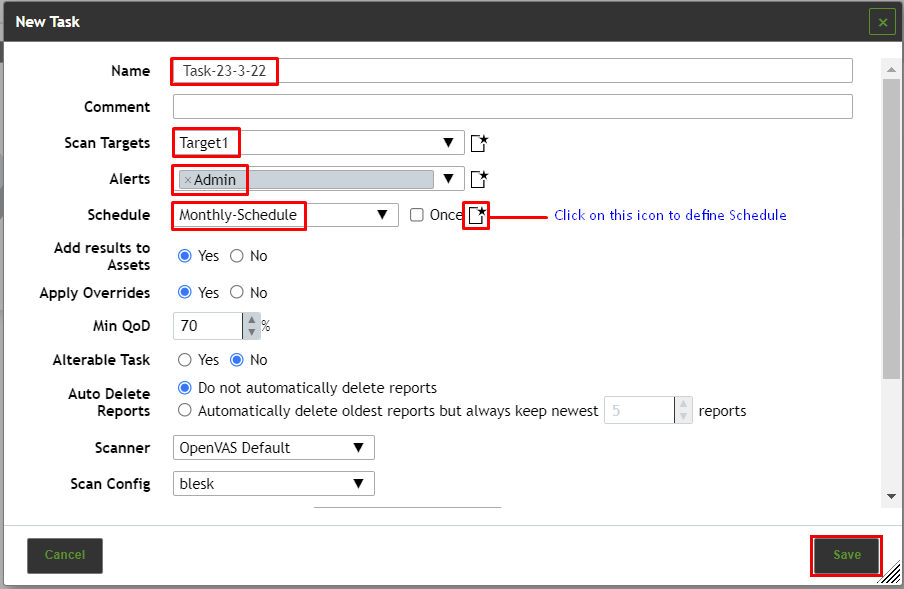
1. Define a name for this task.
2. In the “Scan Targets” pull-down menu, select the subnet representing the target you’ve created previously in this tutorial.
3. In the “Alerts” field, select the one you’ve created previously in this tutorial.
6. Under the "Schedule" pulldown menu select the one we created previously.
7. Under the "Scan Config" pulldown menu select the Scan Config named blesk we created previously.
8. Click “Save” at the bottom of the page to save your automated task.
¶ Run scan
After adding a Task, click on the Run button next to the task you would like to execute. Upon completion, a report will be sent to the administrator.

¶ Reports
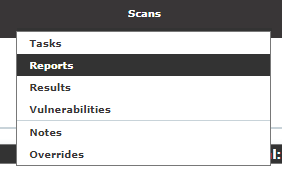
Scan reports can be accessed from the Reports submenu located under the Scans menu located at the top menu bar.
