The Scans menu consists of 6 submenus as the following:
- Tasks
- Reports
- Results
- Vulnerabilities
- Notes
- Overrides
A brief description of the functionalities is described below.
¶ Tasks
The task wizard can configure and start a basic scan with minimal user input.
¶ Using the Task Wizard
A new task with the task wizard can be configured as follows:
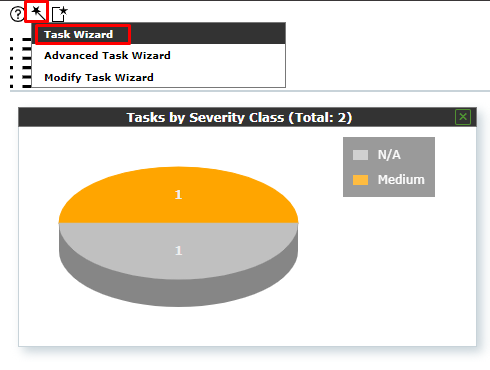
1. Select Scans > Tasks from the upper menu bar.
2. Start the wizard by moving the mouse over to  and clicking Task Wizard as shown in Image - 1.
3. Enter the IP address or hostname of the target system in the input box
4. Click Start Scan.
The task wizard performs the following steps automatically:
- Creating a new scan target on the NSM.
- Creating a new scan task.
- Start the scan task immediately.
- Displaying the page Tasks.
After the task is started, the progress can be monitored as shown in Image - 2.

¶ Using the Advanced Task Wizard
Next to the simple wizard the NSM also provides an advanced wizard that allows for more configuration options.
A new task with the advanced task wizard can be configured as follows:
1. Select Scans > Tasks in the menu bar.
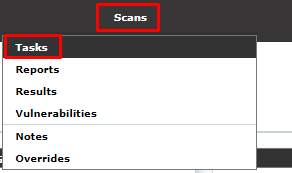
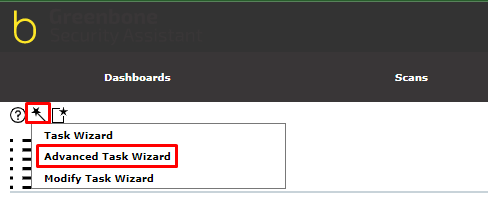
2. Start the wizard by moving the mouse over  and clicking Advanced Task Wizard.
3. Define the task.
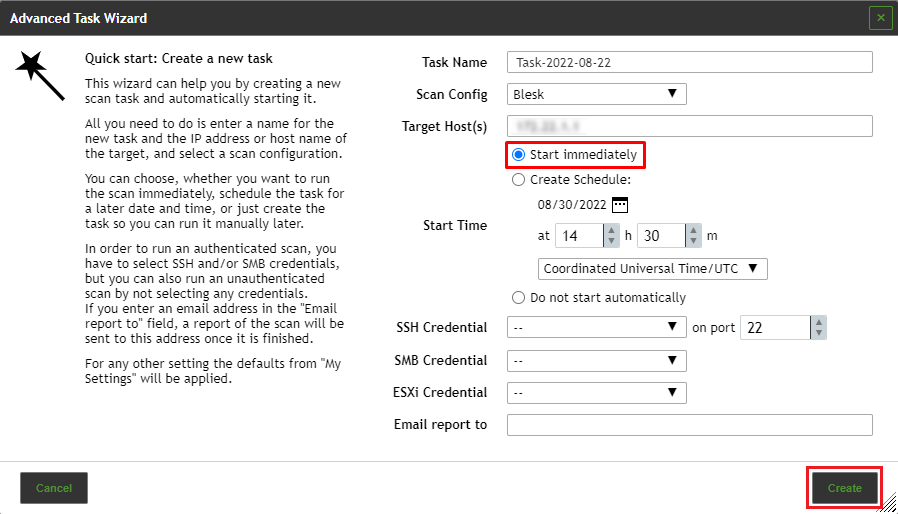
4. Click Create.
The advanced task wizard performs the following steps automatically:
- Starting the scan task immediately.
- Displaying the page Tasks.

Note
It can take a while for the scan to complete. The page is refreshing automatically if new data is available.
¶ Modify a Task, using the Wizard
An additional wizard can modify an existing task:
1. Select Scans > Tasks in the menu bar.
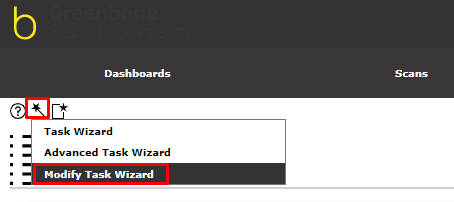
2. Start the wizard by moving the mouse over to  and clicking Modify Task Wizard.
3. Select the task which should be modified in the drop-down list Task
4. Create a schedule for the task by selecting the radio button Create Schedule.
5. The date of the first scan can be selected by clicking on  and the time can be set using the input boxes.
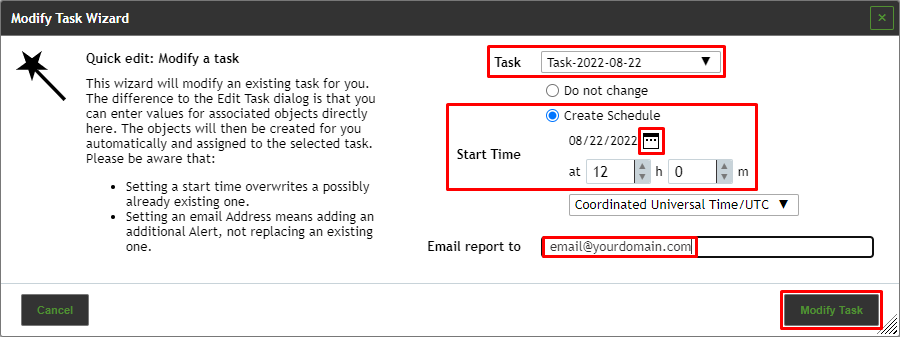
6. Enter the e-mail address to which the report should be sent in the input box Email report to.
7. Click Modify Task.