¶ Introduction
blësk Lite for Windows is a lightweight program that is great for situations where blësk can’t access the Windows machines, but the Windows machines can access blësk. The communication is initiated by the Windows client (passive mode) over a HTTP or HTTPS (SSL) port on a regular interval.
¶ Install the agent
1. Start by downloading a copy of the lite agent from this link
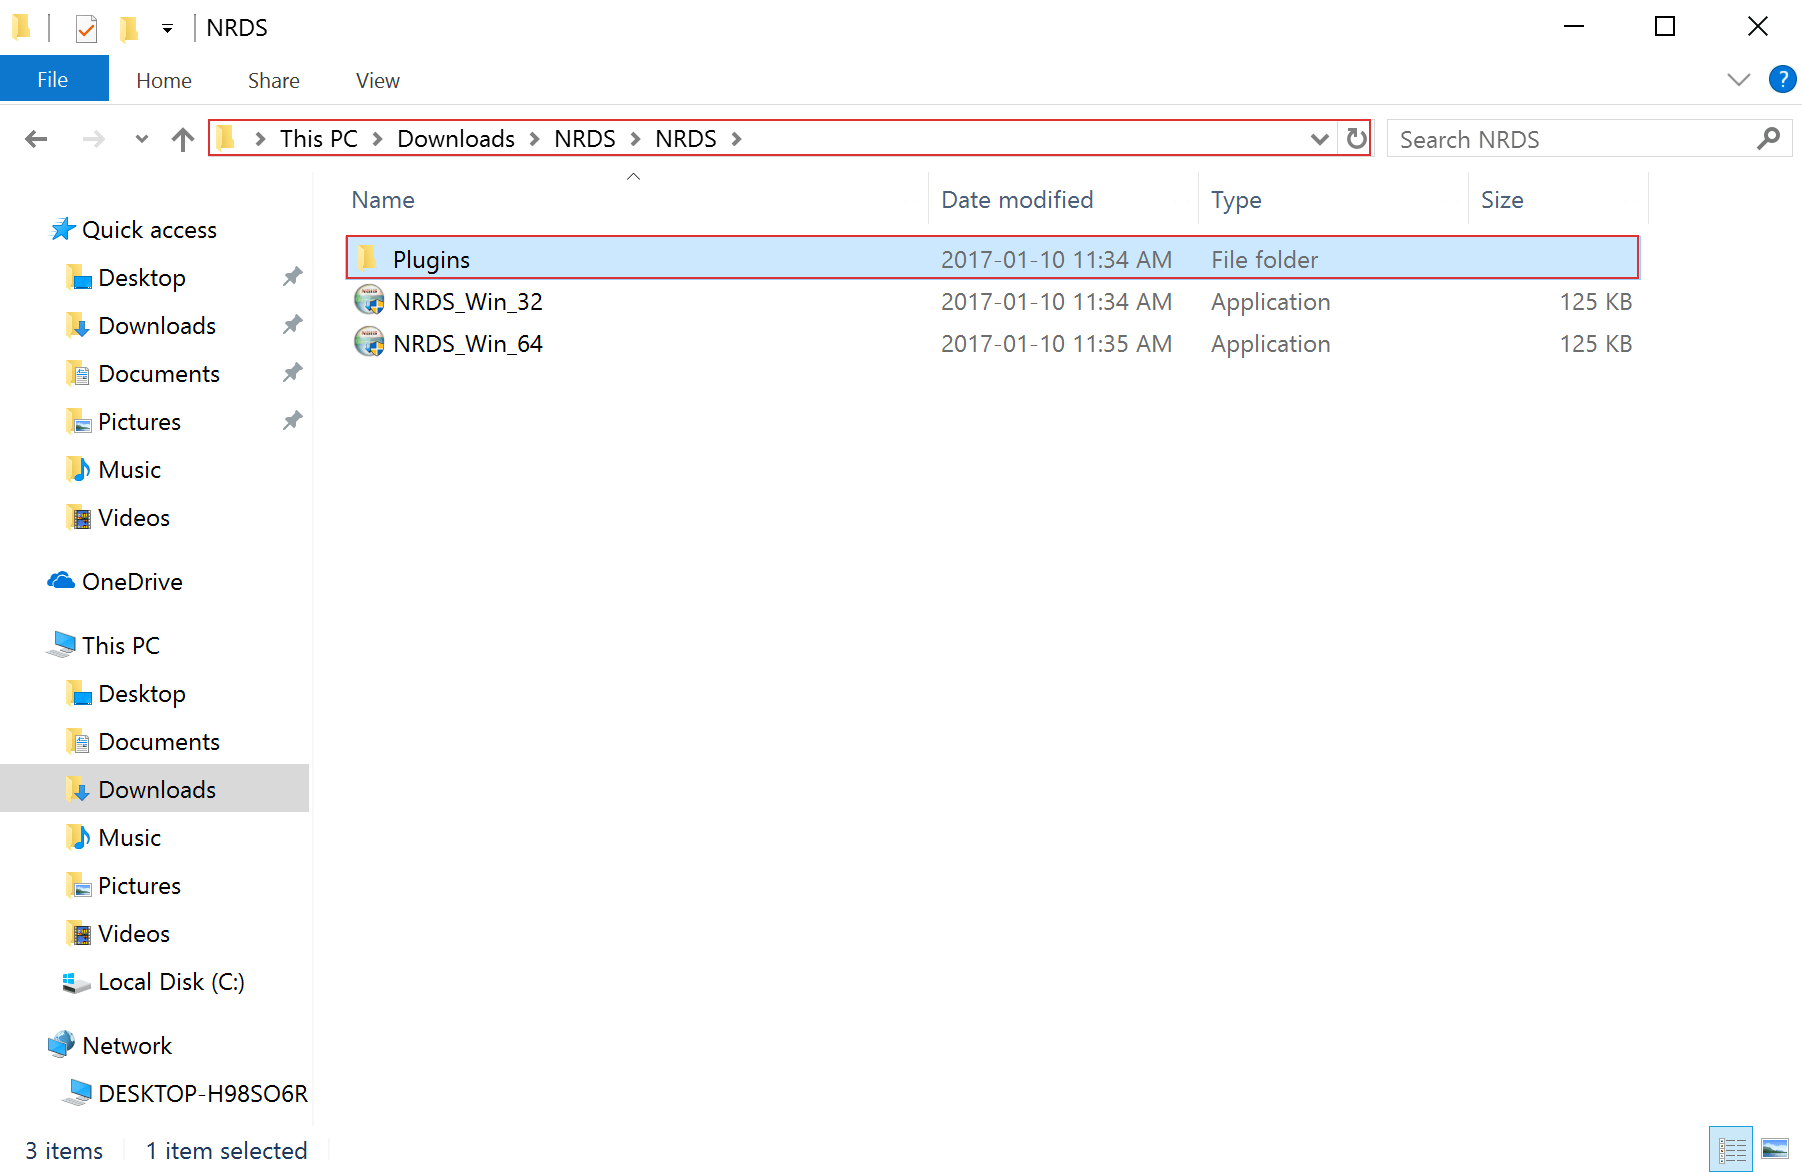
2. After unzipping the archive on your Windows server, you should have two executable files and the folder containing the plugins for the agent.
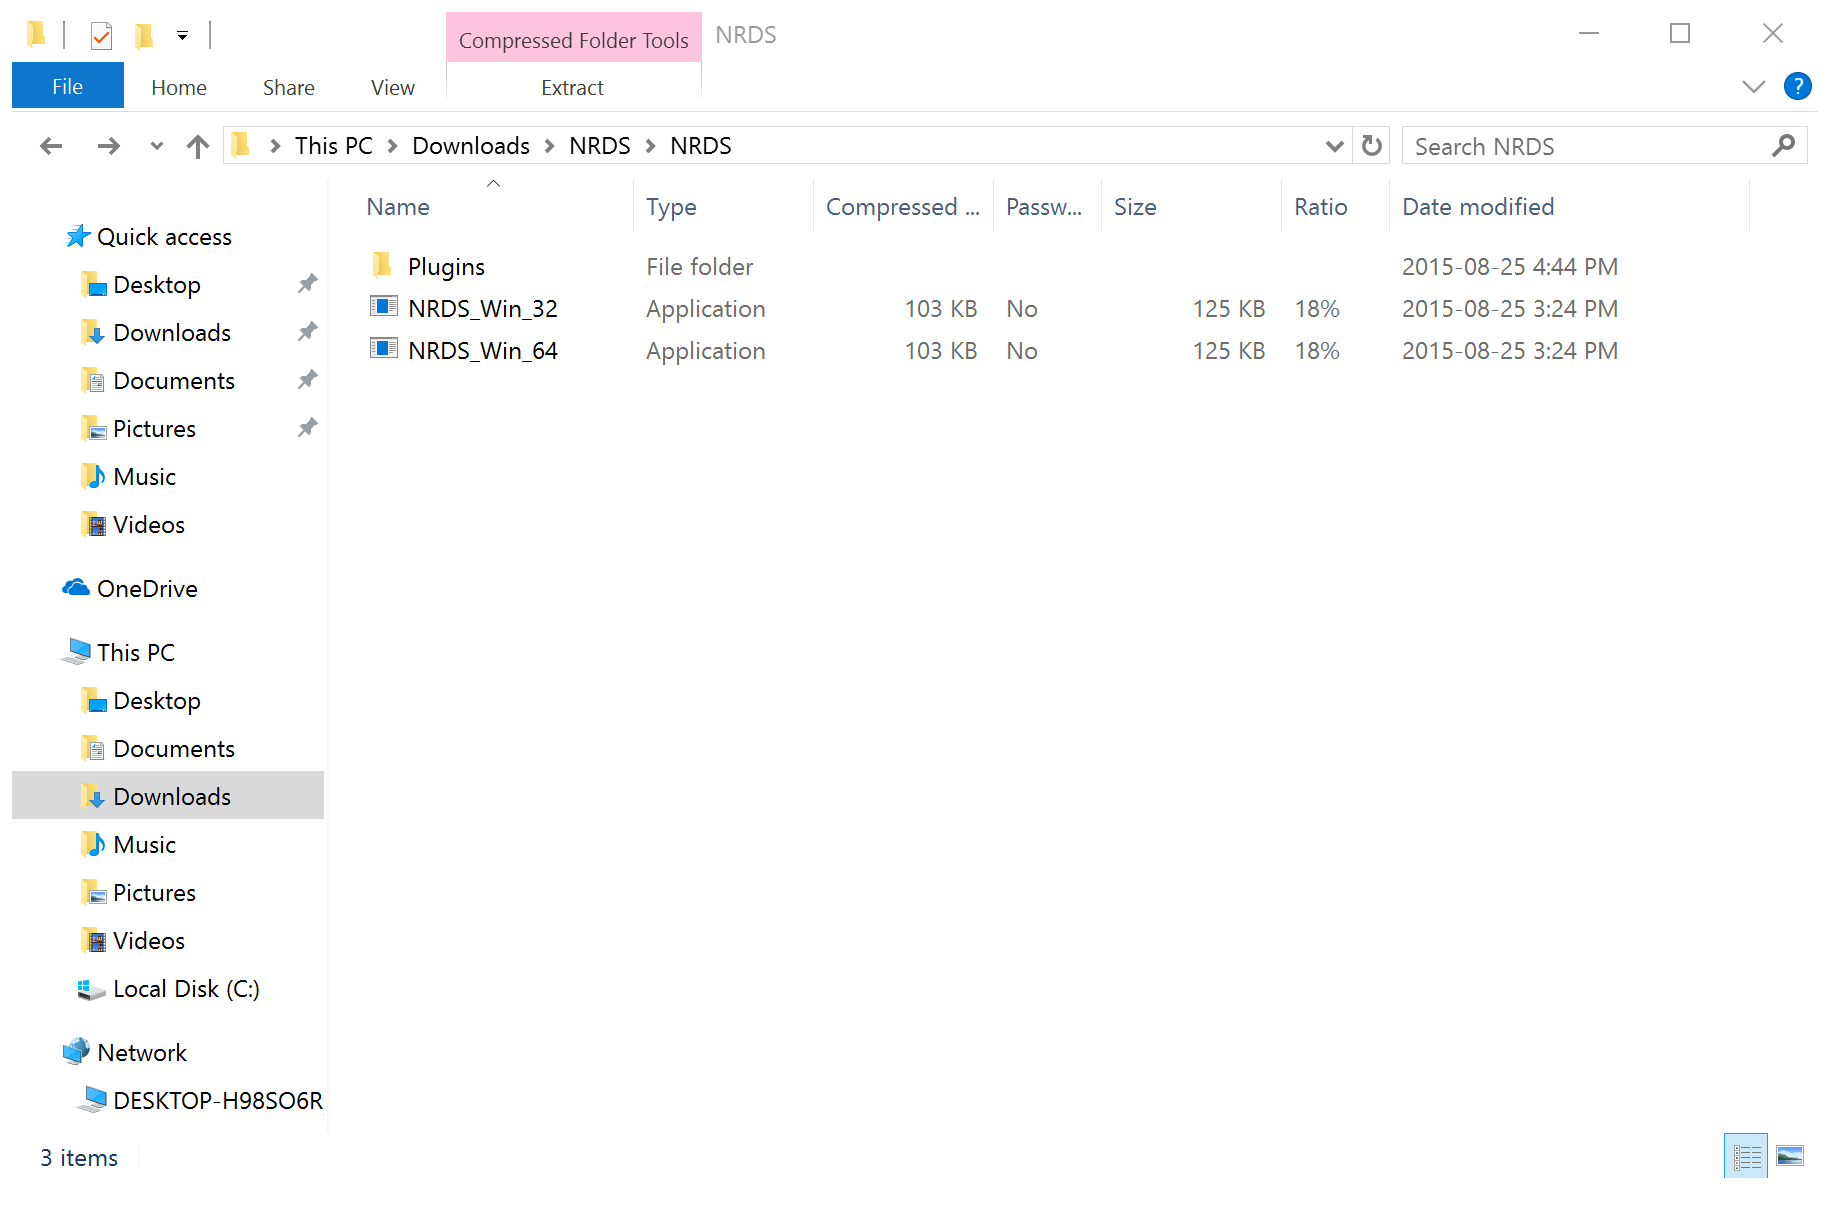
Note: Use the executable version of the lite agent that matches your Windows architecture (64 bits, 32 bits). Double click on the file to start the installation.
3. Accept the software license agreement.
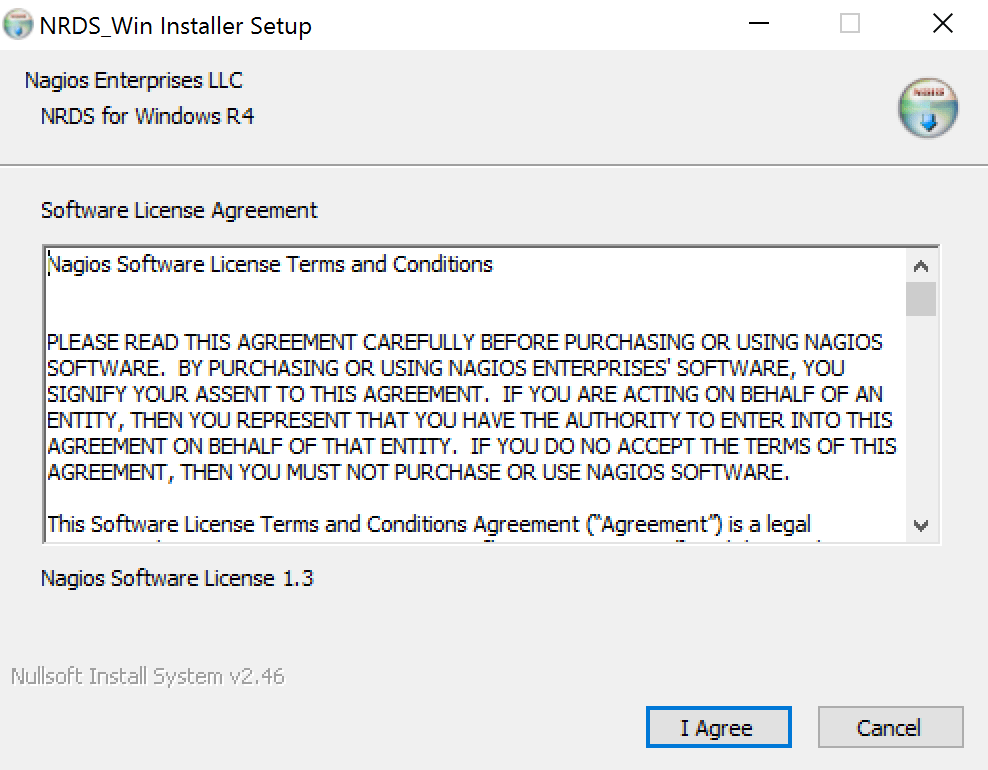
4. Now it’s time to add the information’s about your blësk server.
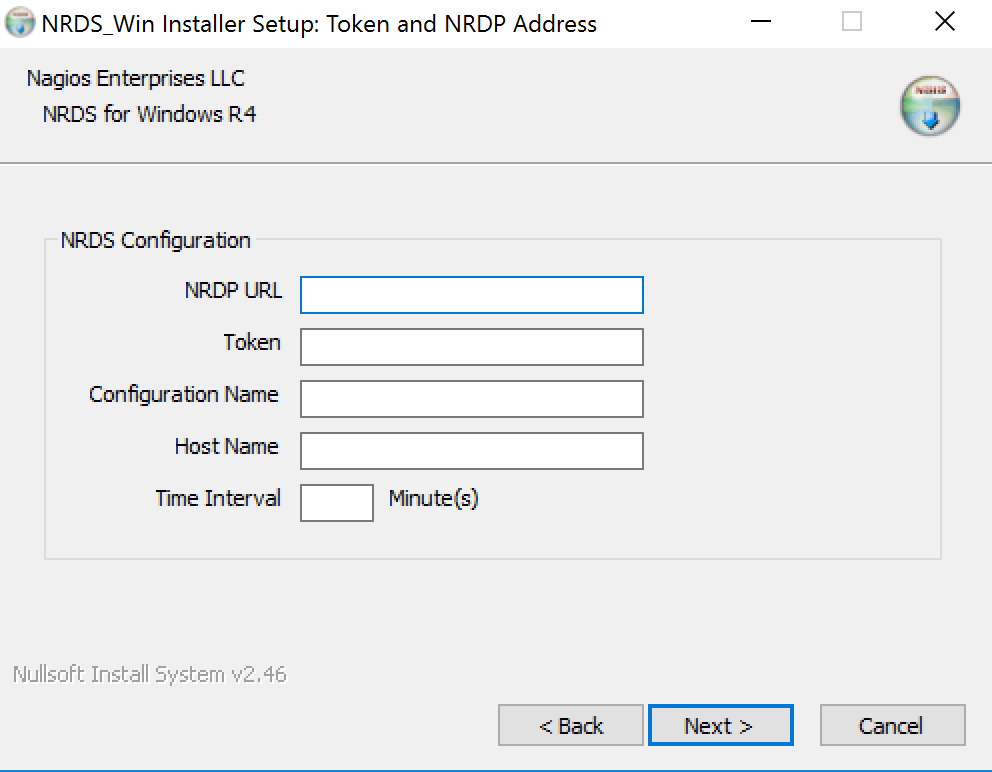
- In the NRDP URL field enter the url of your NRDP server (your blësk server). You can use your blësk server’s FQDN or it’s public IP address. For example: http://1.2.3.4/nrdp/ or http://blesk.mydomain.com/nrdp/
Note: You should use the http protocol. The https protocol isn’t tested yet.
- The Token field is used to define the pre-shared key between the agent that you are installing on this server and the blësk server. This token will be used for the authentication on both sides. For example: _N65=7e43Q5Butj
- The Configuration Name field is used to assign a name to this configuration. For example My Camera server
- The Host Name field is important because it is used to specify the FQDN of the server on which you installed the lite agent. For example camera.mydomain.com
- Time Interval – Keep this at 5 minutes. This is the time we have established as optimal in order to have all information transmitted to the blësk server.
5. After you have entered all of the information, press the “Next” button.
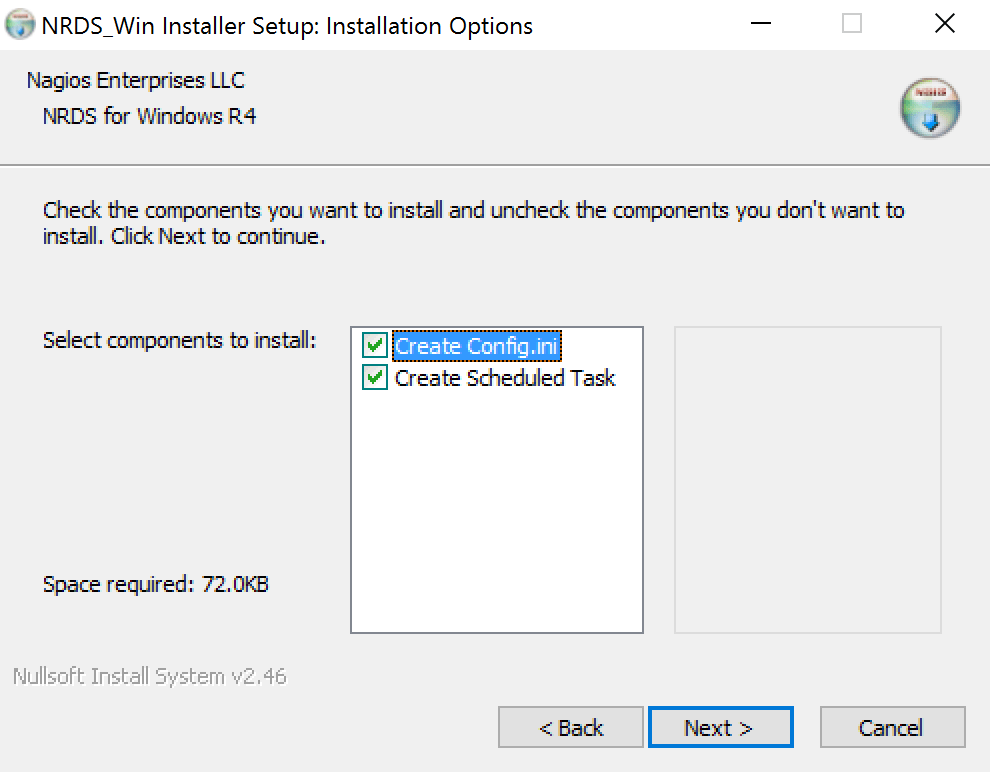
On the next screen keep the two components selected then press “Next”. The first selected component will create the configuration file and the second will add the Windows task needed to automatically send the collected information to the blësk server.
6. On the next screen, Keep the default destination folder and click “Install”.
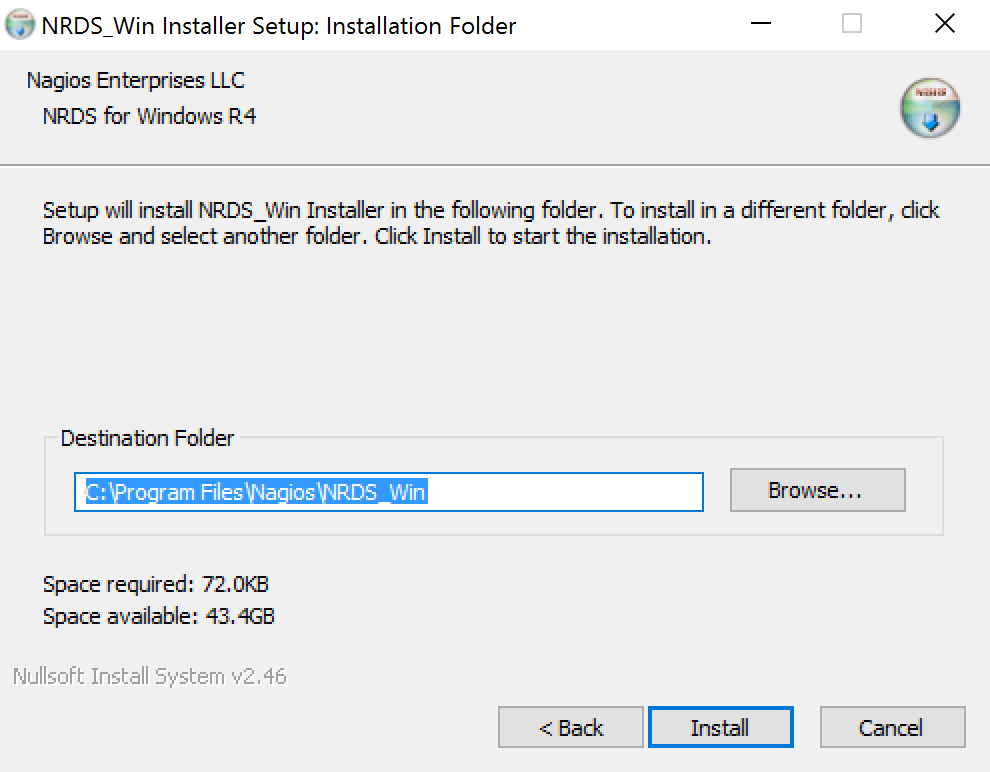
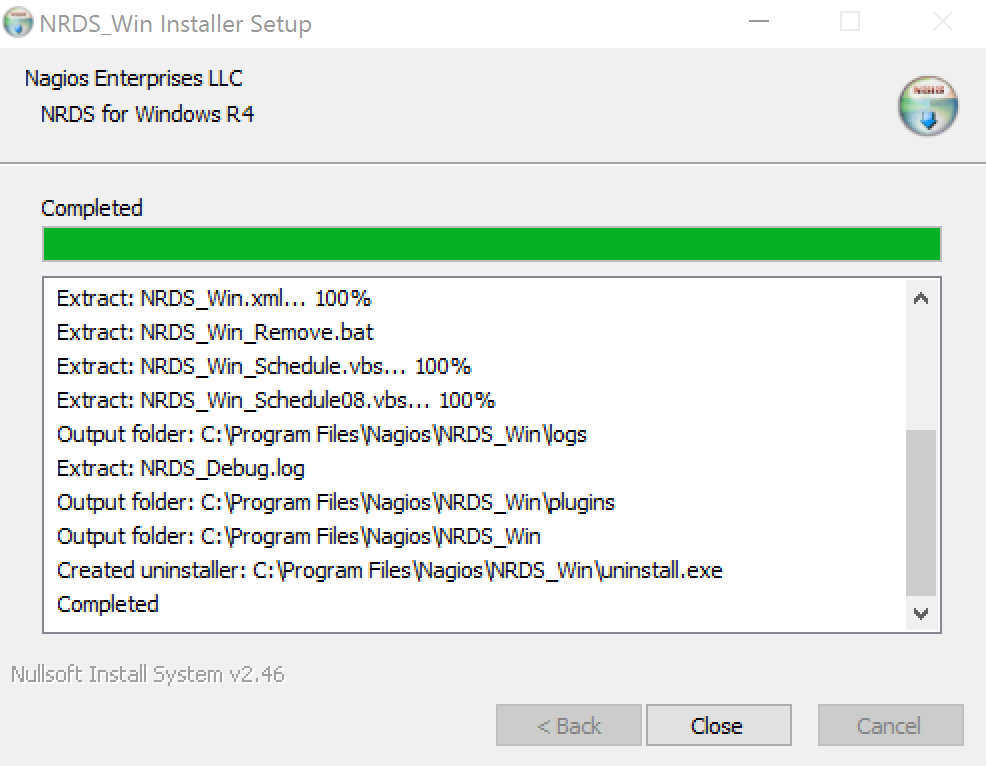
7. Wait for the installation process to complete then click the “Close” button.
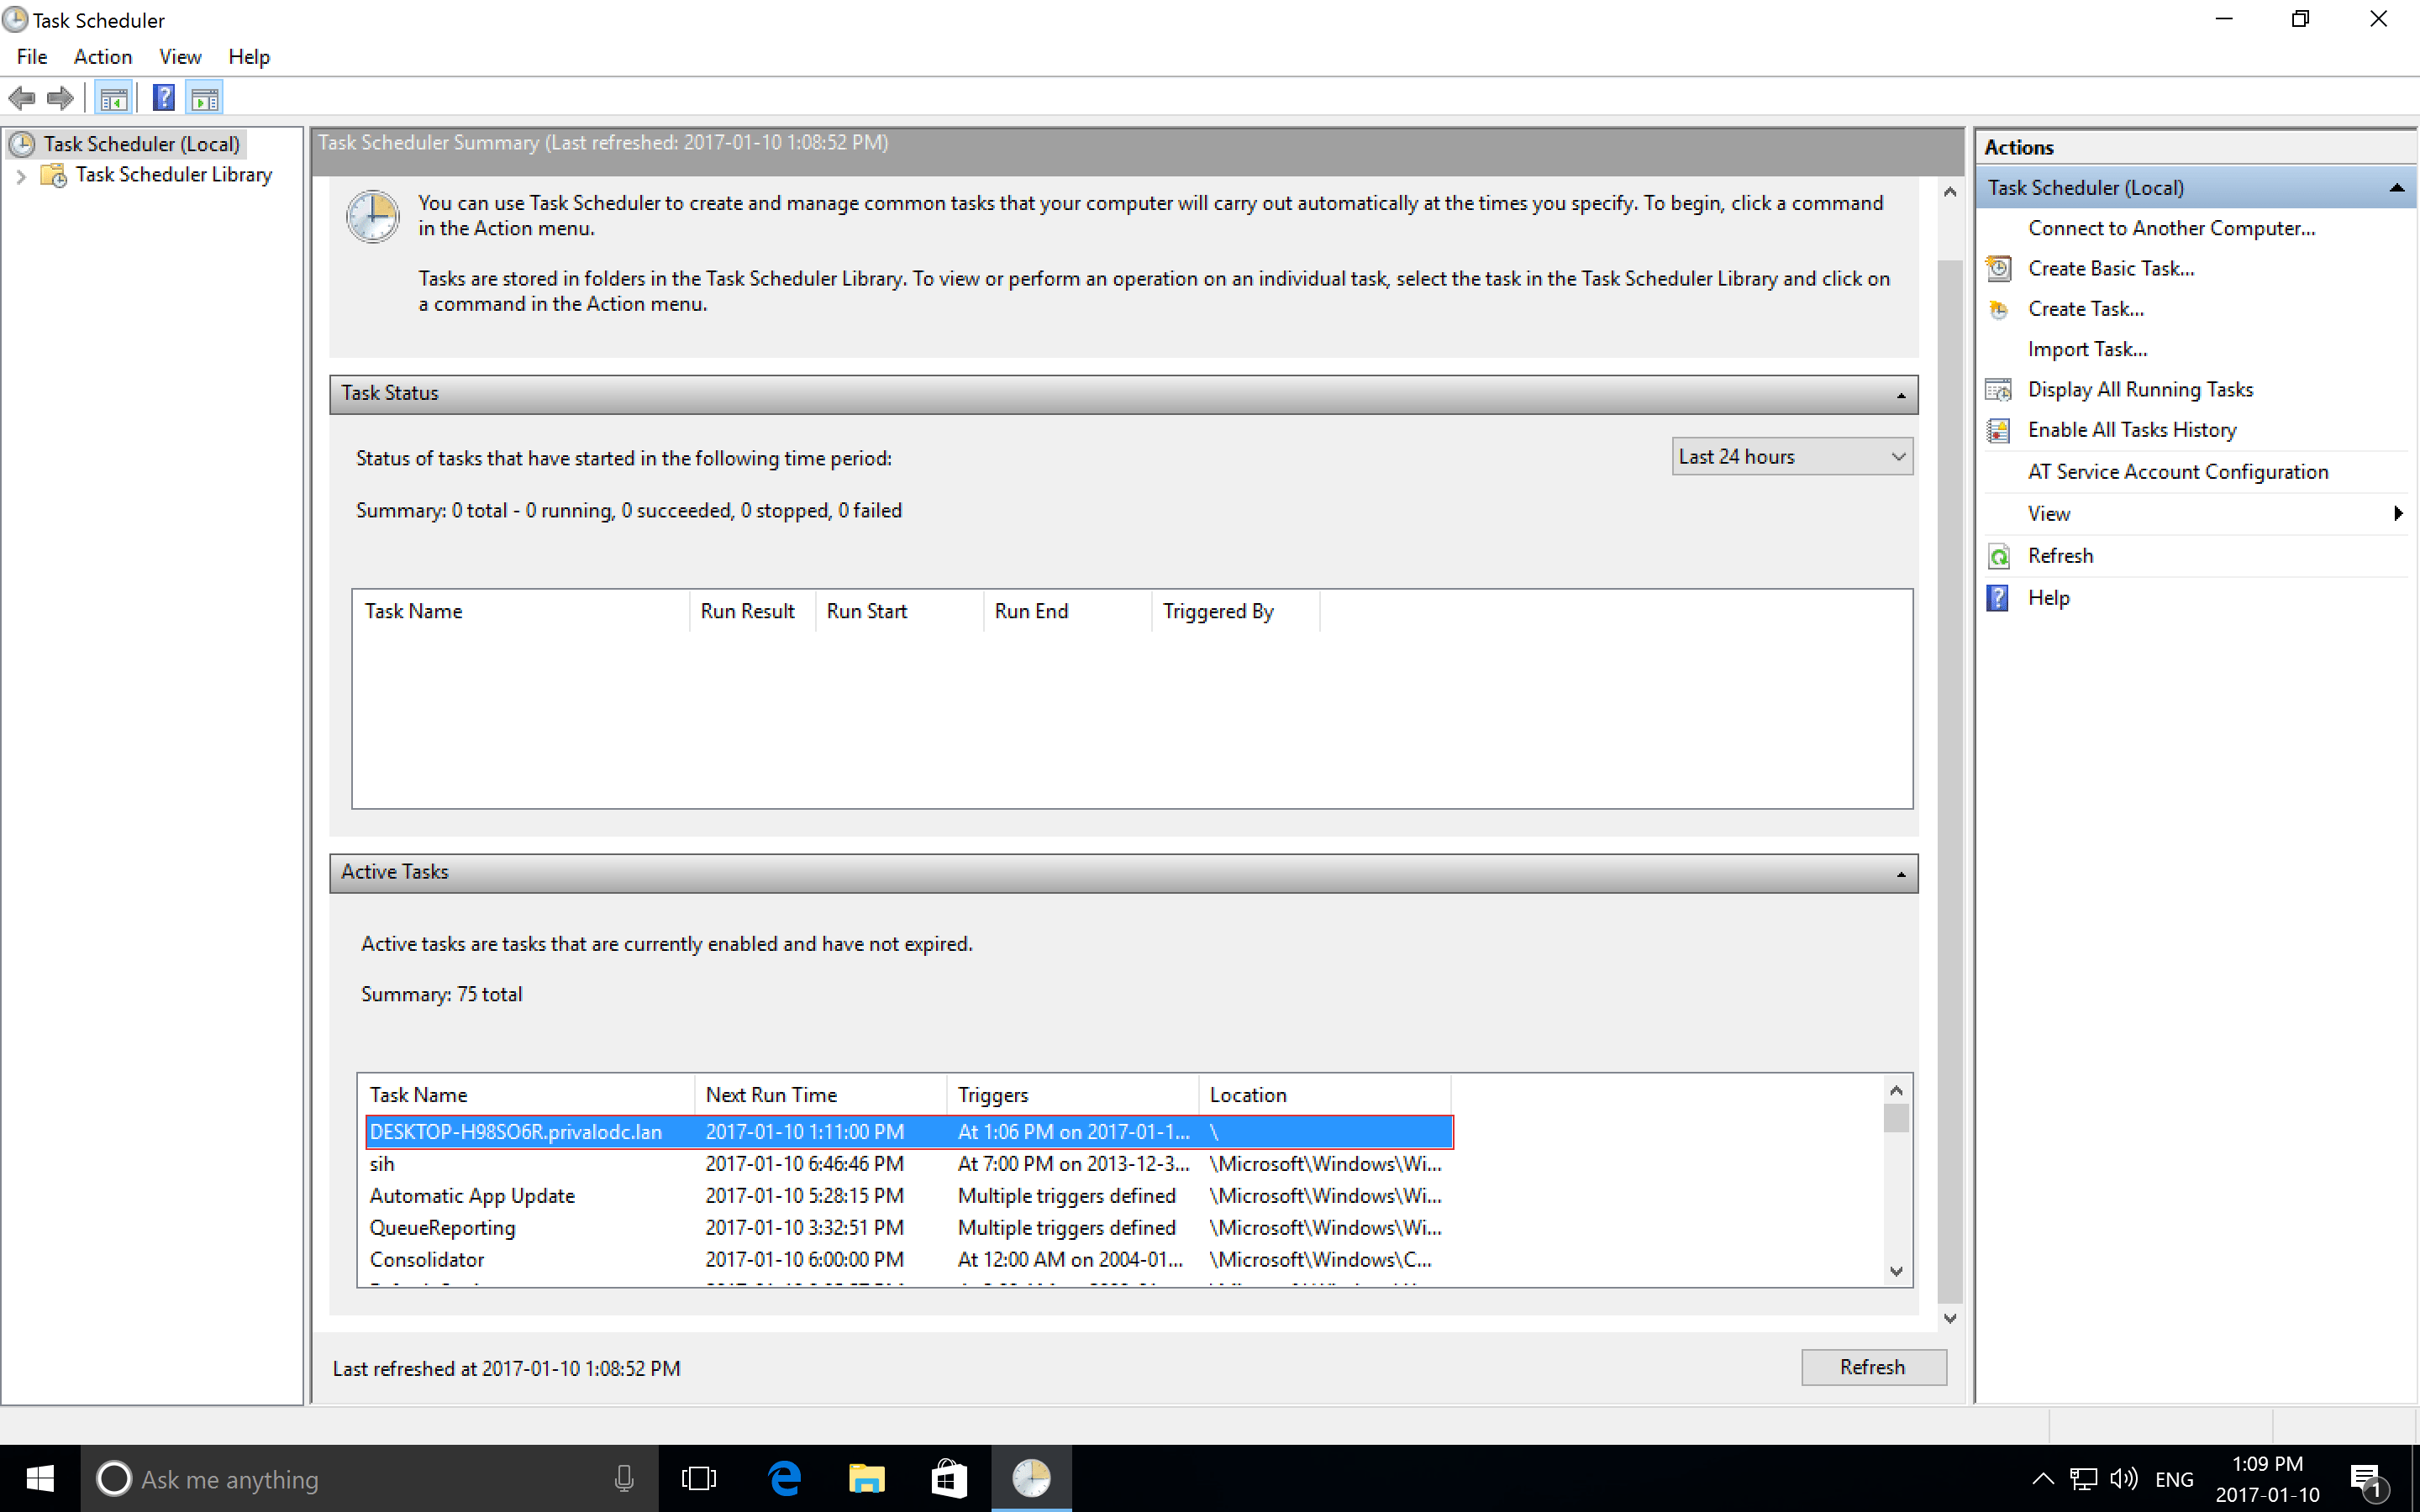
8. Go to the Task Scheduler and verify if the task was created. The name of the task should be the FQDN of the server on which you are installing the agent.
¶ Install the Plugins
The agent uses plugins to gather information such as used disk space and the like. Therefore, we need to copy the plugins that the agent will use into corresponding directory and add the required plugin command lines to the appropriate section of the configuration file.
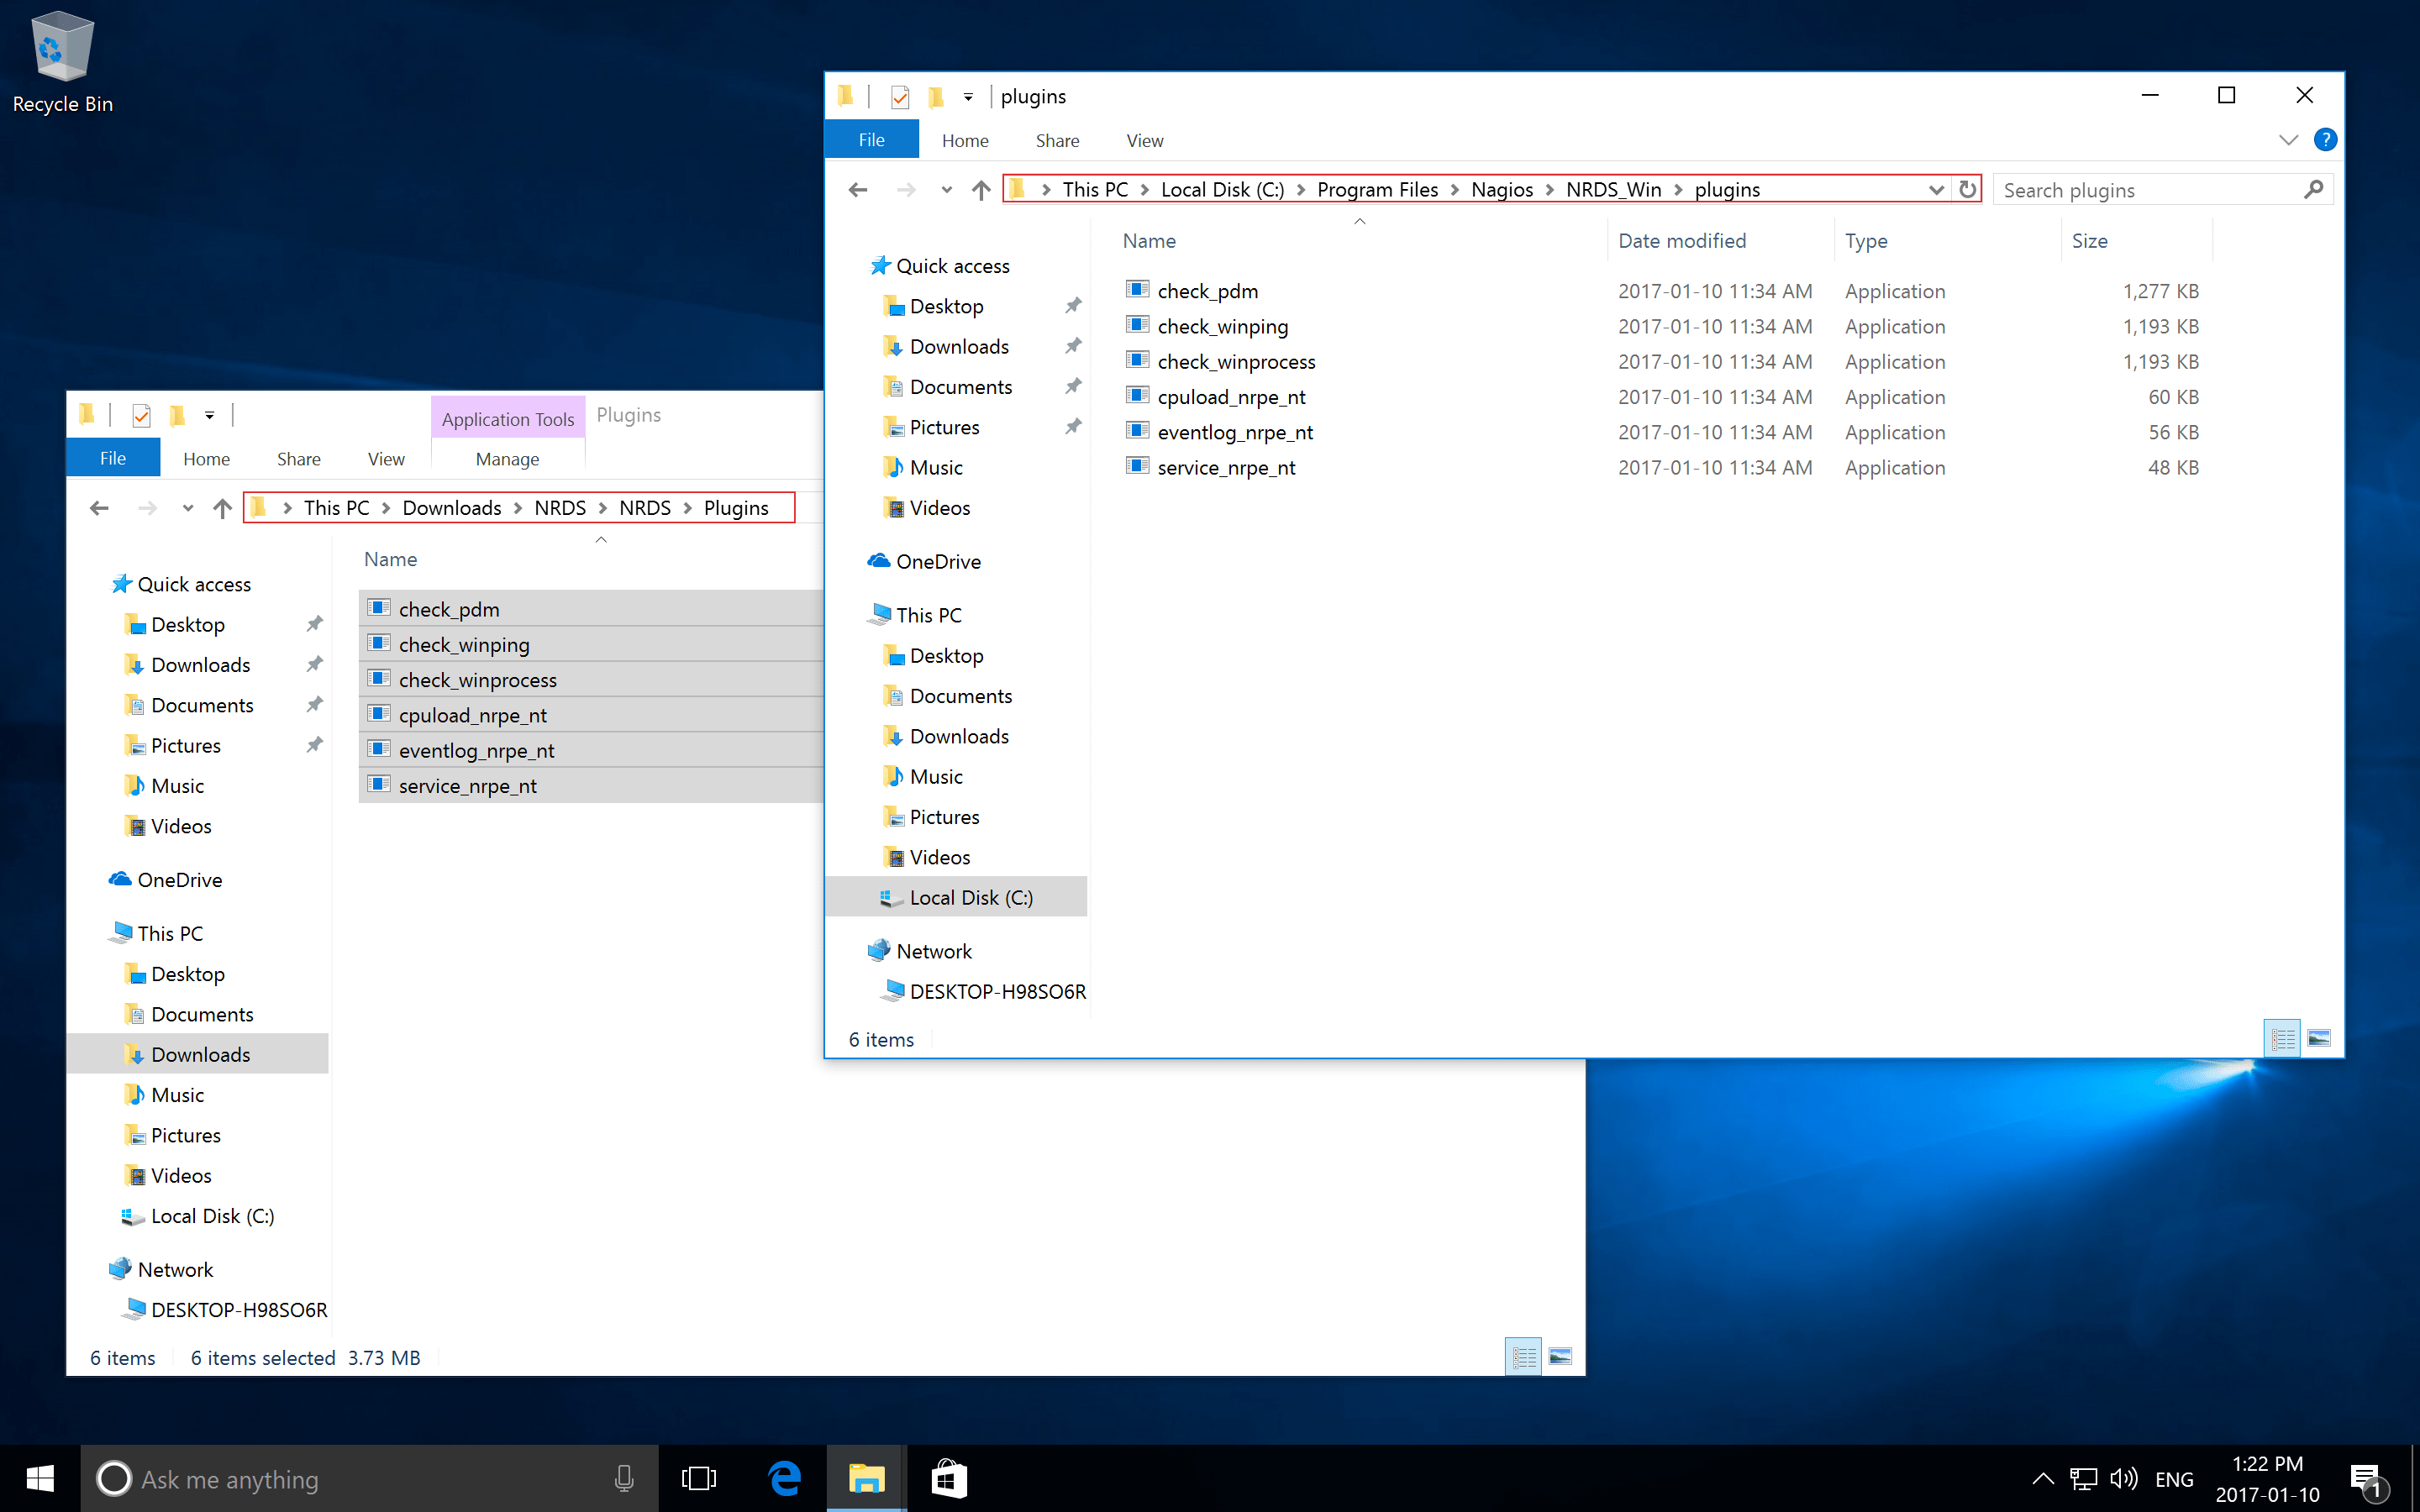
1. Open the folder plugins located under “C:\Program Files\Nagios\NRDS_Win\config” (if you kept the default installation folder).
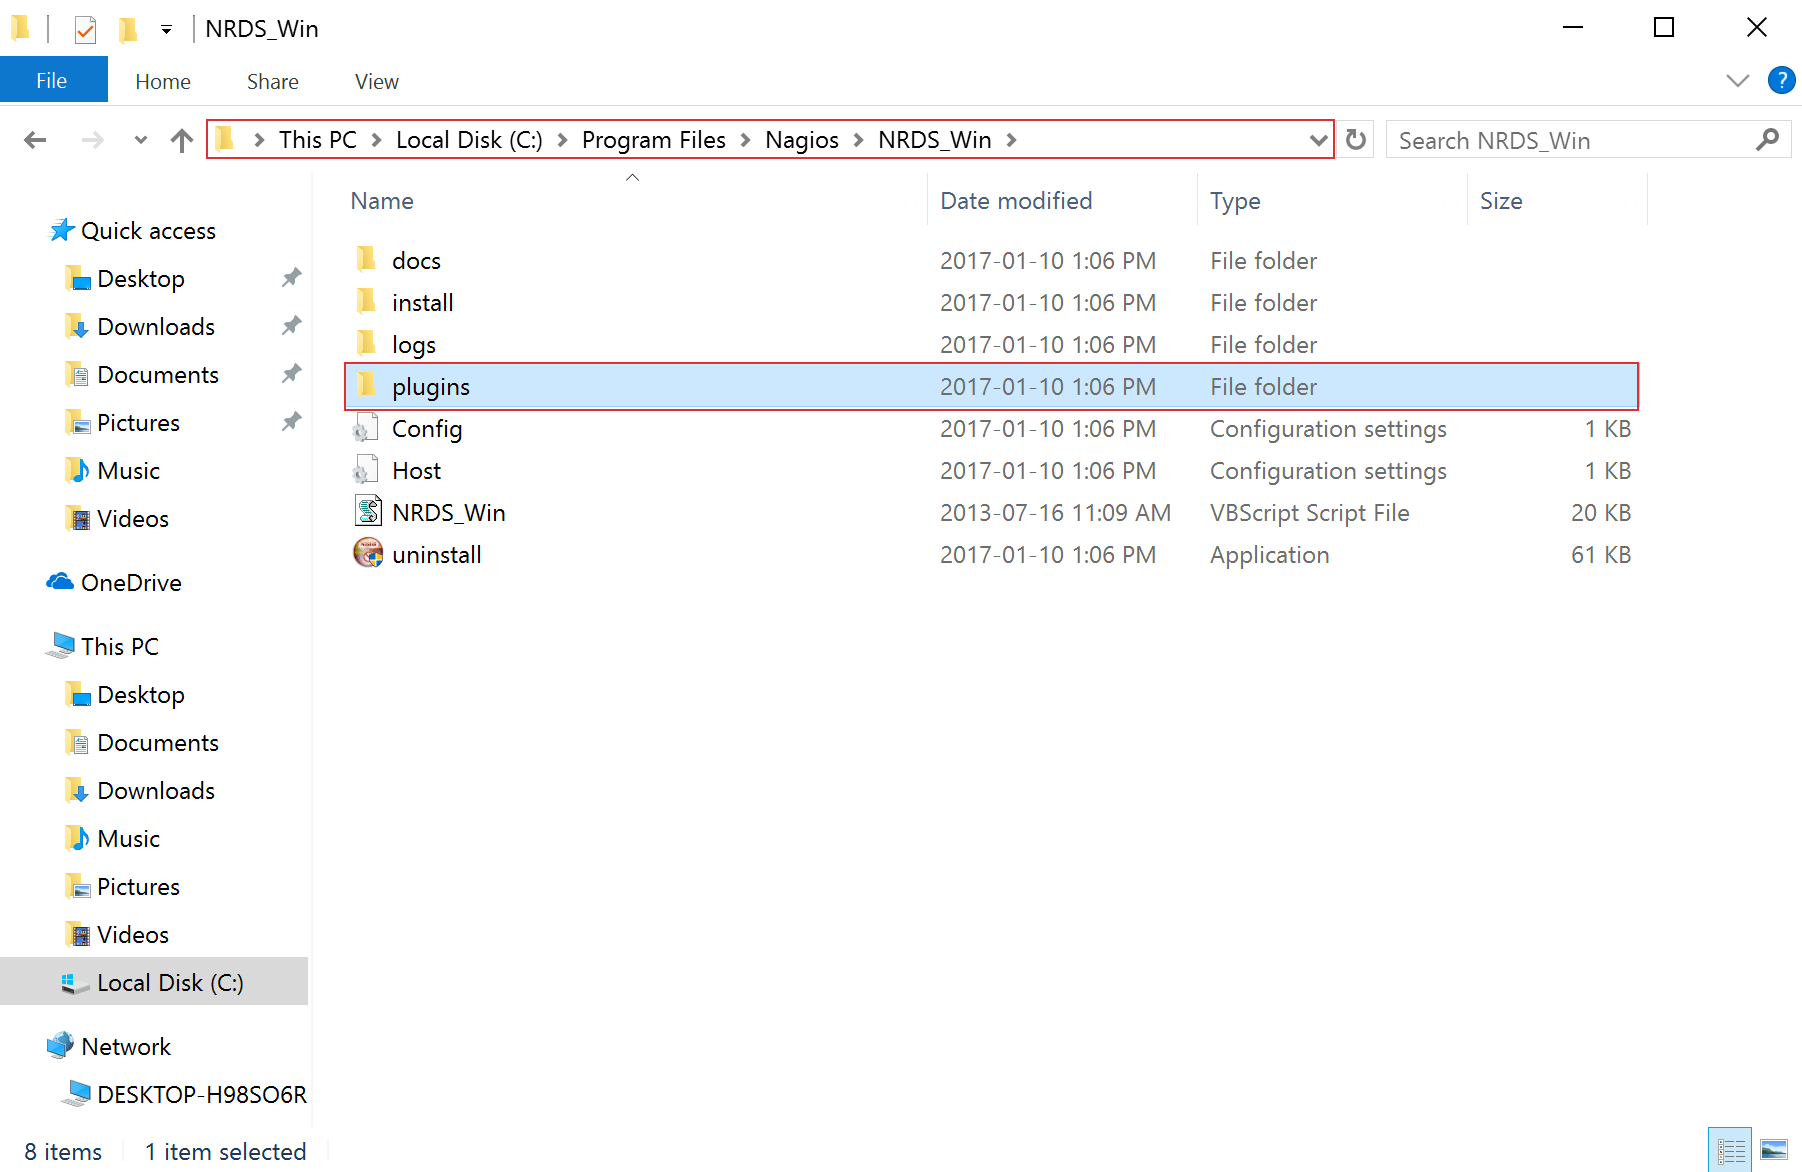
Note: This is where we’ll paste the plugins needed in order for the agent to work.
2. Now go to the agent folder that you had previously unzipped and open the “Plugins” folder.
3. Copy all plugins from the “Plugins” folder to the “C:\Program Files\Nagios\NRDS_Win\plugins” folder.
¶ The plugins command
You can tell the agent how to use the plugins by adding some new command lines to its configuration file. Each command informs the program how to use the plugin, and each plugin has a specific function.
Edit the configuration file at “C:\Program Files\Nagios\NRDS_Win” using administrator permissions. You should see something like the following:
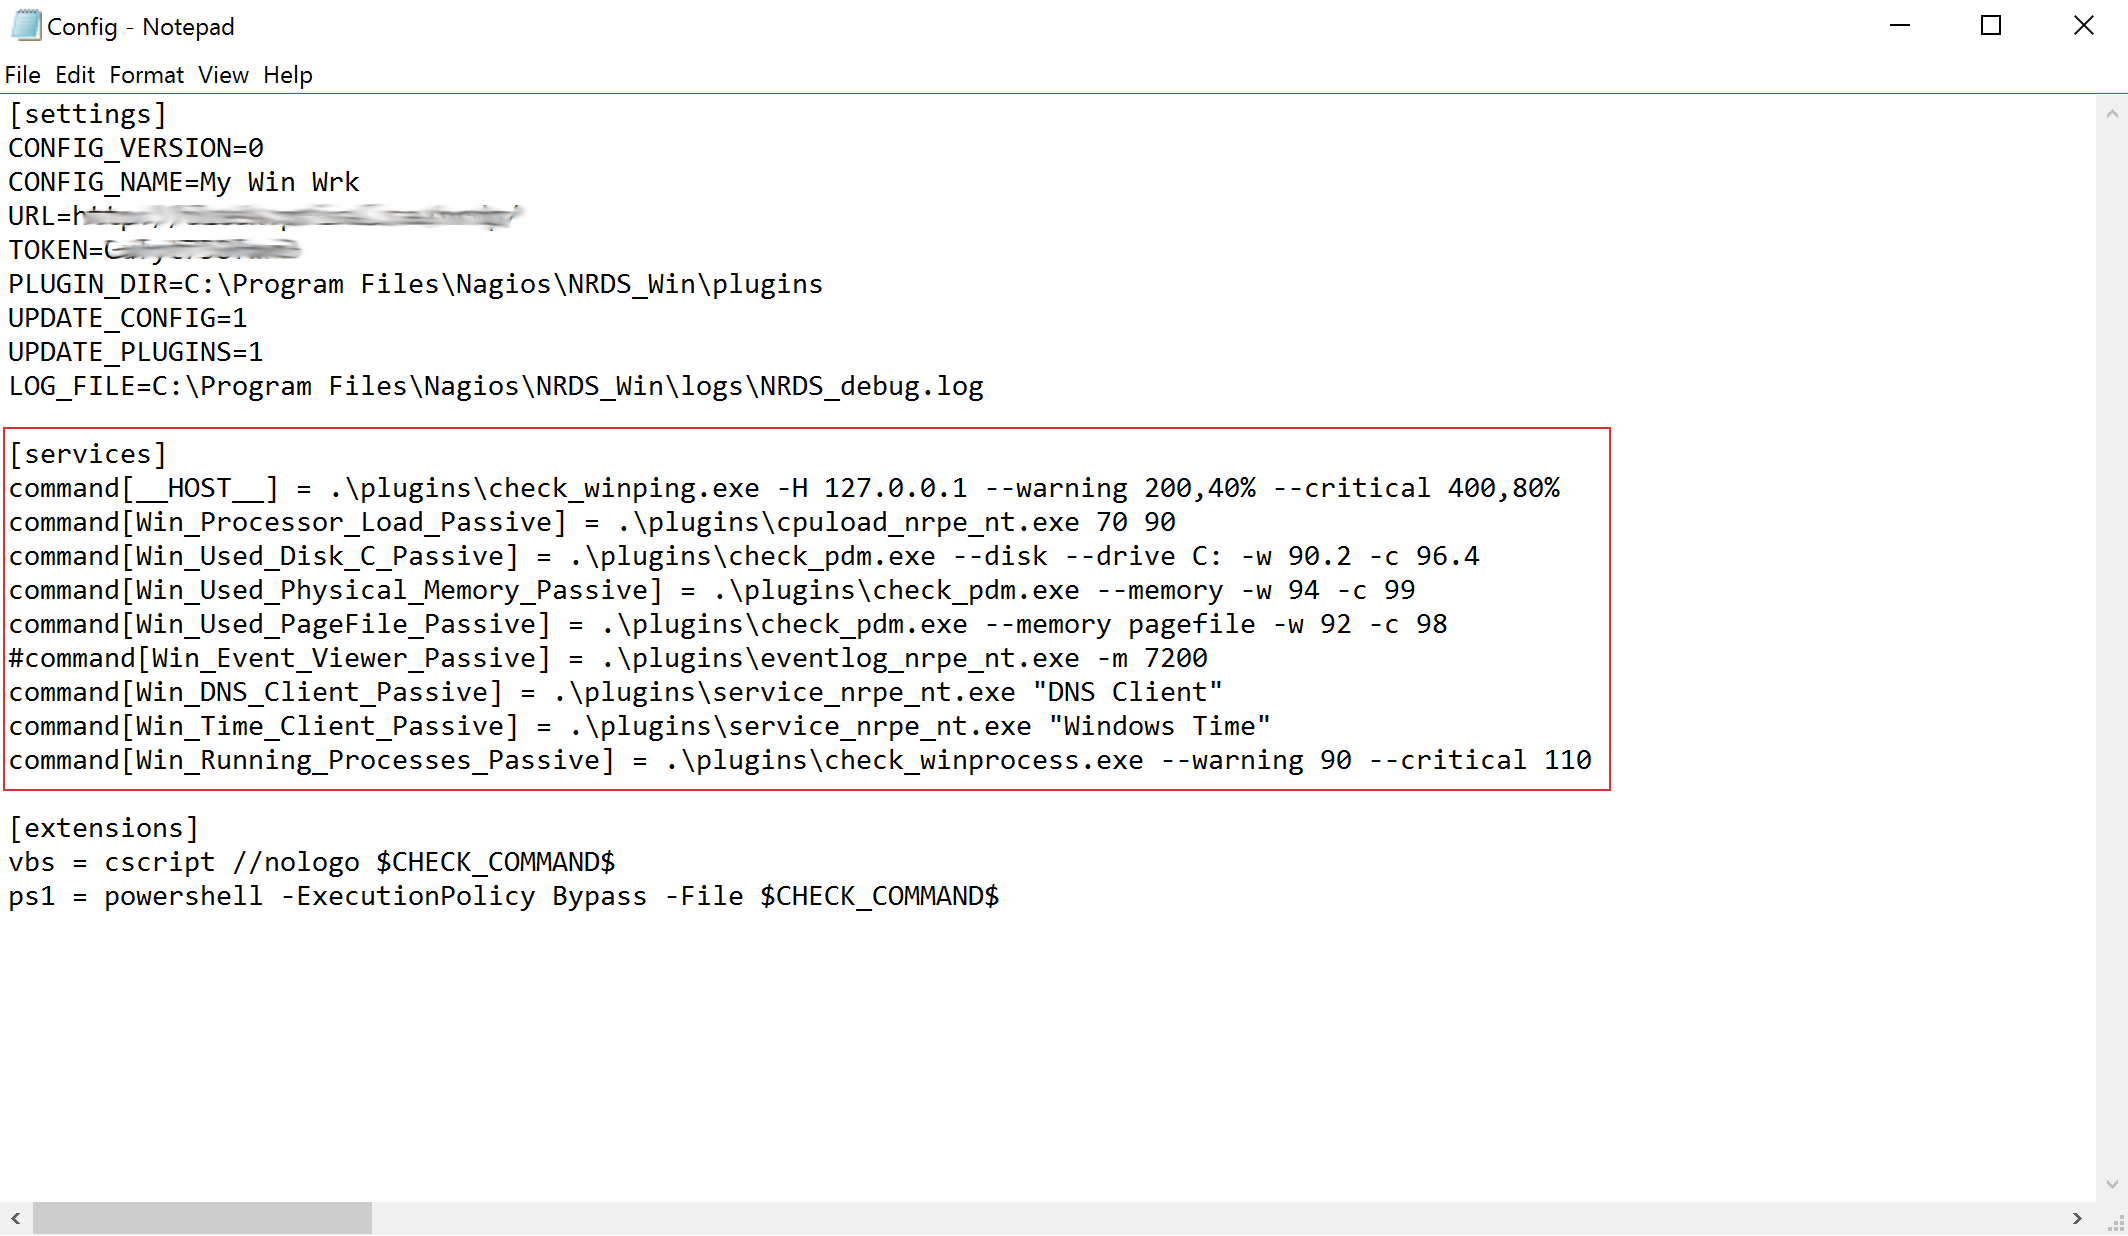
1. There are three sections in the configuration file: [settings], [services], and [extensions]. We need to add our commands (as shown below) to the [services] section of the config file.
command[__HOST__] = .\plugins\check_winping.exe -H 127.0.0.1 --warning 200,40% --critical 400,80%
command[Win_Processor_Load_Passive] = .\plugins\cpuload_nrpe_nt.exe 70 90
command[Win_Used_Disk_C_Passive] = .\plugins\check_pdm.exe --disk --drive C: -w 90.2 -c 96.4
command[Win_Used_Physical_Memory_Passive] = .\plugins\check_pdm.exe --memory -w 94 -c 99
command[Win_Used_PageFile_Passive] = .\plugins\check_pdm.exe --memory pagefile -w 92 -c 98
#command[Win_Event_Viewer_Passive] = .\plugins\eventlog_nrpe_nt.exe -m 7200
command[Win_DNS_Client_Passive] = .\plugins\service_nrpe_nt.exe "DNS Client"
command[Win_Time_Client_Passive] = .\plugins\service_nrpe_nt.exe "Windows Time"
command[Win_Running_Processes_Passive] = .\plugins\check_winprocess.exe --warning 90 --critical 110The commands are composed of three parts: “Command Name”, “plugin path”, and “options”. Here some explanations regarding each of them.
- Command[Win_Processor_Load_Passive] will check the processor load. This command uses the “cpuload_nrpe_nt.exe” plugin and in this case we will receive a warning if the load is between 70% and 90%, and a critical alert if more than 90%.
- Command[__HOST__] is a special command used to ping the server itself. It uses the “check_winping.exe” plugin to do its job. At the end of this command we can see definition for the warning and the critical state threshold in %. In our case if in 200 ms we have more than a 40% of loss, we will be notified with a warning. If in 400 ms there is more that 80% packet loss, the state will change to critical.
- Command[Win_DNS_Client_Passive] will check if the “DNS Client” service is up and running and will send you a notification if it is down.
- Command[Win_Used_PageFile_Passive] will check the page file usage. Warnings are configured at 92% and the critical state is 98%.
- Command[Win_Used_Disk_C_Passive] will help you keep an eye on your disk space. You can add additional lines if you need to monitor more than one disk. Just copy and paste the line to create a new one and change the default C: letter.
- Command[Win_Used_Physical_Memory_Passive] monitor used memory on your server. In our definition, you’ll get a warning notification at 94% and a critical notification at 100%.
- Command[Win_Event_Viewer_Passive] will check the event viewer for warning or critical messages. You can use the “-m” option to specify how many minutes back from the current time to check (eventlog_nrpe_nt.exe -m 7200 will check for the last 5 days). Using the “-s” option to exclude a service (eventlog_nrpe_nt.exe –s “Windosws DNS” will not notify you if there is a warning or critical messages for the “Windows DNS” service). To exclude a specific event ID number use option “-i” (event_nrpe_nt.exe – i “1000, 7011”).
- Command[Win_Time_Client_Passive] verifies if the service “Windows Time” is up. If not, you will receive a notification.
- Command[Win_Running_Processes_Passive] will check the number of running services. In our definition, we have configured the agent to send a warning when the number of running services is between 90 and 109. At 110 running services, you will receive a critical notification. Feel free to modify this to your liking.
¶ Accept the connection
That’s all concerning the installation and configuration of the agent. Now, let’s see how we can configure the blësk server to accept the data sent by the agent.
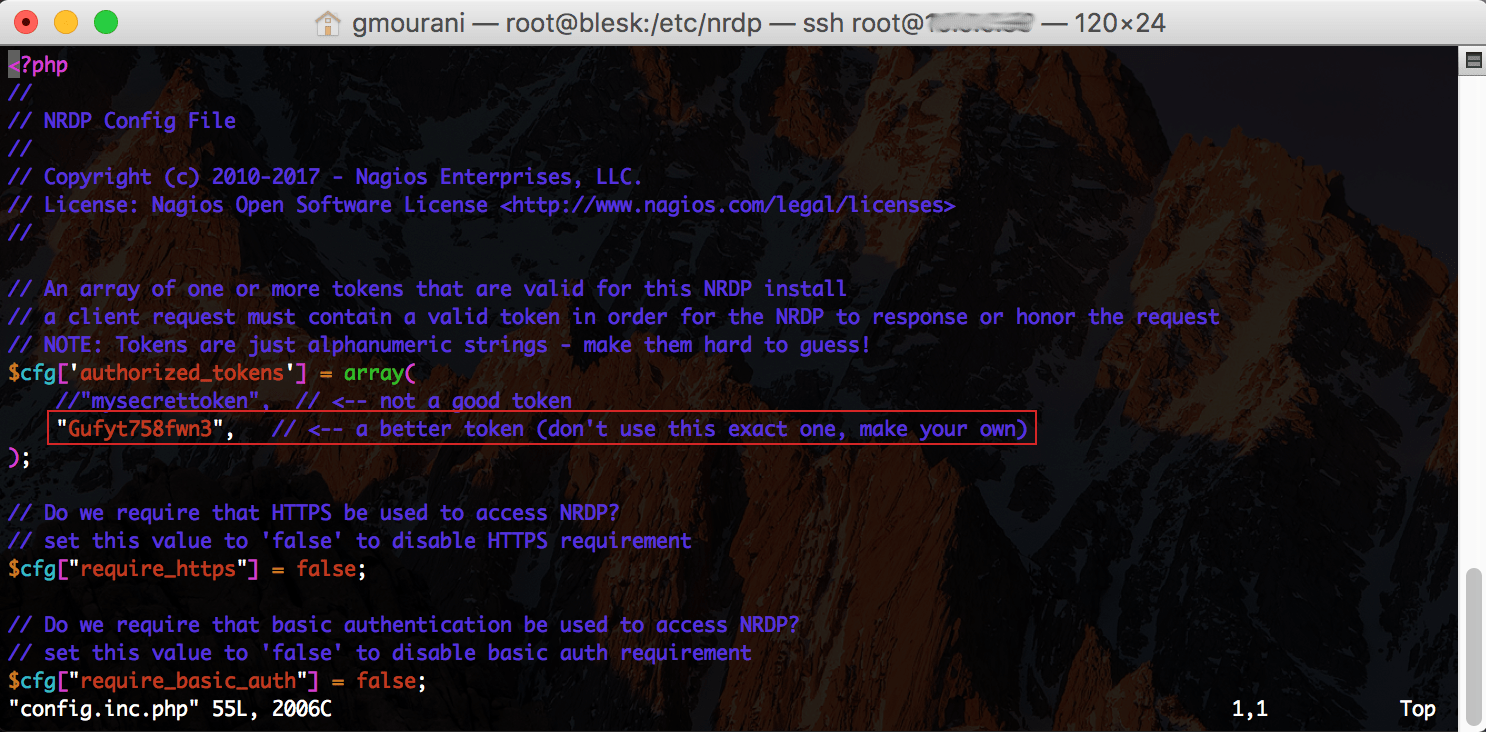
1. Log in to the blësk server through an SSH connection. Edit the config.inc.php file located in the /etc/nrdp directory.
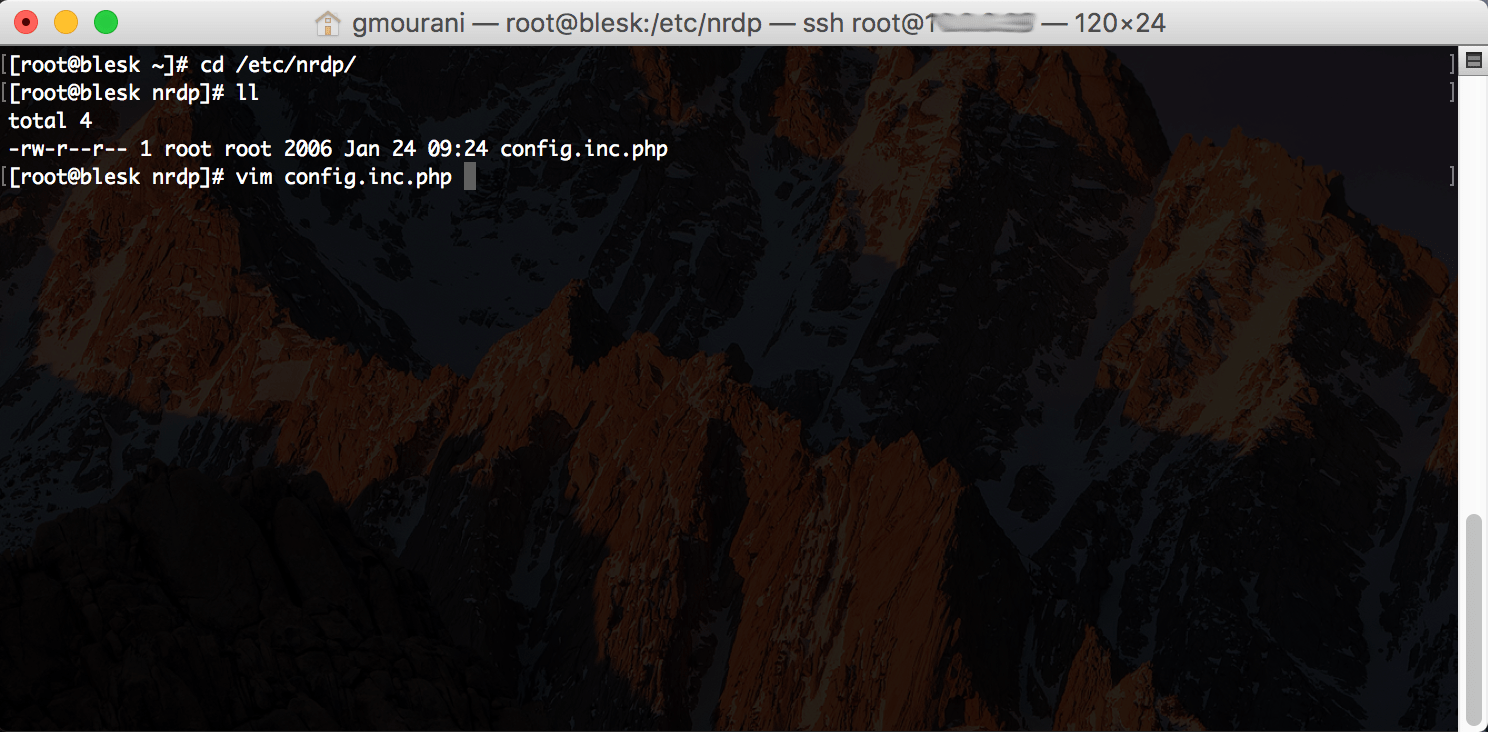
2. Enter the pre-shared key that you had chosen previously under the “authorized_tokens” section of the configuration file and save your change.
¶ Create the new Host
Now the agent is installed and configured on the remote Windows server we wish to monitor, and its pre-shared key has been added to the blësk server NRDP configuration. The last step is to create/add the host in the APM module and start monitoring it.
1. Log in to the blësk web interface. Select the APM module.

2. Click on “Configure" from the top menu bar.
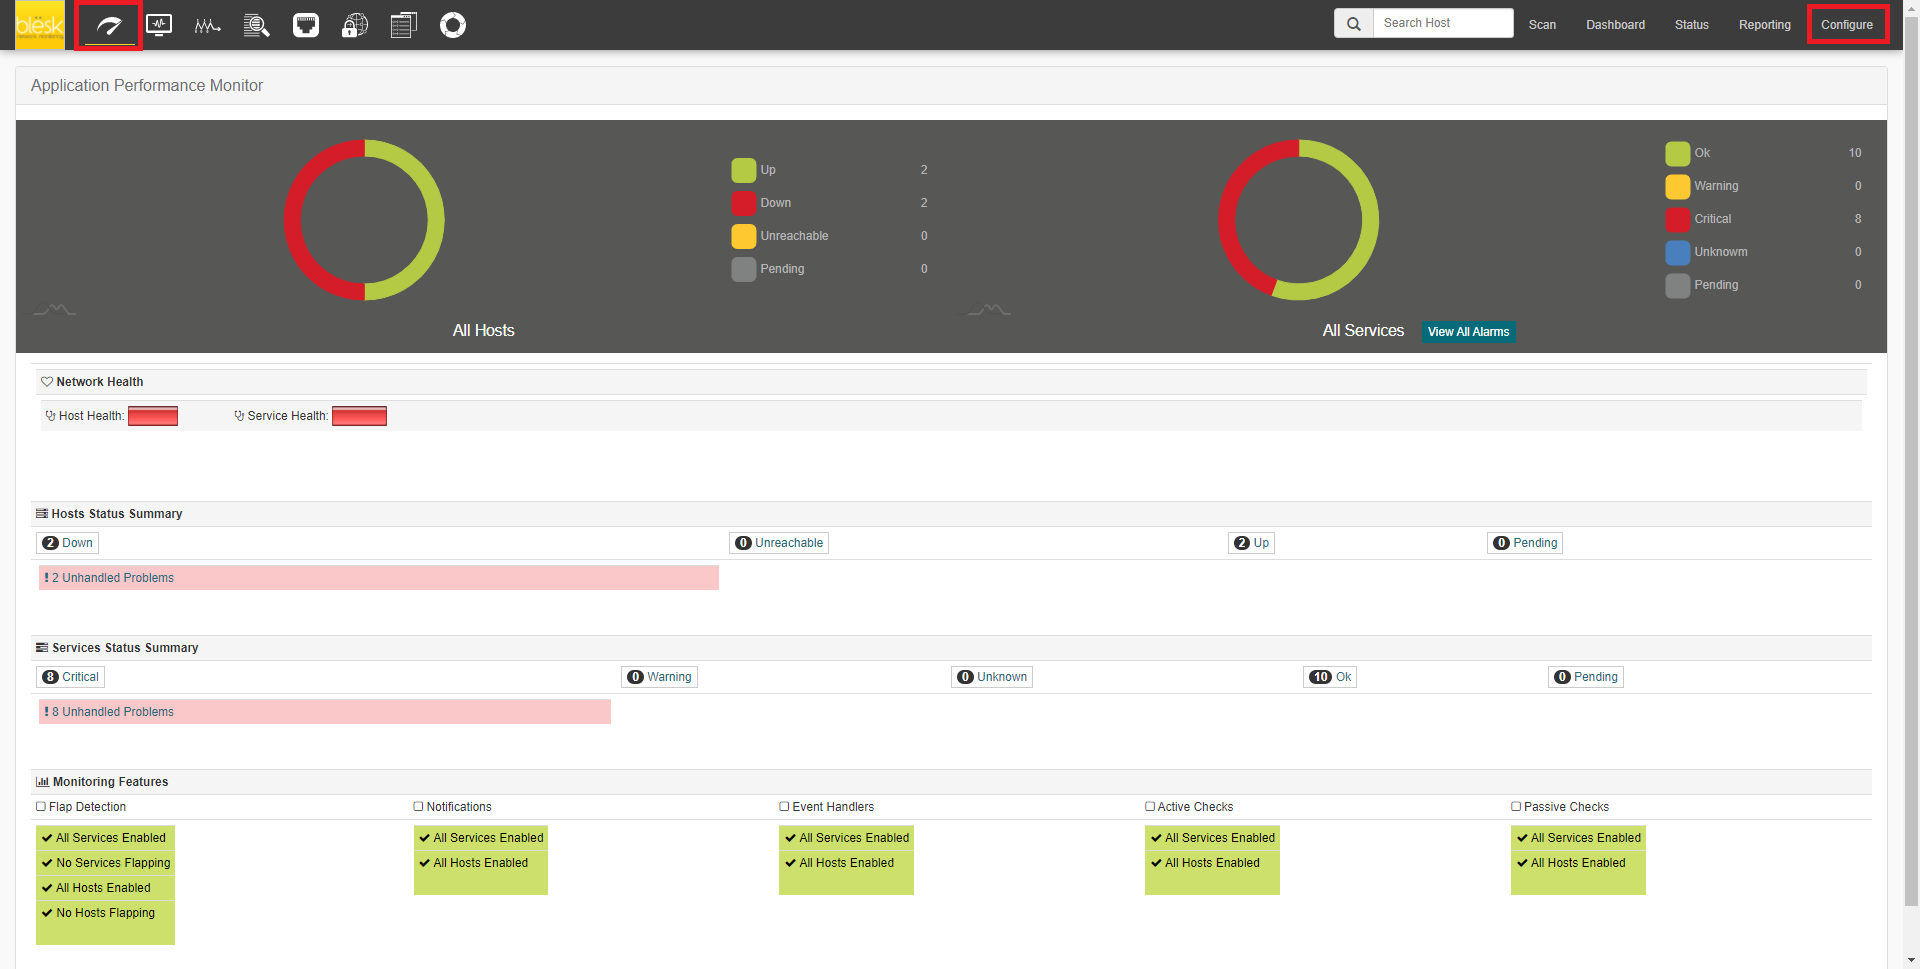
3. On the left panel select “Supervision | Host”. Press the “Add” button to add a host.

4. The following page will appear. Three of the fields are required, after that you should select the check command to use and fill the argument field.
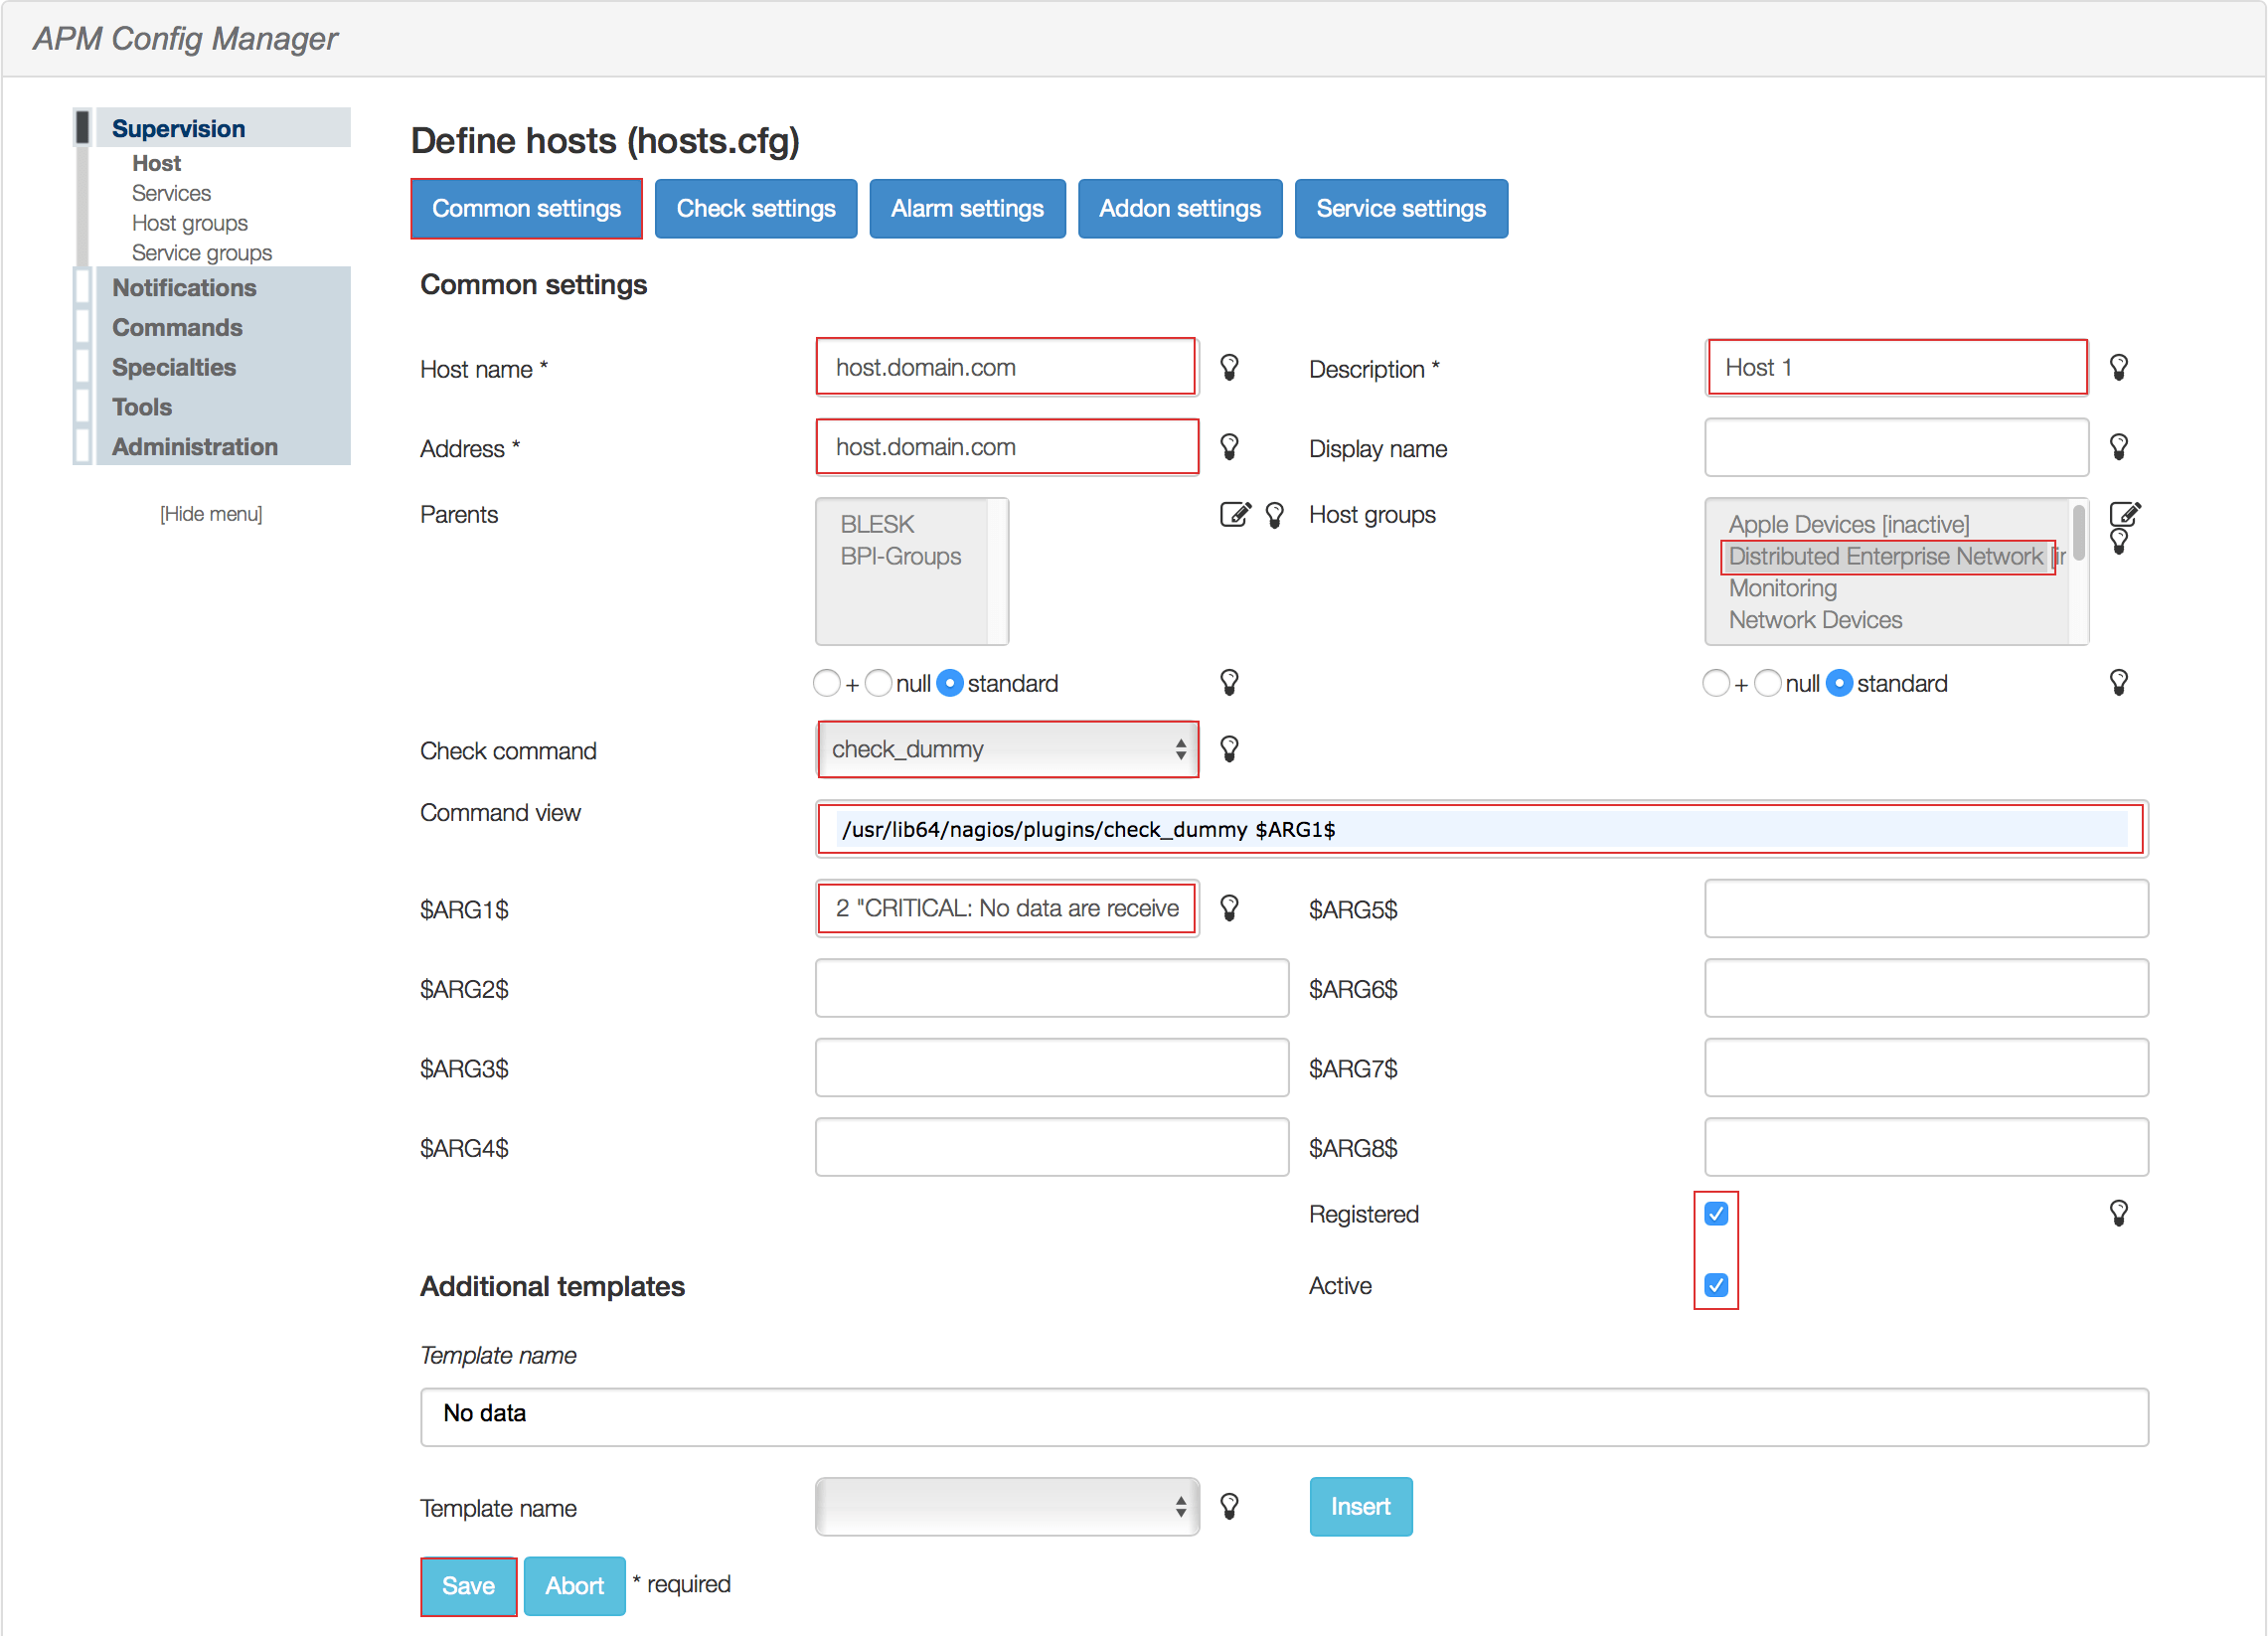
- Host name – here you should enter the FQDN of the server to be monitored.
- Address – as with the hostname, use the FQDN of the server to monitor.
- Description – here you can add a description for the server.
- Host groups – here you should choose the group in which the host will appear in APM. If you don’t choose the host group, you wont be able to see your host.
- Check command – Keep in mind that we check passively the server on which the agent is installed. So, we need to choose a command that will fit our needs. That command is “check_dummy”. After choosing the command, you should see the command definition in the “Command view” field.
- $ARG1$ – after choosing the command, you need to add some arguments. For a new passive created host, we use the following arguments (2 “CRITICAL: No data is received from this host since last check”) which lets the system inform us when no data is received from the host.
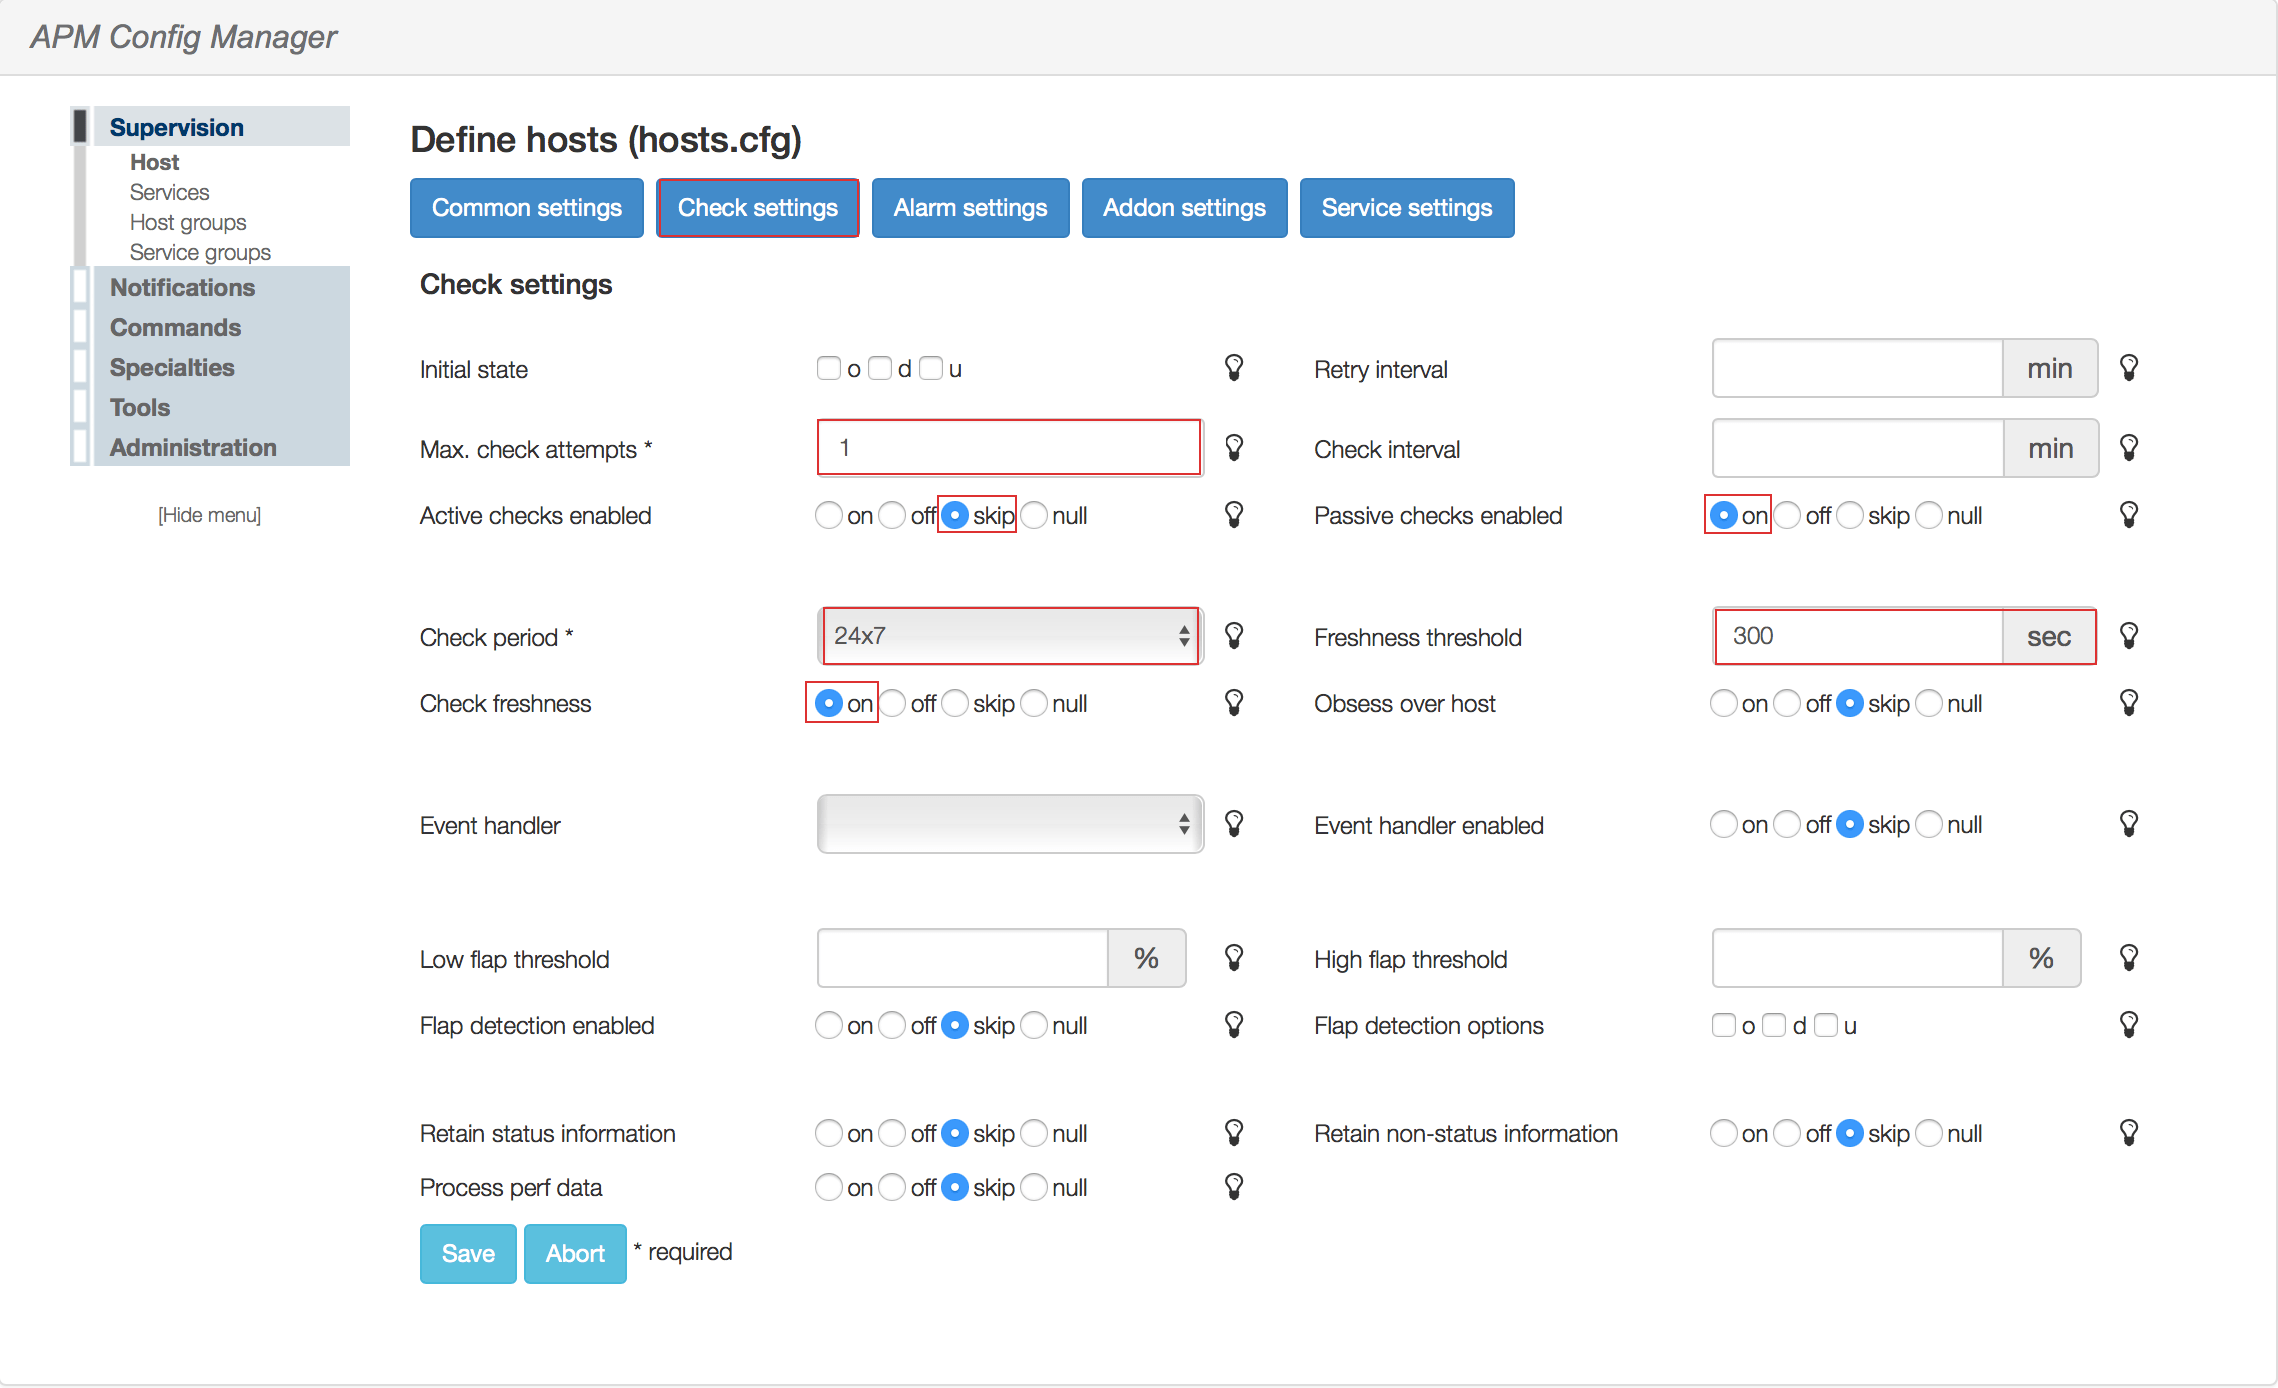
5. Next, check the boxes “Registered” and “Active”, and go to the next tab “Check settings”. In the “Check settings” tab, we use the following settings for passively checked nodes.
- Max check attempts = 1
- Active checks enabled = off
- Passive checks enabled = on
- Check period = 24×7
- Freshness threshold = 300
- Checks freshness = on
6. We will complete the addition of the host by going to the “Alarm settings” tab. Here you have the default settings for passively checked nodes.
- Contact groups – if you want a group to be alerted, select the contact group that will receive the notifications.
- Contacts – if you prefer a contact to be alerted, select the user that will receive the notifications concerning this node.
- Notification period – the period during which the notifications will be sent. Generally we keep this simple and choose to send them 24×7.
- Notifications interval – the interval in minutes between host notifications. By default this is 60 minutes. If the node is down, you will receive notification at the specified interval.
- Notification enabled – enable or disable the notifications.
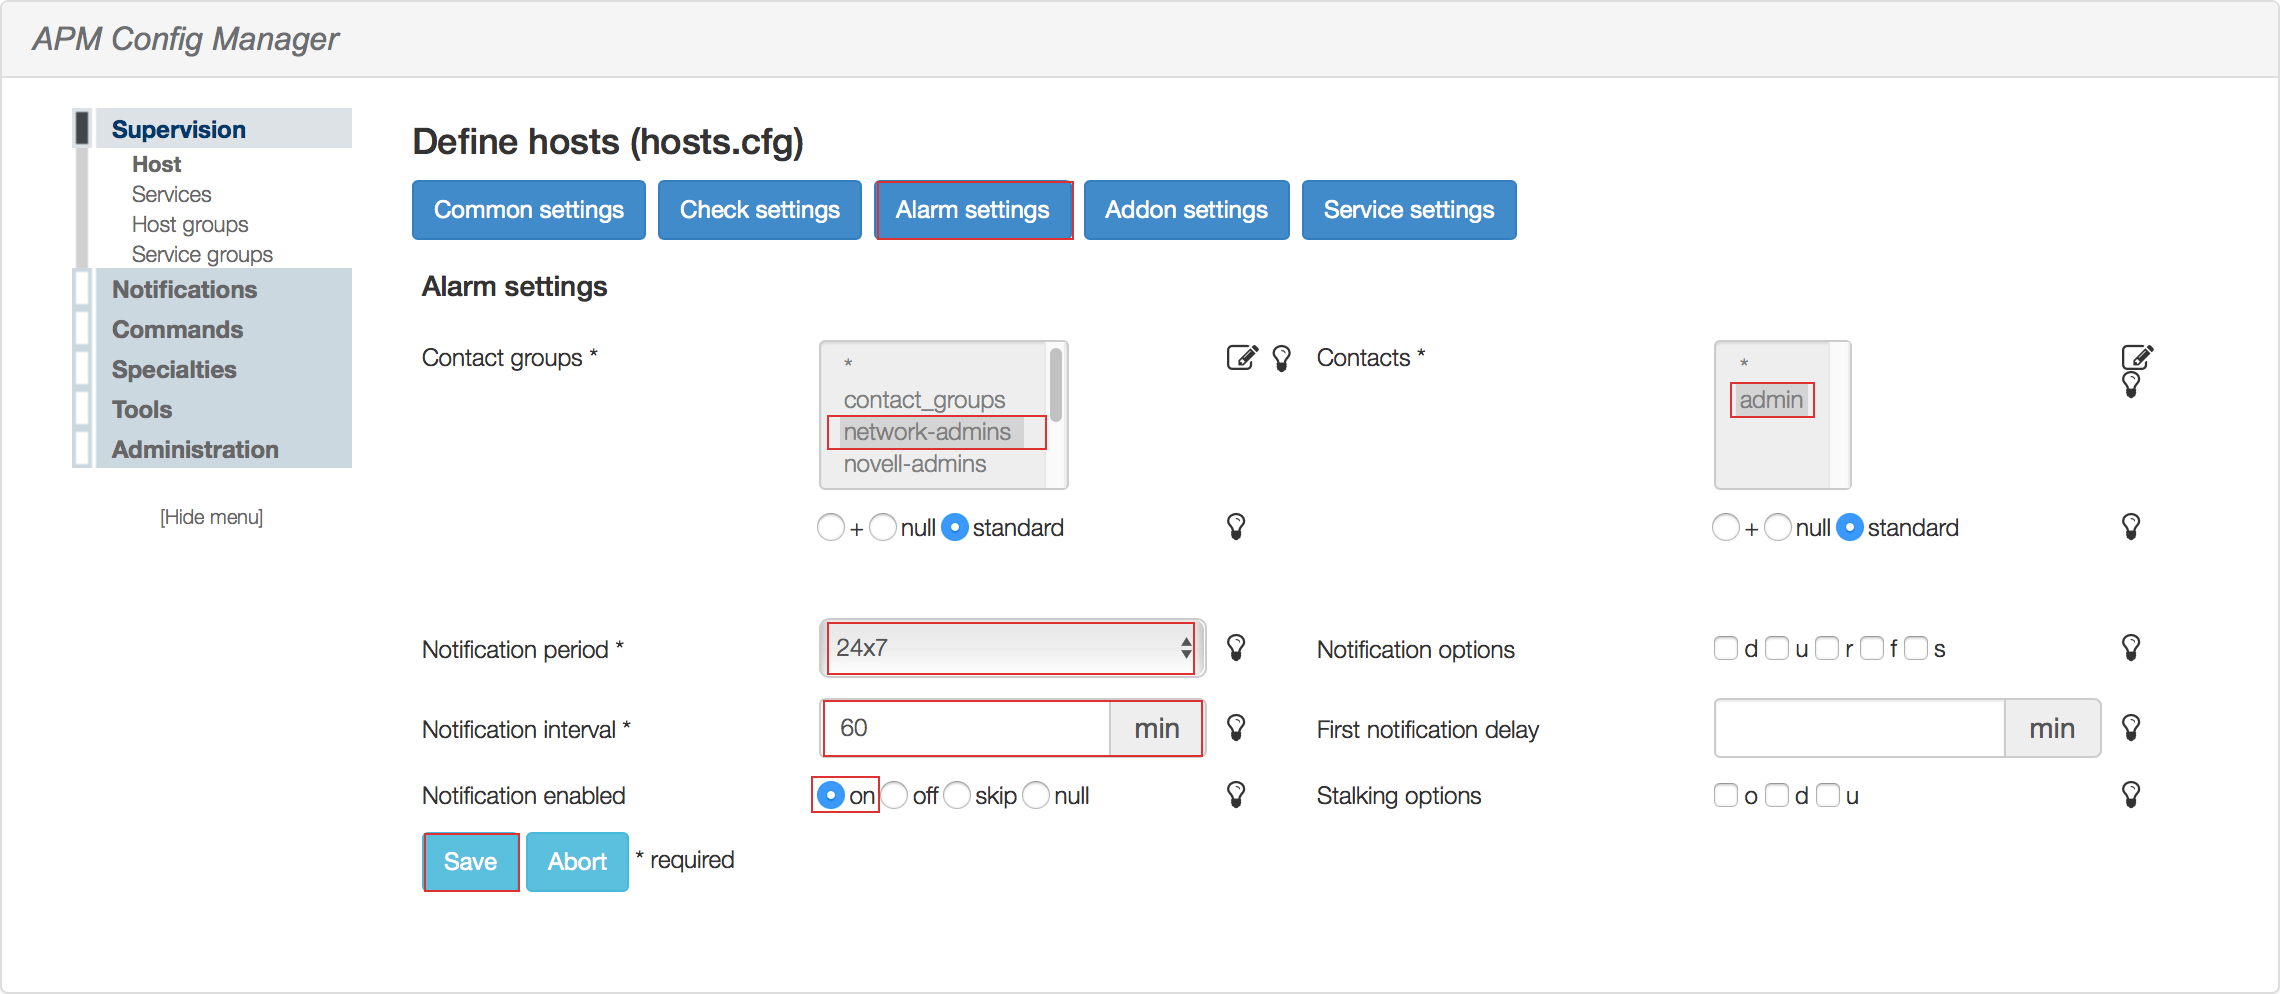
Once completed, click on the Save button to save your changes for the host definition.
¶ Activate passive services
Once the passive host has been created and activated in APM, we need to activate the passive services to monitor on the host. These services represent the command lines we added in the agent configuration file on the remote Windows server.
1. For passive checks, there is eight pre-defined service template that we can activate in blësk. Go to “Configure | Administration | Supervision | Services”, then search for “passive” to see the list of passive check services available.

2. To activate, register and associate the passive service template to a passive host, edit the desired passive services template, then be sure that the following are selected.
- The “Registered” check box should be checked.
- The “Active” check box should be checked.
- You must, at a minimum, use the default selected “Host group” called “Distributed Enterprise Network” (or select another one of your choice), or instead the host for which this passive service should be associated in the “Host” field. It is up to you to choose the method used to associate the service to the host (Host groups vs Hosts approach).
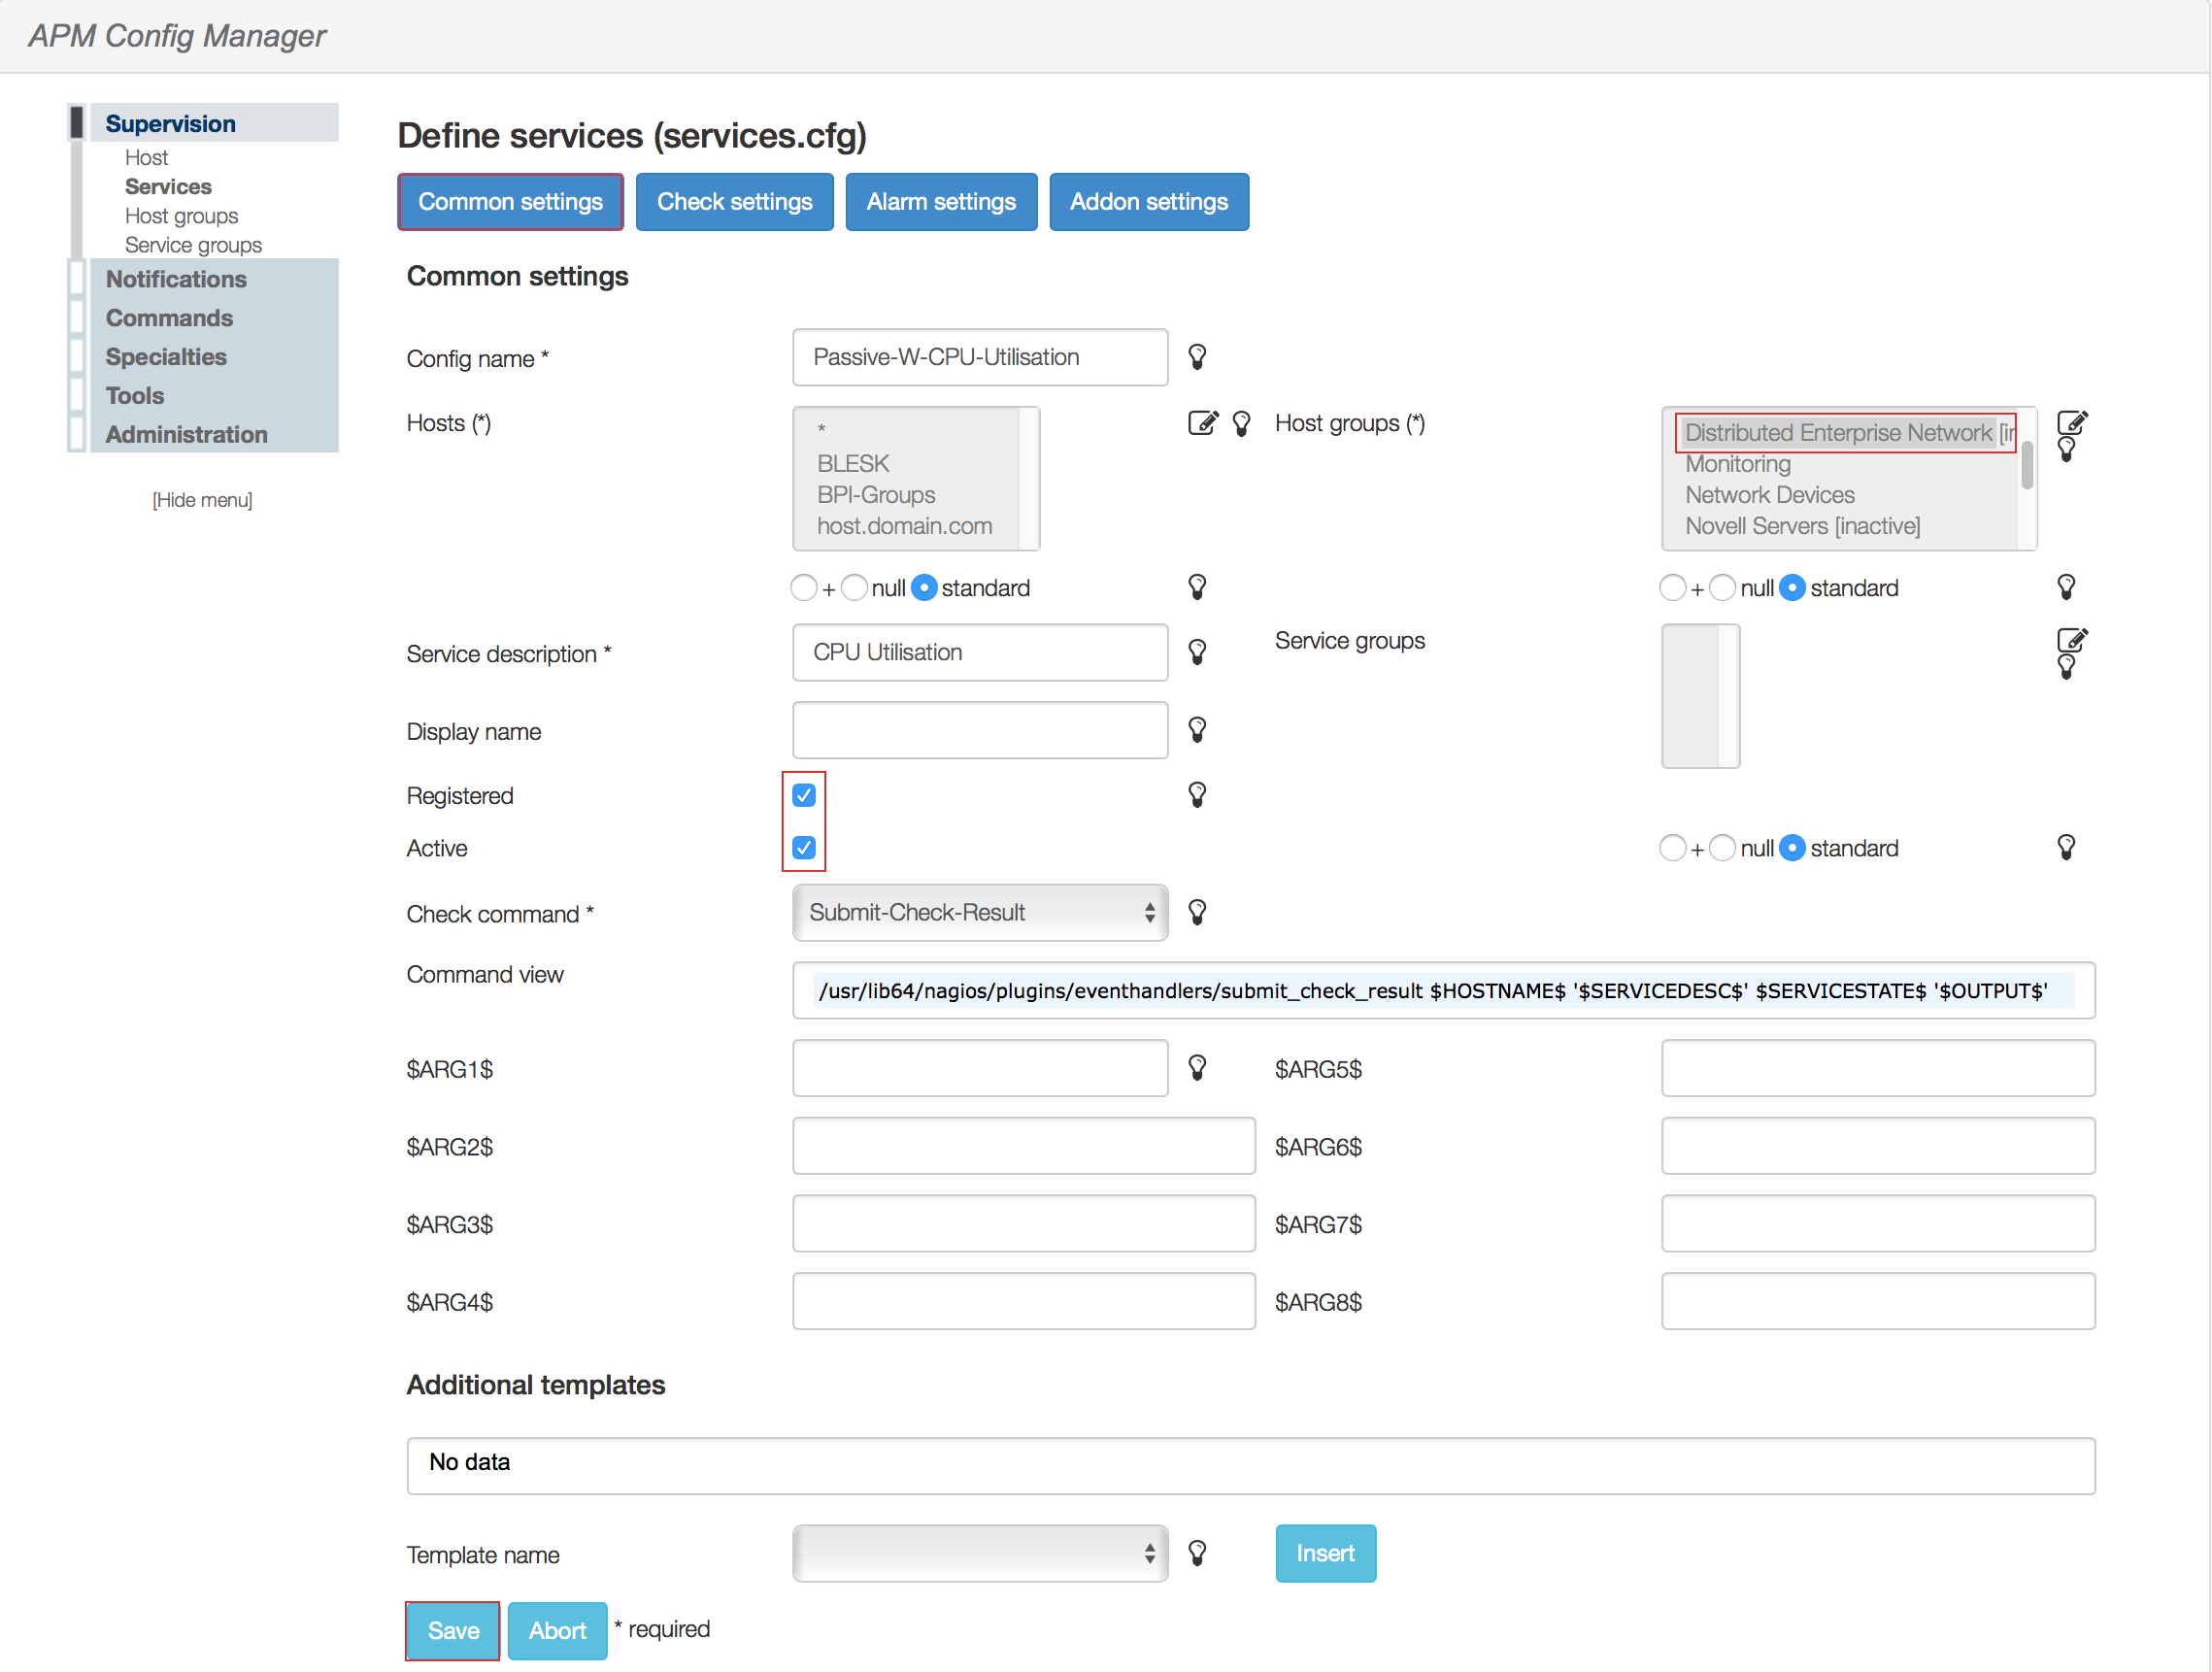
Once completed, click on the “Save” button to save your changes for the service definition. Repeat the same procedure for any additional passive service templates you want to activate.
¶ Apply your changes
Finally, we need to make sure that all the modifications we made are correct and have been applied on the server. To do this, go to “Tools”, “Control” and click the four buttons in order to write and apply all the information.

Be aware that you should always click them in this order:
1. Write monitoring data
2. Write additional data
3. Check configuration files
4. Restart APM
When you press the “Check configuration files” button, blësk will verify if everything is ok. Never click the “Restart APM” button if you see that there are errors reported by the “Check configuration files” step.
You can now visit APM to see your newly added passive host and associated passive services!